TABLE OF CONTENTS
- Prerequisites
- Understand sentiment analysis for tickets
- Enable and configure Sentiment analysis feature
- Configure advanced settings
- Add instructions for sentiment analysis
- Preview sentiment analysis
- Use Sentiment Analysis on tickets
- Automate ticket actions based on sentiment
- Things to keep in mind
Use Sentiment analysis, an AI Copilot feature, to understand how the requester feels throughout a ticket and the factors that influence the sentiment. This article explains how admins can configure and publish sentiment analysis, and how agents view and provide feedback on sentiment predictions.
Prerequisites
Before you configure or use Sentiment Analysis, ensure that:
- Your account has the Freddy AI Copilot add-on on a supported Pro or Enterprise plan.
- You have administrator access to AI Agent Studio to configure and publish Sentiment Analysis.
- Agents who need to view sentiment have an active Freddy AI Copilot license and the required role permissions under Admin > Roles > Freddy AI Copilot User assigned.
The enablement of optional functionality is subject to the Freshworks Supplemental Terms.
Understand sentiment analysis for tickets
Sentiment analysis uses Freddy AI to analyze the requester’s messages in a ticket and classify the sentiment as Negative, Neutral, or Positive. It also shows how the sentiment has changed since the ticket started and, when enabled, explains the factors that influenced the prediction.
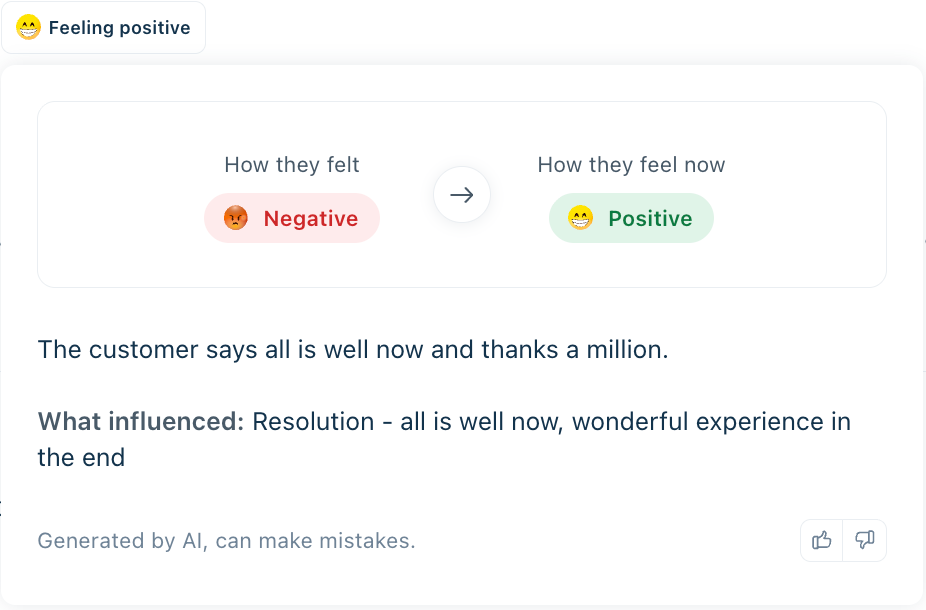
This helps you quickly identify changes in requester sentiment without reading the entire conversation to determine how the requester feels. You can use this information to prioritize tickets that may need attention and respond to changes in sentiment before the issue escalates.
Sentiment is calculated for tickets from Email, Portal, Web Form, Web Chat, Phone, WhatsApp, Instagram (DMs and comments), Facebook (DMs and comments), SMS, and custom sources, including tickets created through the API.
Important considerations
- Changes to the starting point for sentiment analysis apply only to tickets created after you save the new configuration.
- When a historical ticket is reopened with a new customer conversation, Sentiment Analysis calculates sentiment for the initial and latest interactions. These appear as How they felt and How they feel now.
- Sentiment is inferred from ticket text using AI. Predictions are subjective and may be inaccurate.
Enable and configure Sentiment analysis feature
Use AI Agent Studio to configure how Sentiment Analysis evaluates ticket conversations, what additional reasoning it displays, and which messages provide context for that reasoning.
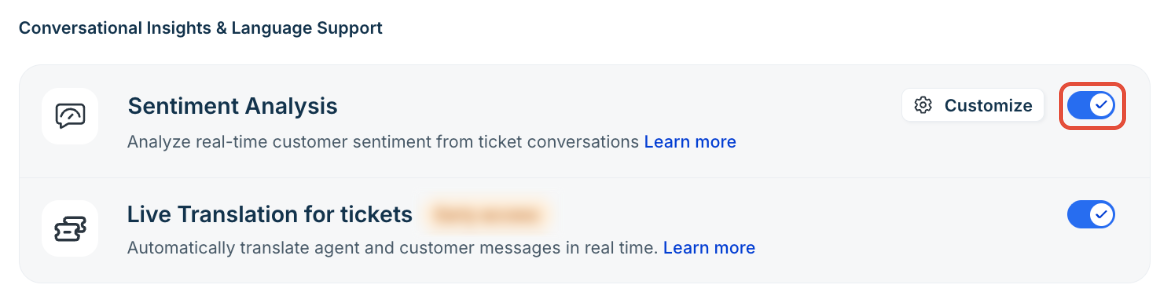
To enable the Sentiment Analysis feature,
- Go to AI Agent Studio > AI Copilot > Sentiment Analysis.
- Toggle the switch to the right to enable the feature.
Configure advanced settings
To configure how sentiment is analyzed and what information is used to generate sentiment reasoning,
Use the Configuration page to control how sentiment analysis evaluates ticket conversations, what extra reasoning it displays, and which messages provide context for that reasoning.
To configure sentiment analysis:
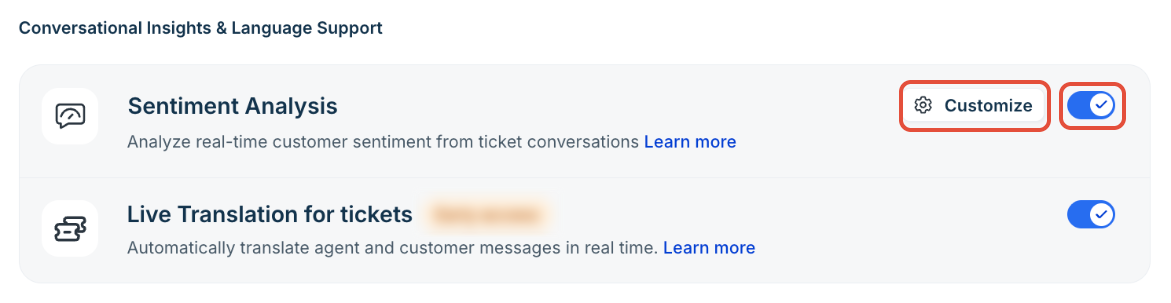
- Go to AI Agent Studio > AI Copilot.
- Select Customize next to Sentiment Analysis.
- In the left pane, under Build, select Configuration.
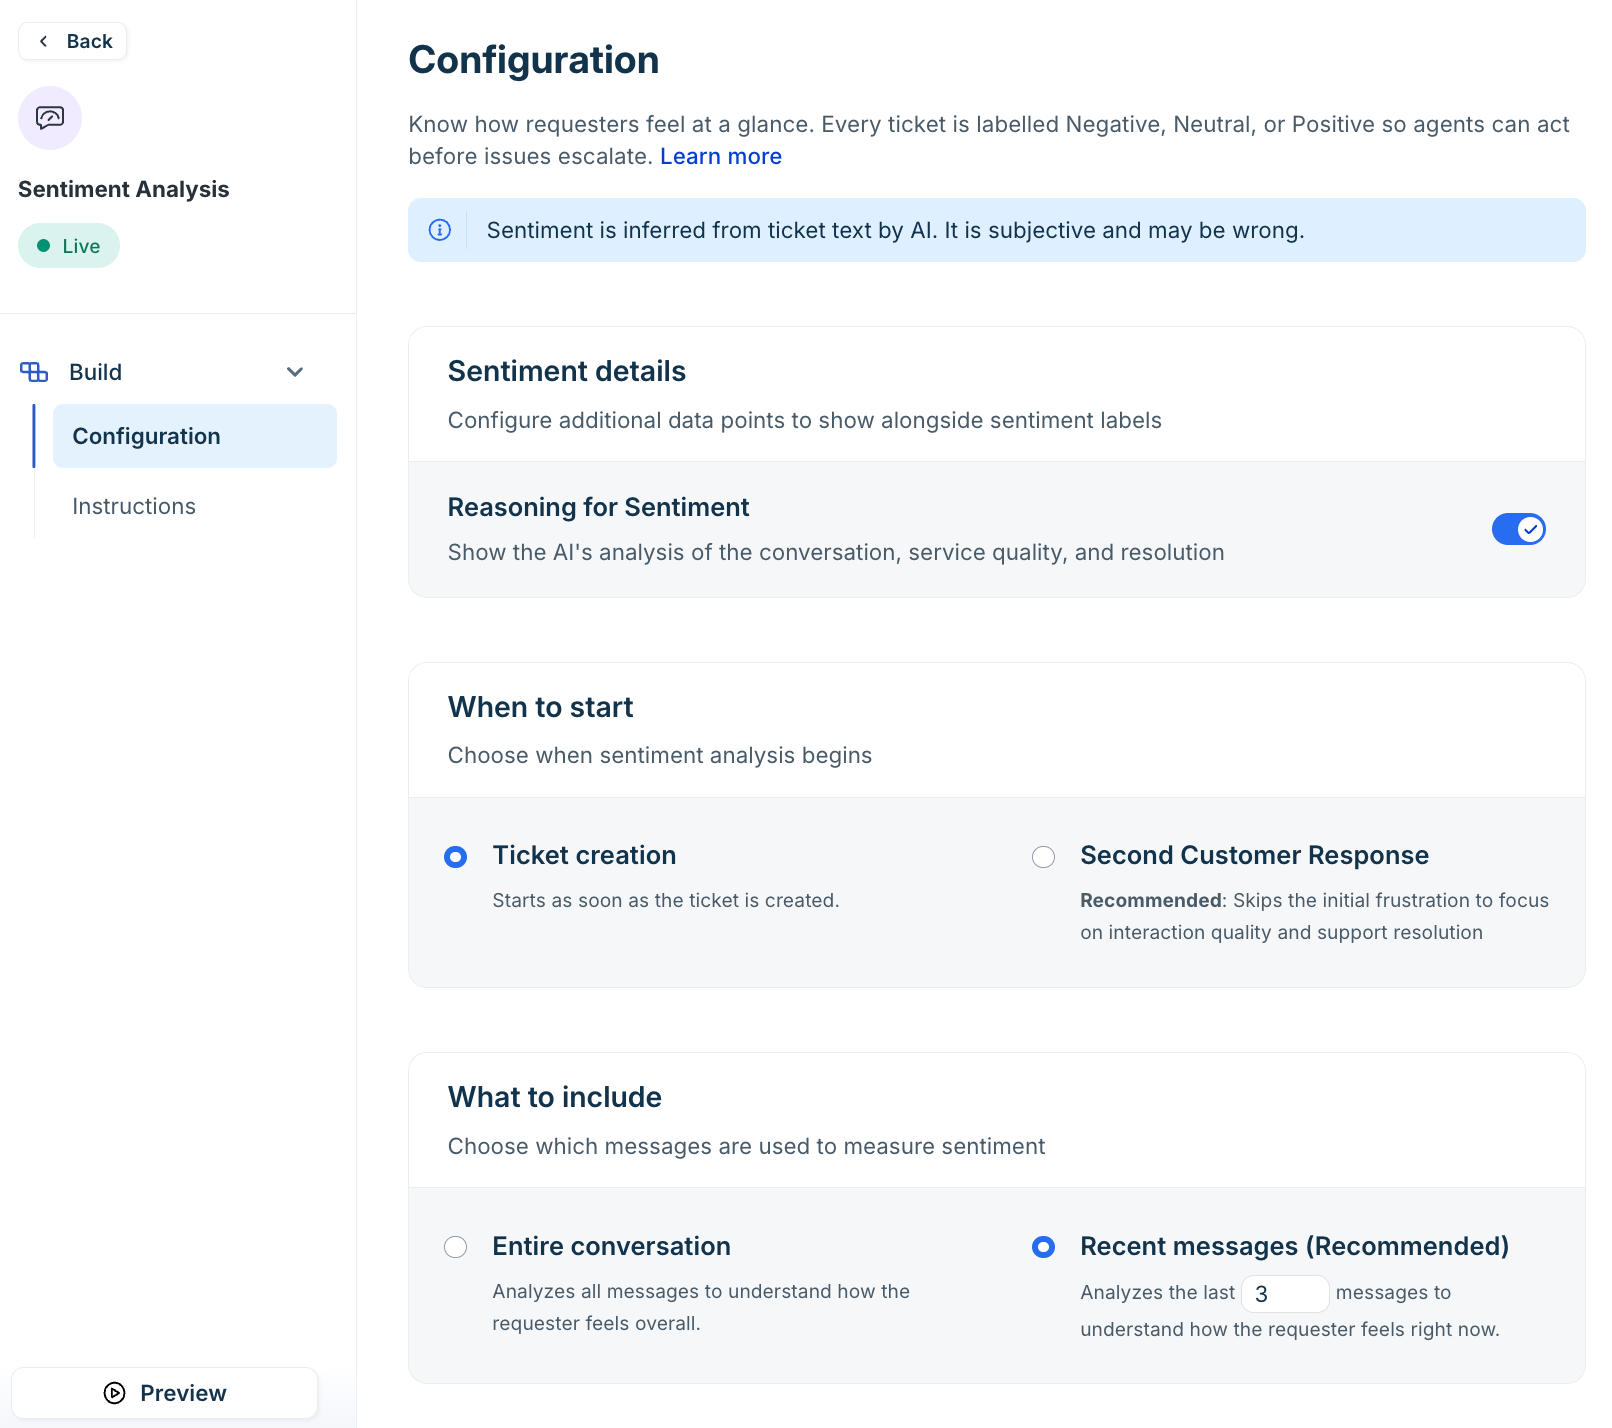
- Configure the settings under Sentiment details, When to start, What to include, and Inputs for reasoning, as described in the following sections.
- Save your changes as a draft or publish the configuration when you're ready.
Configure sentiment details
Under Sentiment details, enable Reasoning for Sentiment to show the AI's analysis of the conversation, service quality, and resolution alongside sentiment labels.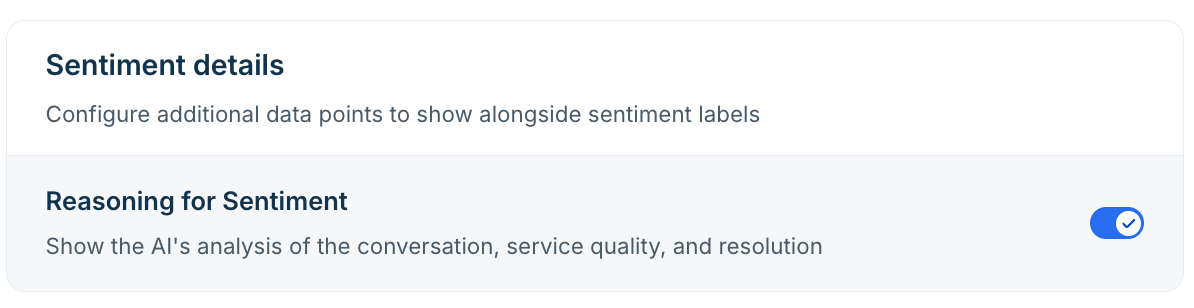
Sentiment labels indicate whether the customer's sentiment is Negative, Neutral, or Positive. Reasoning provides additional context about the factors that may have influenced the prediction, helping agents understand why the AI assigned a particular sentiment.
Choose when sentiment analysis starts
Use Start analysing from to choose the point in the ticket lifecycle from which the AI begins analyzing the conversation. This setting determines which part of the interaction provides the starting context for sentiment analysis.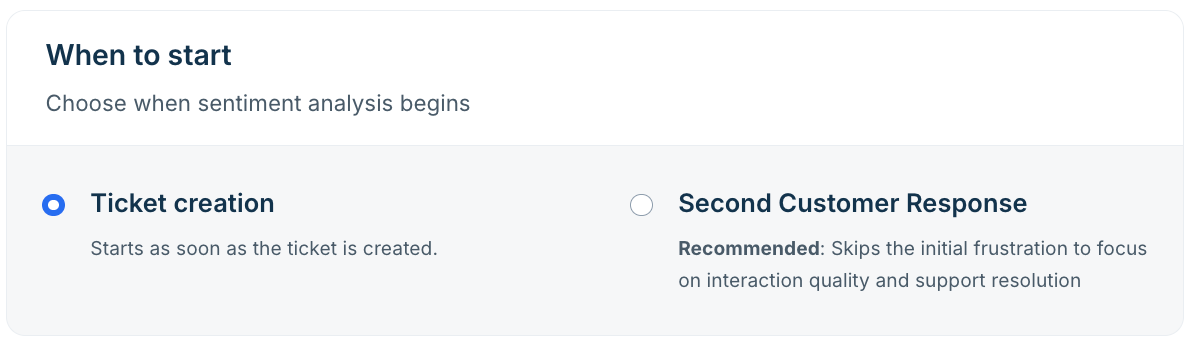
Choose one of the following options:
- Ticket Creation: Starts sentiment analysis from the beginning of the ticket. This helps capture the customer's initial sentiment before an agent responds and provides a view of the severity of the incoming issue.
- Second Agent Response: Skips the initial frustration so that the analysis focuses on the quality of the interaction and the support resolution
Choose Ticket Creation when you want to understand the customer's initial sentiment and identify negative experiences as soon as a ticket arrives. Choose Second Agent Response when you want the analysis to focus on the support interaction rather than the customer's initial reaction.
Note: Changes to this setting affect tickets created after you change the configuration. They do not change the starting point for existing tickets.
Choose which messages to analyze
Use What to include to determine how much of the ticket conversation the AI considers when analyzing sentiment. You can analyze the entire conversation or focus on the most recent messages.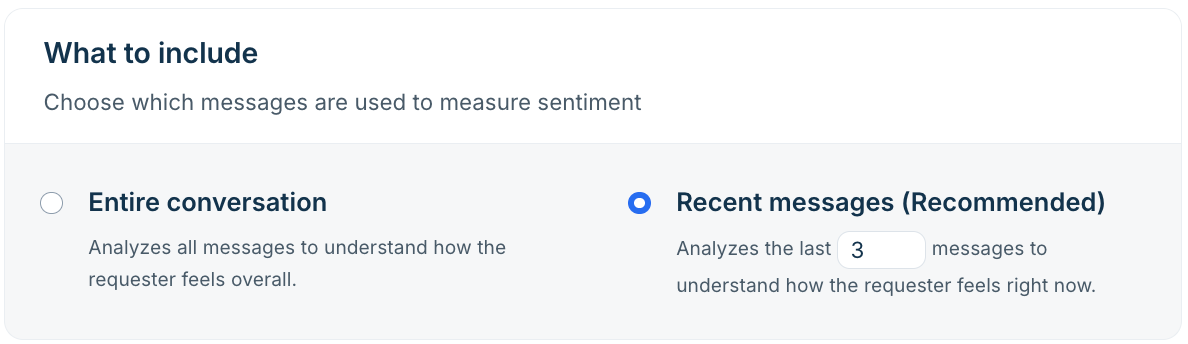
Choose one of the following options:
- Entire conversation: Analyzes all messages in the conversation. Use this option when you want sentiment analysis to consider the full interaction, including how the conversation has developed over time.
- Recent messages (Recommended): Analyzes the last number of messages that you enter, to understand how the requester feels right now. The default is 3. Use this when recent interactions matter most for your team's response.
Choose the option that best matches your monitoring needs. Analyzing the entire thread provides broader conversation context, while analyzing recent responses focuses on the latest interactions.
Inputs for reasoning
Use Inputs for reasoning to control which additional ticket information the AI can use when explaining a sentiment prediction. These settings affect the reasoning displayed alongside the sentiment label, not the underlying sentiment score.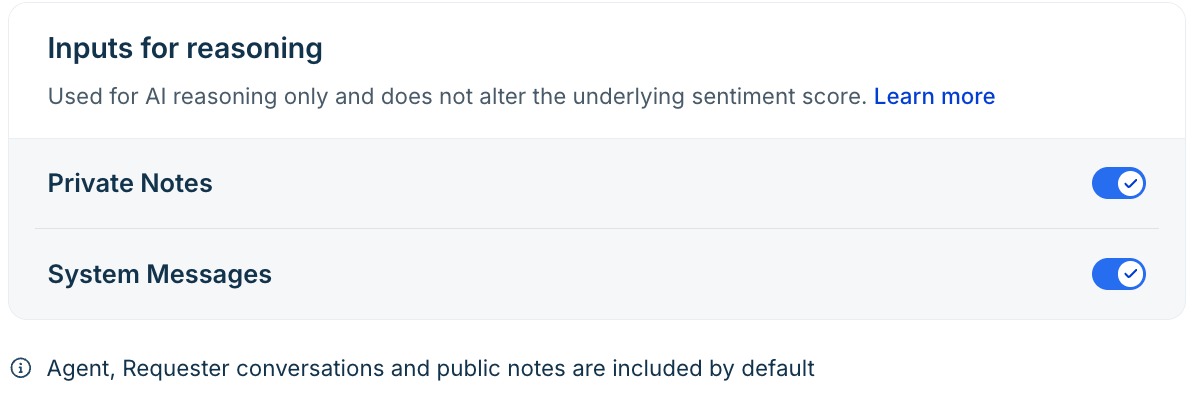
The available settings are,
| Input | What it provides |
|---|---|
Private Notes | Internal notes that can provide context about troubleshooting, investigations, and actions taken by the support team. |
System Messages | System-generated messages that provide additional context about events in the ticket conversation. |
Agent-requester conversations and public notes are included by default.
Note: The settings under Inputs for reasoning affect only the AI-generated explanation. They do not change the underlying sentiment score.
Add instructions for sentiment analysis
Use instructions to help the AI interpret business-specific terminology, tone, and exceptions.
- Go to AI Agent Studio > AI Copilot > Sentiment Analysis > Instructions.
- In the Instructions box, add rules that explain how the AI should interpret specific phrases or situations.
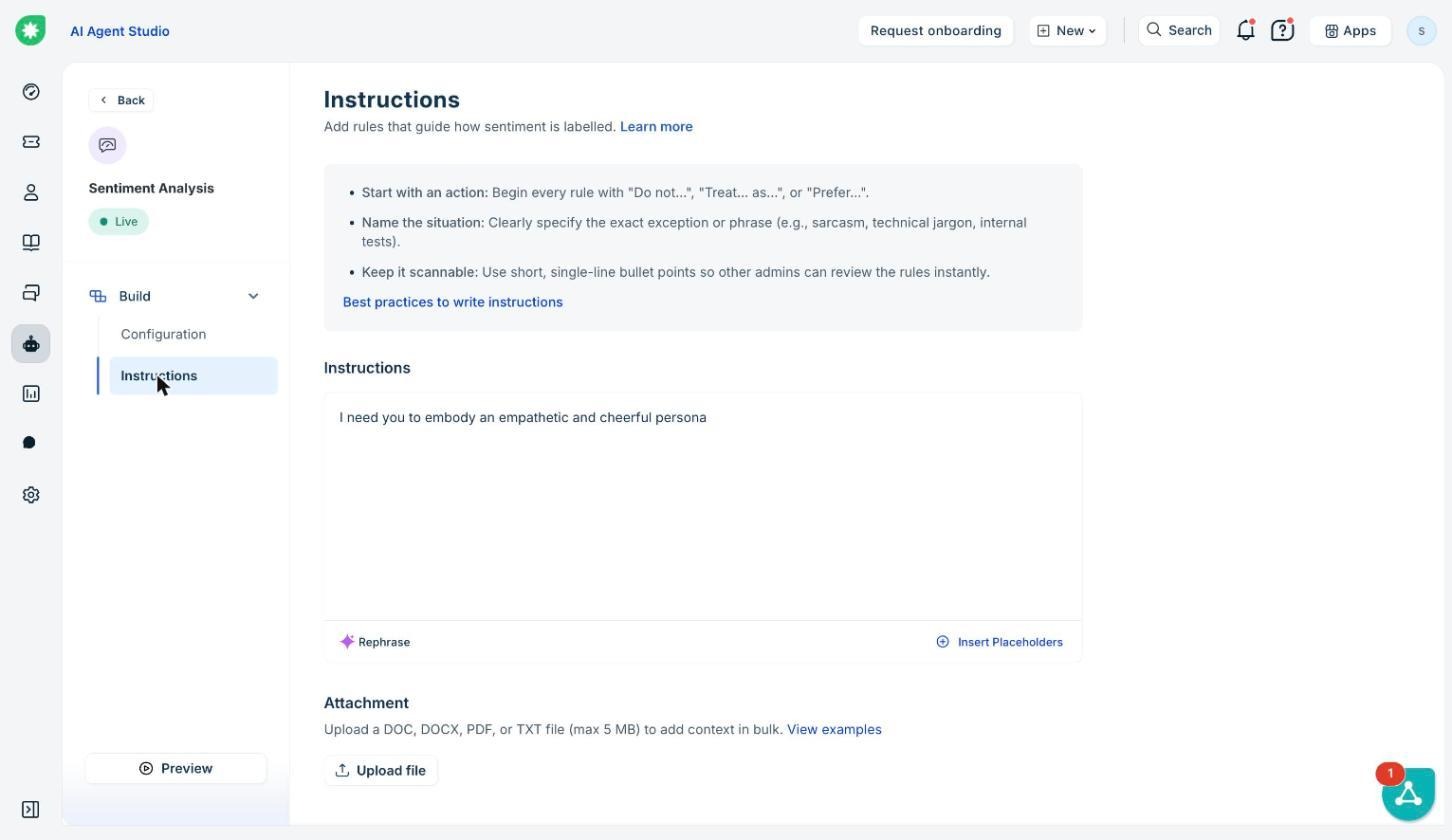
- Select Insert Placeholders to reference ticket fields, such as Subject or Requester, where supported.
- Use Rephrase to refine an instruction, if needed.
- Under Additional context, select Upload file to provide domain-specific reference material, such as a glossary.
- Save your changes as a draft or publish them when ready.
Supported file types for additional context are DOC, DOCX, PDF, and TXT, up to 5 MB.
Write clear, specific instructions. For example, if a customer uses a phrase that has a different meaning in your industry, explain how the AI should interpret it. To learn more about writing Instructions and best practices, refer to Optimize AI Copilot output with effective instructions.
Preview and publish sentiment analysis changes
Preview your configuration and instructions against a real ticket before publishing.
- Go to AI Agent Studio > AI Copilot > Sentiment Analysis.
- Open Configurations or Instructions.
- Select Preview at the bottom of the page.
- Search for a ticket by subject or ticket ID and select it.
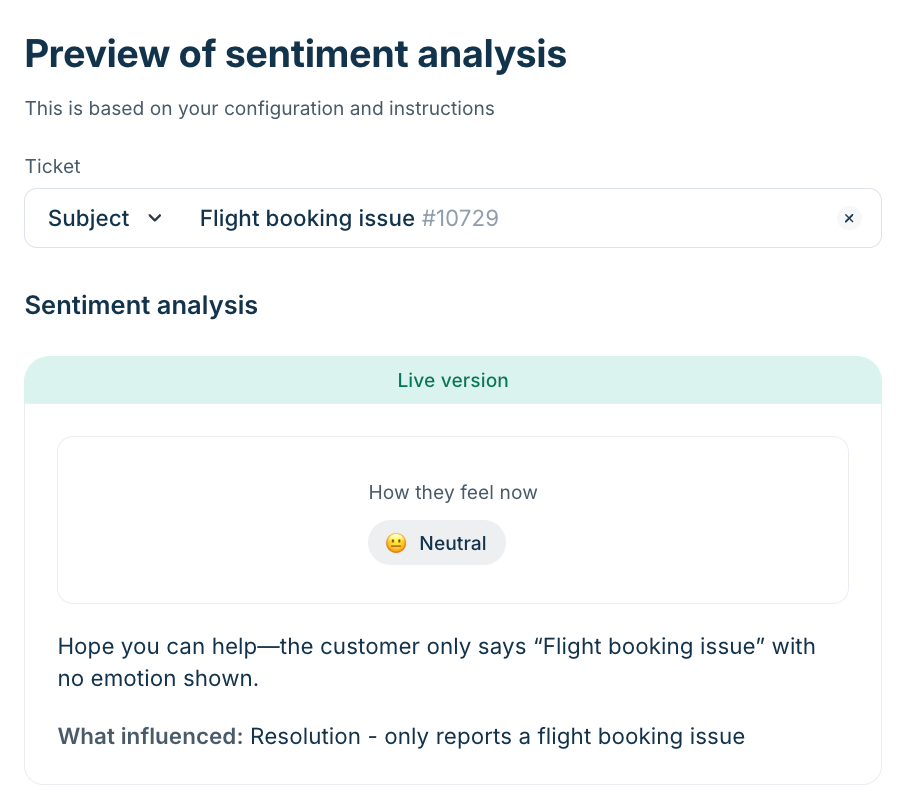
- Review the results. Enable Compare with live to compare the draft results with the currently published version.
- If the results meet your requirements, publish the configuration.
The Draft version uses the configuration and instructions you are currently testing. The Live version uses the configuration and instructions that are already published.
Use Sentiment Analysis on tickets
Agents can use sentiment labels and scores to understand how customers feel and identify tickets that may need attention.
View sentiment on tickets
You can view sentiment in the ticket list and ticket details page.
Ticket list
- The Sentiment column displays a label for each ticket.
- Hover over the sentiment label to view the sentiment score and, where available, how sentiment has changed since the conversation began.
- Filter tickets by Positive, Neutral, or Negative sentiment.
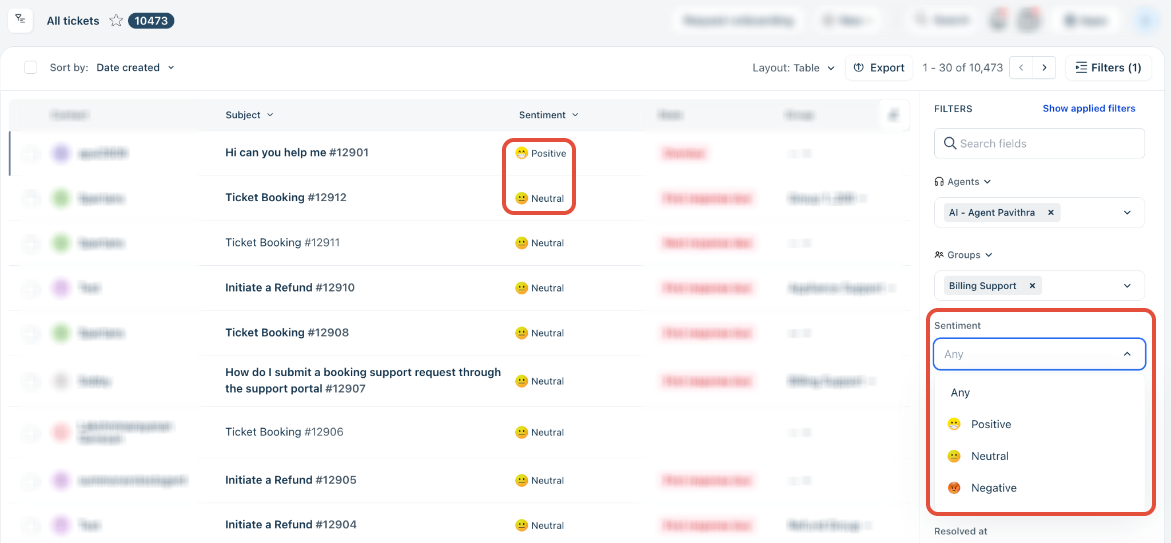
- Sort tickets in ascending or descending sentiment order to help prioritize your work. Confirm the sort order in your current interface before using it to prioritize tickets.
Ticket details
Open a ticket and select or hover over its sentiment label, depending on the interface, to view the sentiment details. These may include How they felt and How they feel now, along with reasoning if your role has permission to view it.
Use sentiment alongside ticket priority, customer impact, and the conversation history. A sentiment label alone does not determine how urgently a ticket needs action.
Provide feedback on a sentiment prediction
If the sentiment prediction is inaccurate, you can provide feedback to help improve future predictions.
- Open the ticket and select its sentiment label.
- Select the thumbs-up icon to mark a prediction as helpful, or the thumbs-down icon to report an issue.
- If you select thumbs-down, choose the reason that best describes the issue, such as incorrect sentiment, poor reasoning, or wrong influencing factors.
- Add details if needed and submit your feedback.
Feedback helps improve future predictions. It does not change the sentiment currently displayed on the ticket.
Automate ticket actions based on sentiment
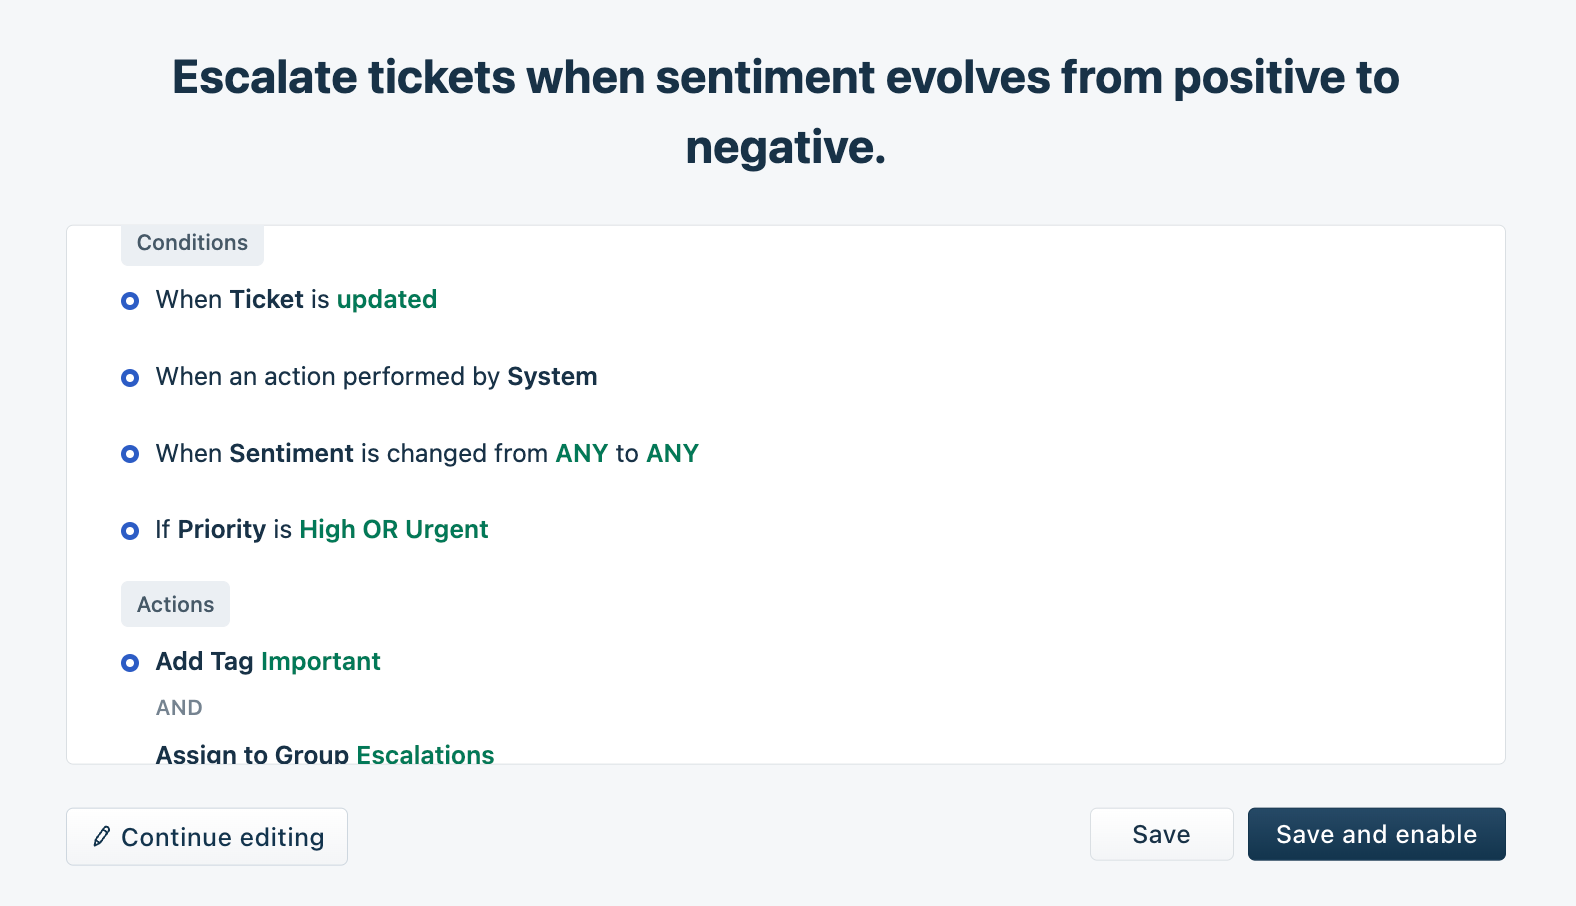
You can use ticket automations to respond to sentiment changes. For example, create a rule that tags a high-priority ticket as Important and assigns it to the Escalations group when its sentiment changes from Positive to Negative.
To create this rule:
- Go to Admin > Automations > Ticket Updates and create a new rule.
- Enter a rule name.
- Under When an action performed by, select System.
- Under Involves any of these events, select Sentiment is changed, with From set to Positive and To set to Negative.
- Under On tickets with these properties, set the ticket conditions to match the priority levels you want to handle, such as High or Urgent.
- Under Perform these actions, select Add tag and enter Important.
- Select Add new action, then select Assign to Group and choose Escalations.
- Select Preview and Save, then Save and enable to activate the rule.
Things to keep in mind
- AI predictions: Sentiment is inferred from ticket text and may not always reflect the customer's actual feelings.
- Role permissions: Agents need the appropriate role permissions to view sentiment and, separately, its reasoning.
- Reasoning inputs: Private notes and system messages provide context for reasoning only. They do not affect the sentiment score.
- Starting point: The selected starting point affects new tickets created after the configuration change.
- Supported channels: The original feature documentation lists Email, Portal, Web Form, Web Chat, Phone, WhatsApp, Instagram DMs and comments, Facebook DMs and comments, SMS, custom sources, and API-created tickets. Verify this list against the current Freshdesk implementation before publishing.
- Reporting: The Freddy AI Copilot value report has a Sentiment analysis tab. It shows initial and current sentiment trends over time, and breaks them down by agent and group, so you can see how sentiment changes across ticket journeys.