TABLE OF CONTENTS
This article provides steps to connect the SharePoint Online connector and select the shared drives that AI Agent Studio can use as knowledge sources. For details on other types of knowledge sources, see Build and curate knowledge for AI Agents.
Prerequisites
Before you set up the integration, ensure that the following requirements are met:
- An active Microsoft administrator account with access to SharePoint Online.
- Ensure that you have administrator permissions to set up the integration.
The integration currently supports SharePoint Serach Connector online (cloud version). The on-premises version is not supported.
Note: Full control of all site collections is required to retrieve SharePoint site permissions. This is a technical limitation introduced by Microsoft.
Overview
The SharePoint Search Connector app lets you connect SharePoint to AI Agent Studio in Freshdesk. Once connected, configured AI Agents can search SharePoint sites and the Freshdesk knowledge base together to provide relevant responses to customer queries and assist with ticket resolution.
How the integration works
Once SharePoint is connected, AI Agents can perform the following:
- Search across sources: Search SharePoint sites and the Freshdesk knowledge base together uses a hybrid search method that combines context-based and keyword search.
- Use information from multiple sources: Retrieve relevant information from both SharePoint sites and the Freshdesk knowledge base without duplicating SharePoint content in Freshdesk.
- Verify access permissions: Check the user's SharePoint permissions in Freshdesk and SharePoint site before referencing SharePoint content.
- Maintain conversation context: Use the current conversation context to answer follow-up questions without requiring users to repeat previously provided information.
- Show response sources: Include citations that help users identify and verify the source of the information used in the response.
- Support multilingual conversations: Allow users to interact with the AI Agent and receive assistance in their preferred language.
- Keep content updated: Automatically index changes to synced SharePoint documents and user access permissions approximately every 15 minutes after the initial sync.
Note: If a user asks a question in a Slack or Microsoft Teams channel and the reply includes SharePoint content, the AI Agent sends it as a direct message(DM) as it cannot confirm that all channel participants have access to the SharePoint content.
The app supports the following file formats:
- Google Docs, sheets, and slides
- HTML
- CSV
- XLS and XLSX
- RTF
- PPT
- Microsoft Word
- TXT
Note: The maximum file size that can be indexed is 50 MB. Files larger than 50 MB, empty documents, and files in unsupported formats aren't synced. Currently, text within tables and images is not extracted or indexed.
Connect SharePoint Search Connector
To connect SharePoint site to AI Agent Studio, install the SharePoint Search Connector app, authorize the account, and select the sites that you want to use as knowledge sources.
Install and authorize the connector
- Log in as an admin.
- Go to AI Agent Studio and select the preferred AI Agent for which you want to connect the SharePoint sites as a knowledge source.
- Click Build > Knowledge > Apps.
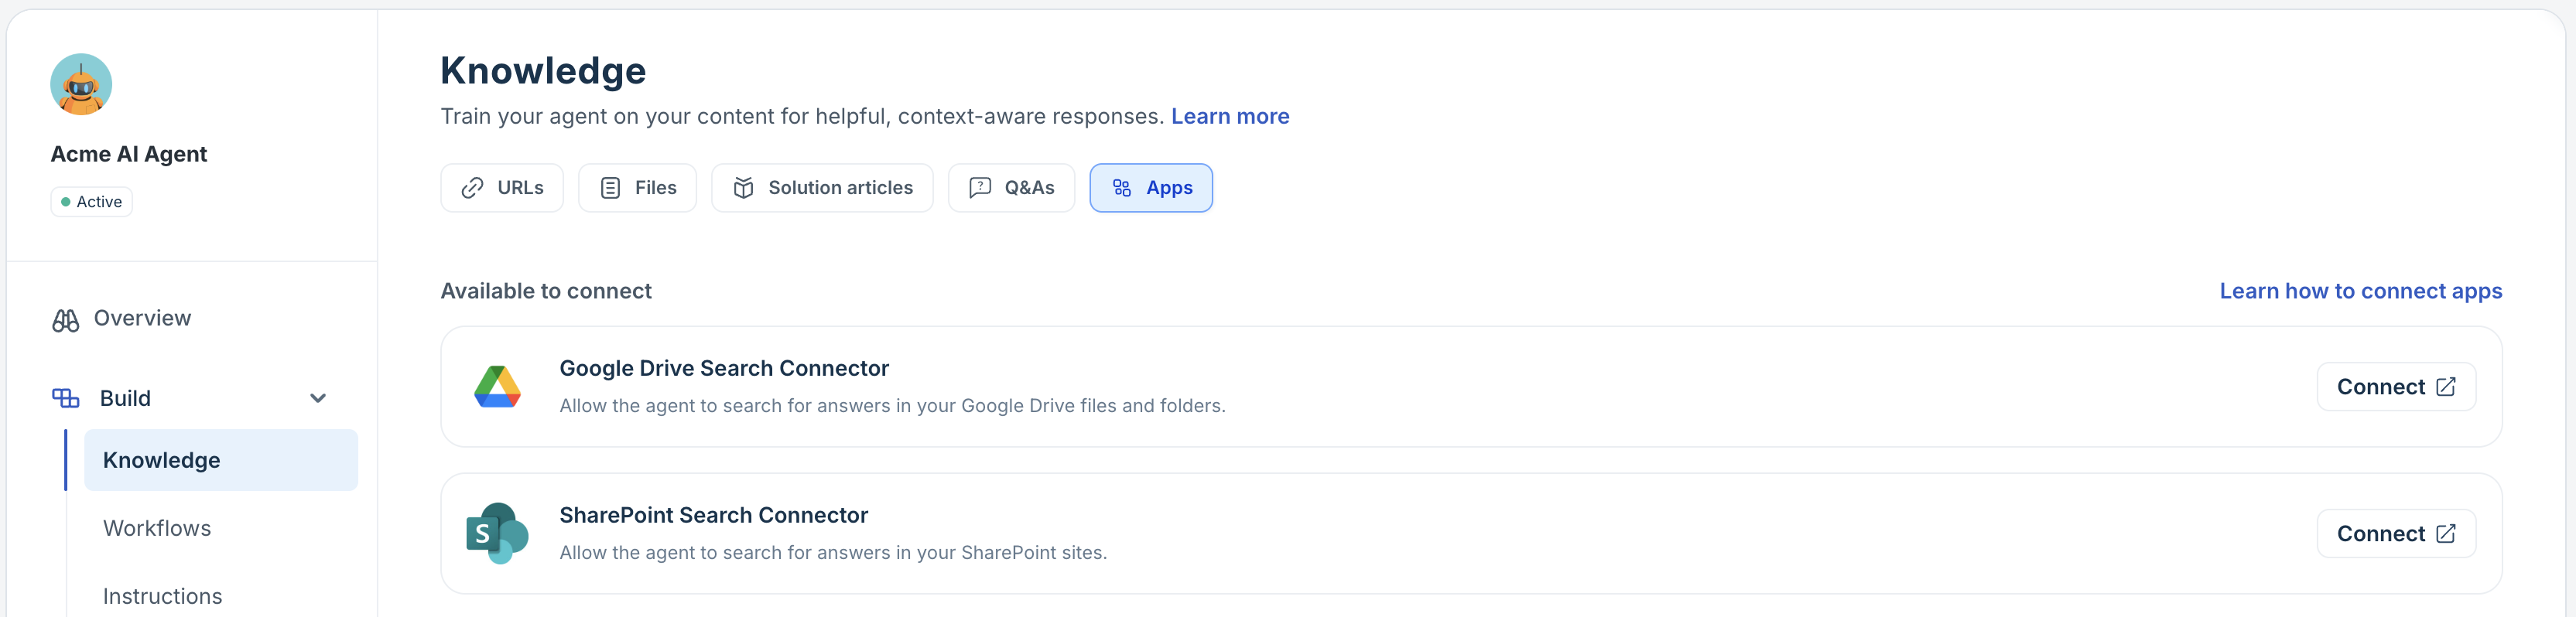
- Click Connect next to SharePoint Search Connector app. You will be redirected to the Freshworks Marketplace apps. Alternatively you can go to Admin > Support Operations > Apps.
- Search for SharePoint Search Connector and click Install.
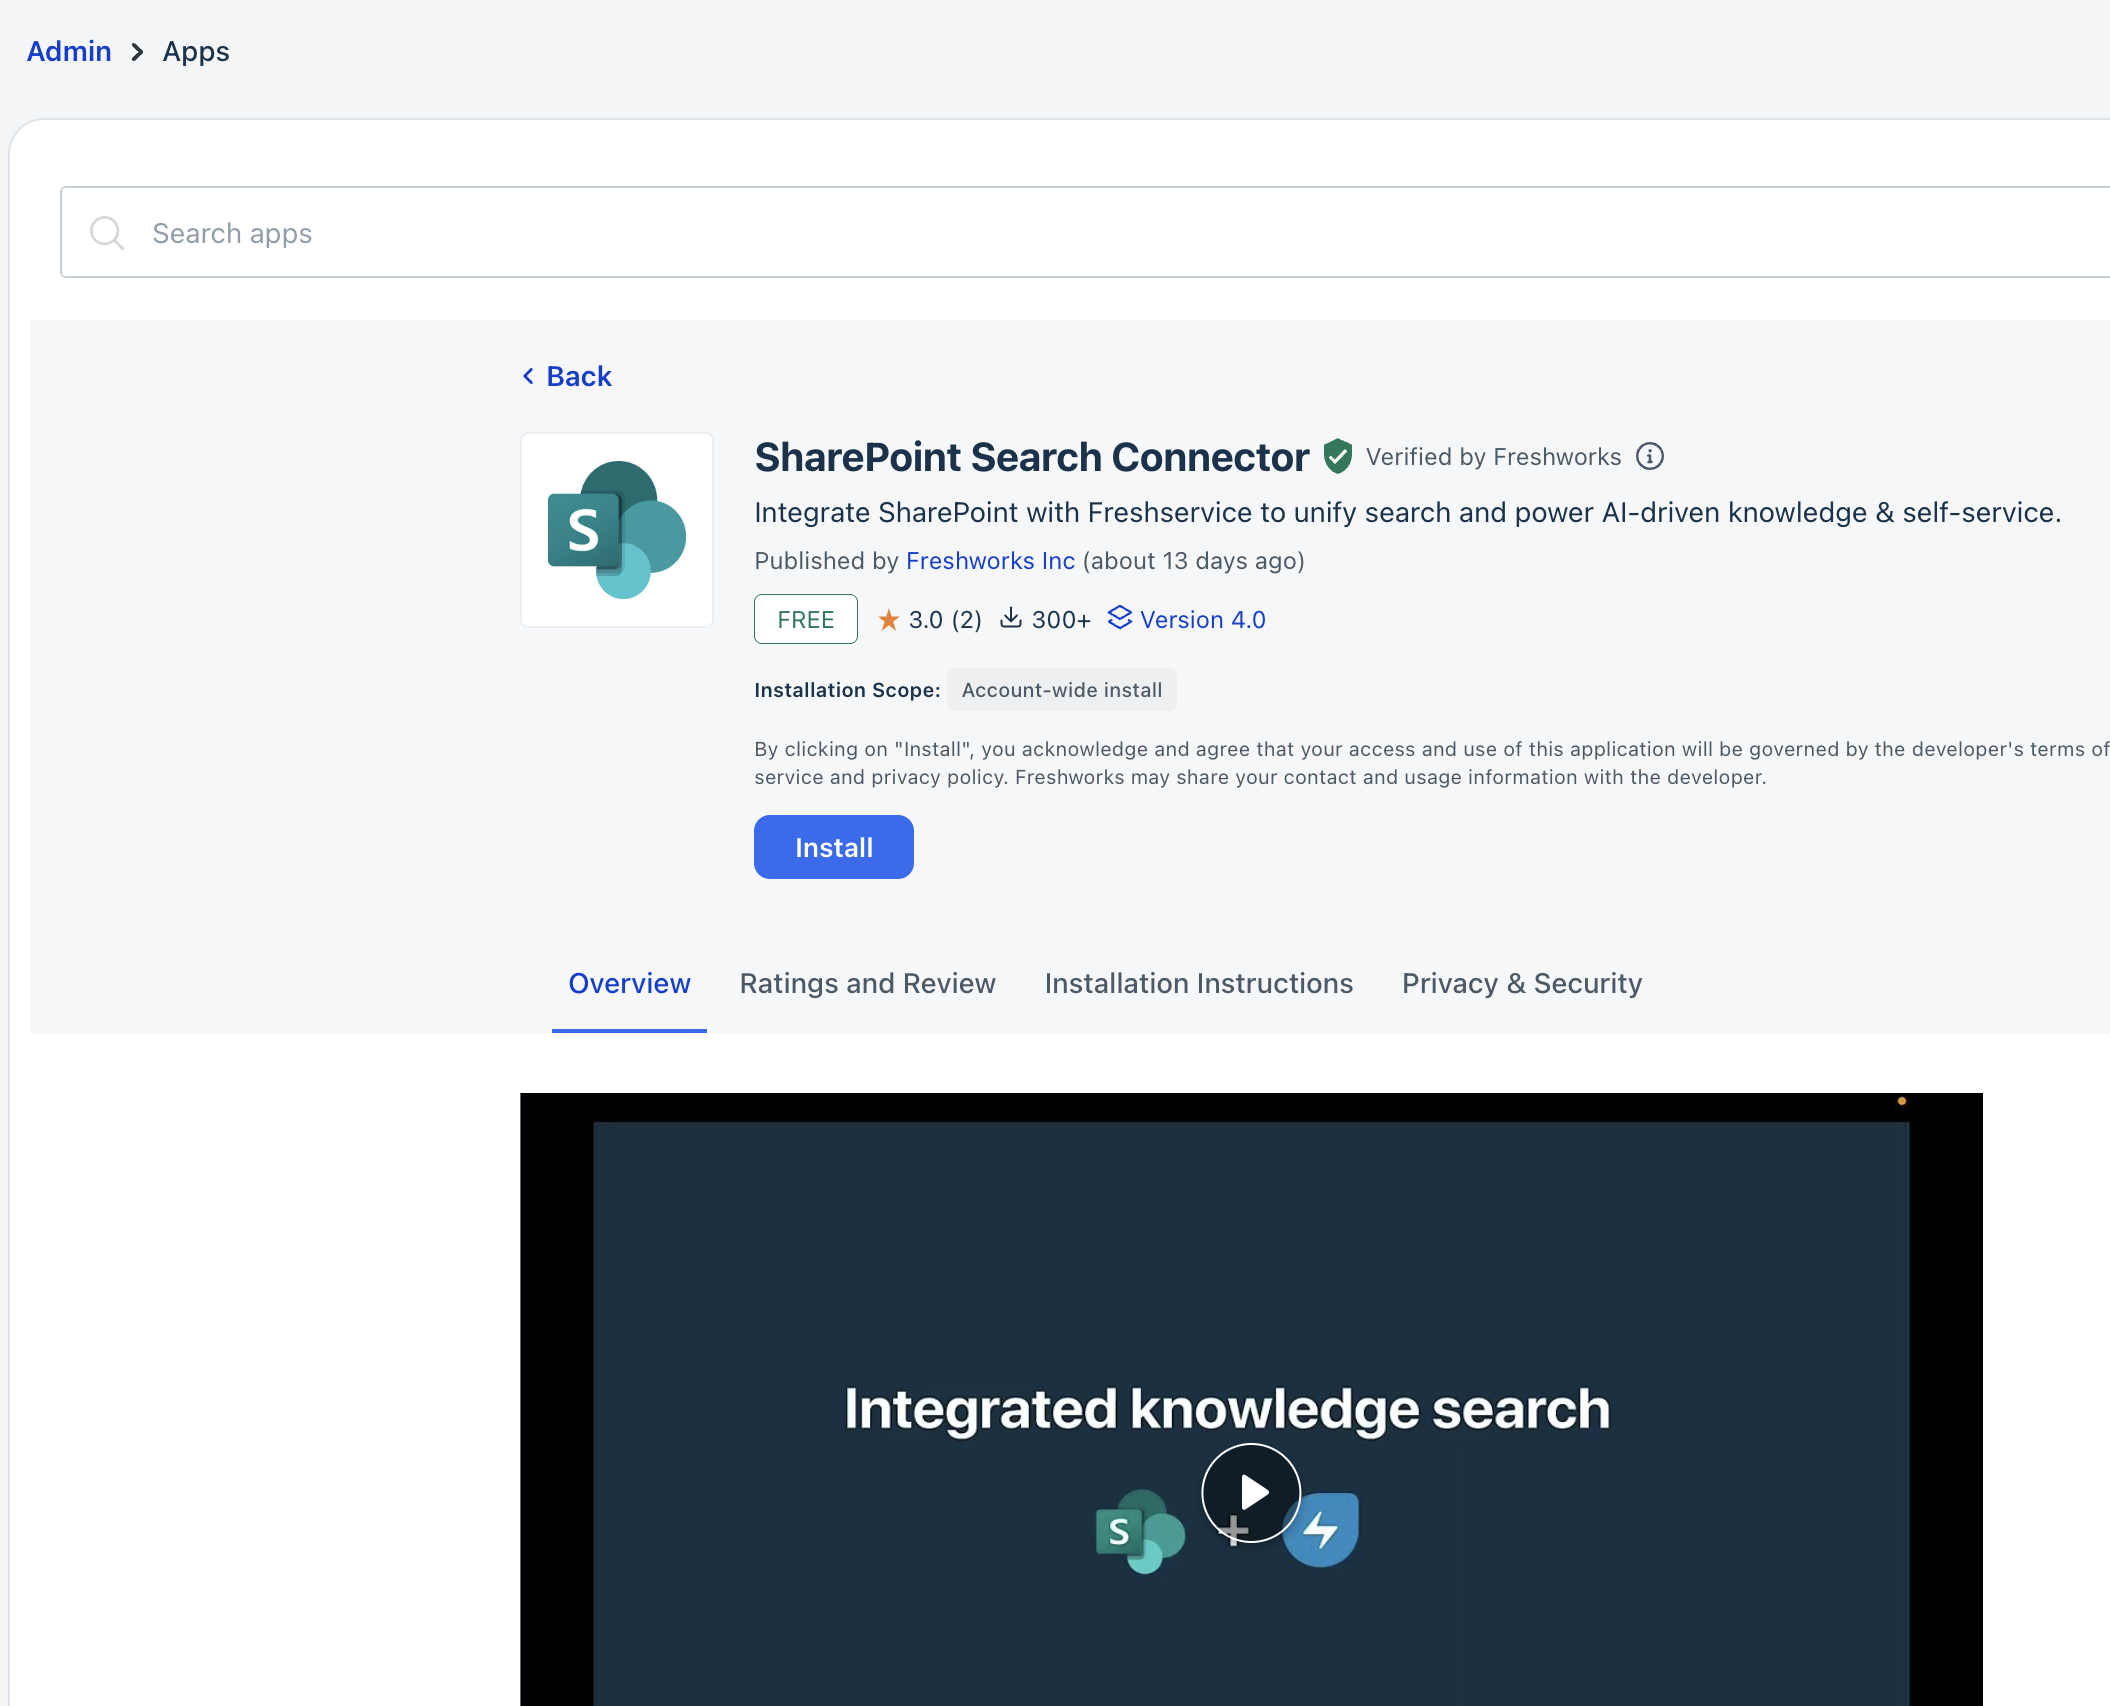
- After the installation is complete, click Connect now to connect your Microsoft account.
Freshdesk partners with Merge, a third-party integration to establish a secure connection to your account. - Click Next to authorize access to SharePoint site.
- Select the Microsoft account that you want to connect to.
- Select the permissions that the third-party app Merge can access, and click Continue.
- After you successfully sign in, click Next to continue configuring SharePoint site.
Select SharePoint sites
After you connect your Microsoft account, select the sites to use as knowledge sources for your AI Agents.
- Once your Microsoft account is successfully connected, you will be redirected to the SharePoint Search Connector app configuration page.
- Select the sites that you want to use as knowledge sources.
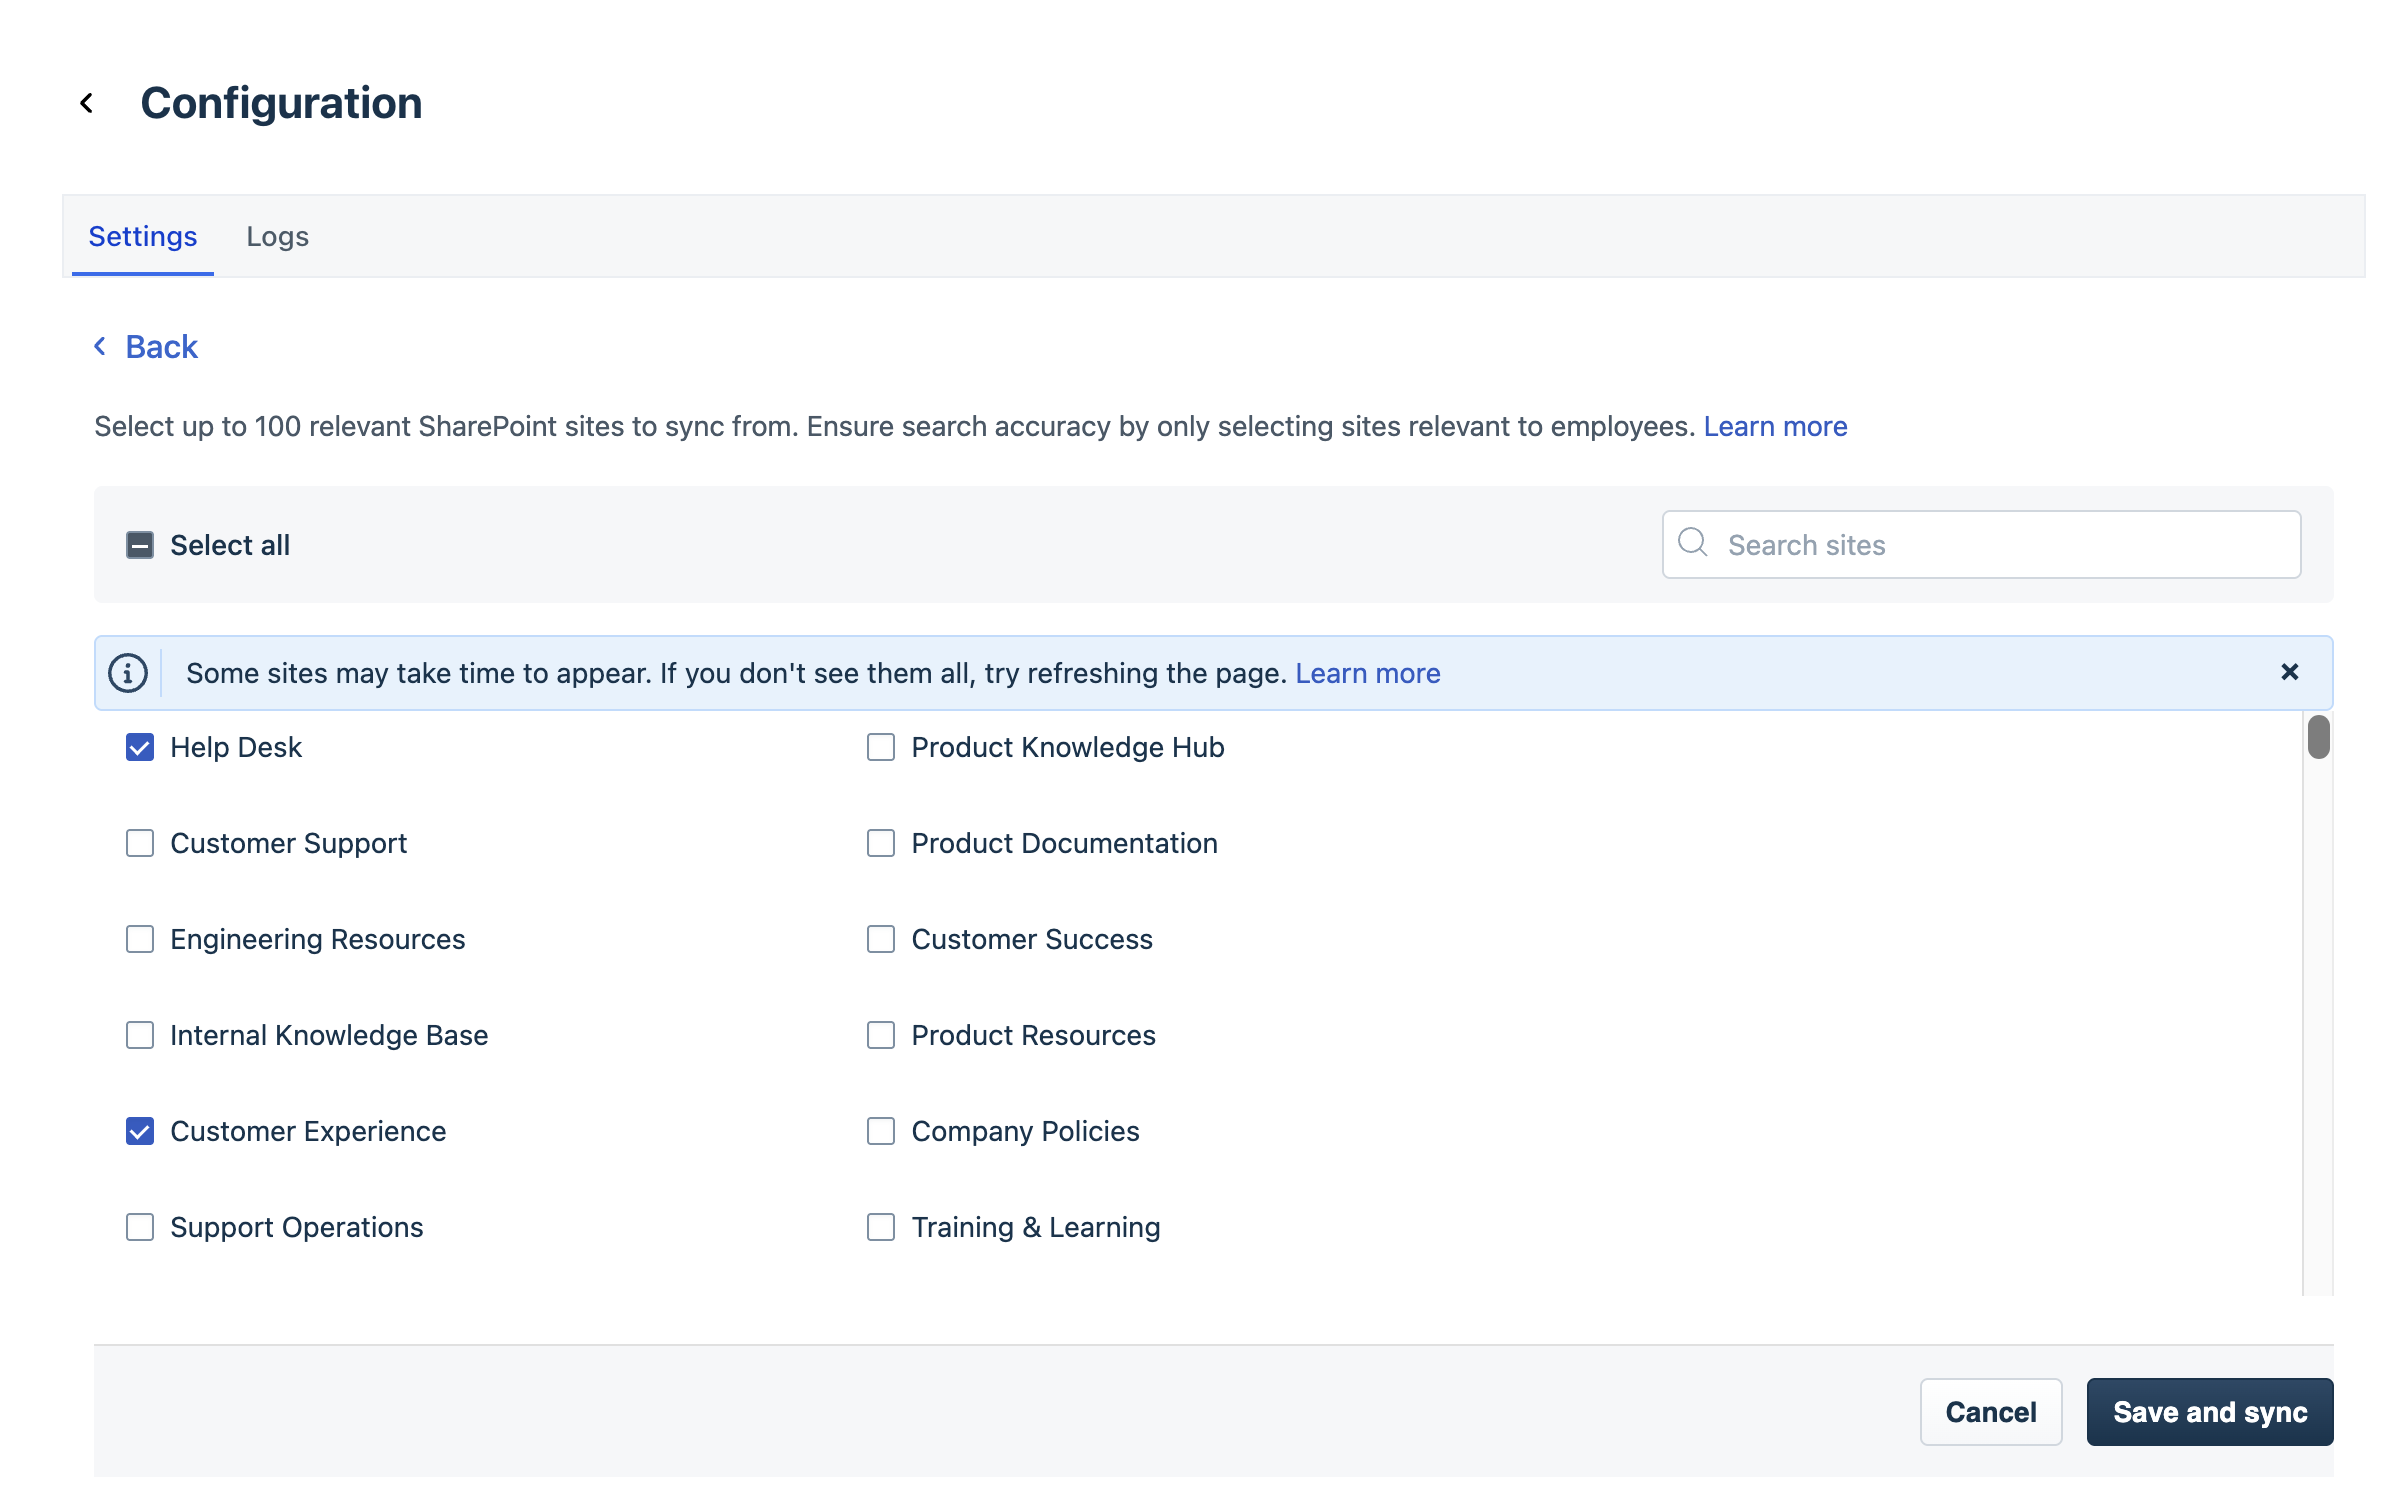 Use the search option to find a specific site, or Select all.
 - Click Save and sync.
Note: The time required for the initial sync depends on the number of files and their total size. For example, syncing 1,000 files upto 250 MB can take approximately 3 hours. - After the sync is complete, you can view the number of synced drives and the last synchronization time on the Apps page.
 Note: Sometimes, even after a successful sync, individual document errors may occur due to unsupported file formats, large file sizes, empty documents, and so on.
Tip: You can select up to 100 sites. For the best results, we recommend selecting drives that contain relevant and up-to-date information.
Manage drives and synchronization
You can add or remove the shared drives connected to AI Agent Studio and monitor synchronization.
- Go to AI Agent Studio and select the preferred AI Agent.
- Click Build > Knowledge > Apps.
- On the SharePoint Search Connector card, click Manage sites.
- Select or clear the sites that you want AI Agent Studio to use as knowledge sources.
- Click Save.
View and edit app settings
You can sync more sites and monitor the logs directly from the App settings.
- Click App Settings.
- On the SharePoint Search Connector app page, click Edit settings. You will be redirected to the Configuration page where you can view the sync status.
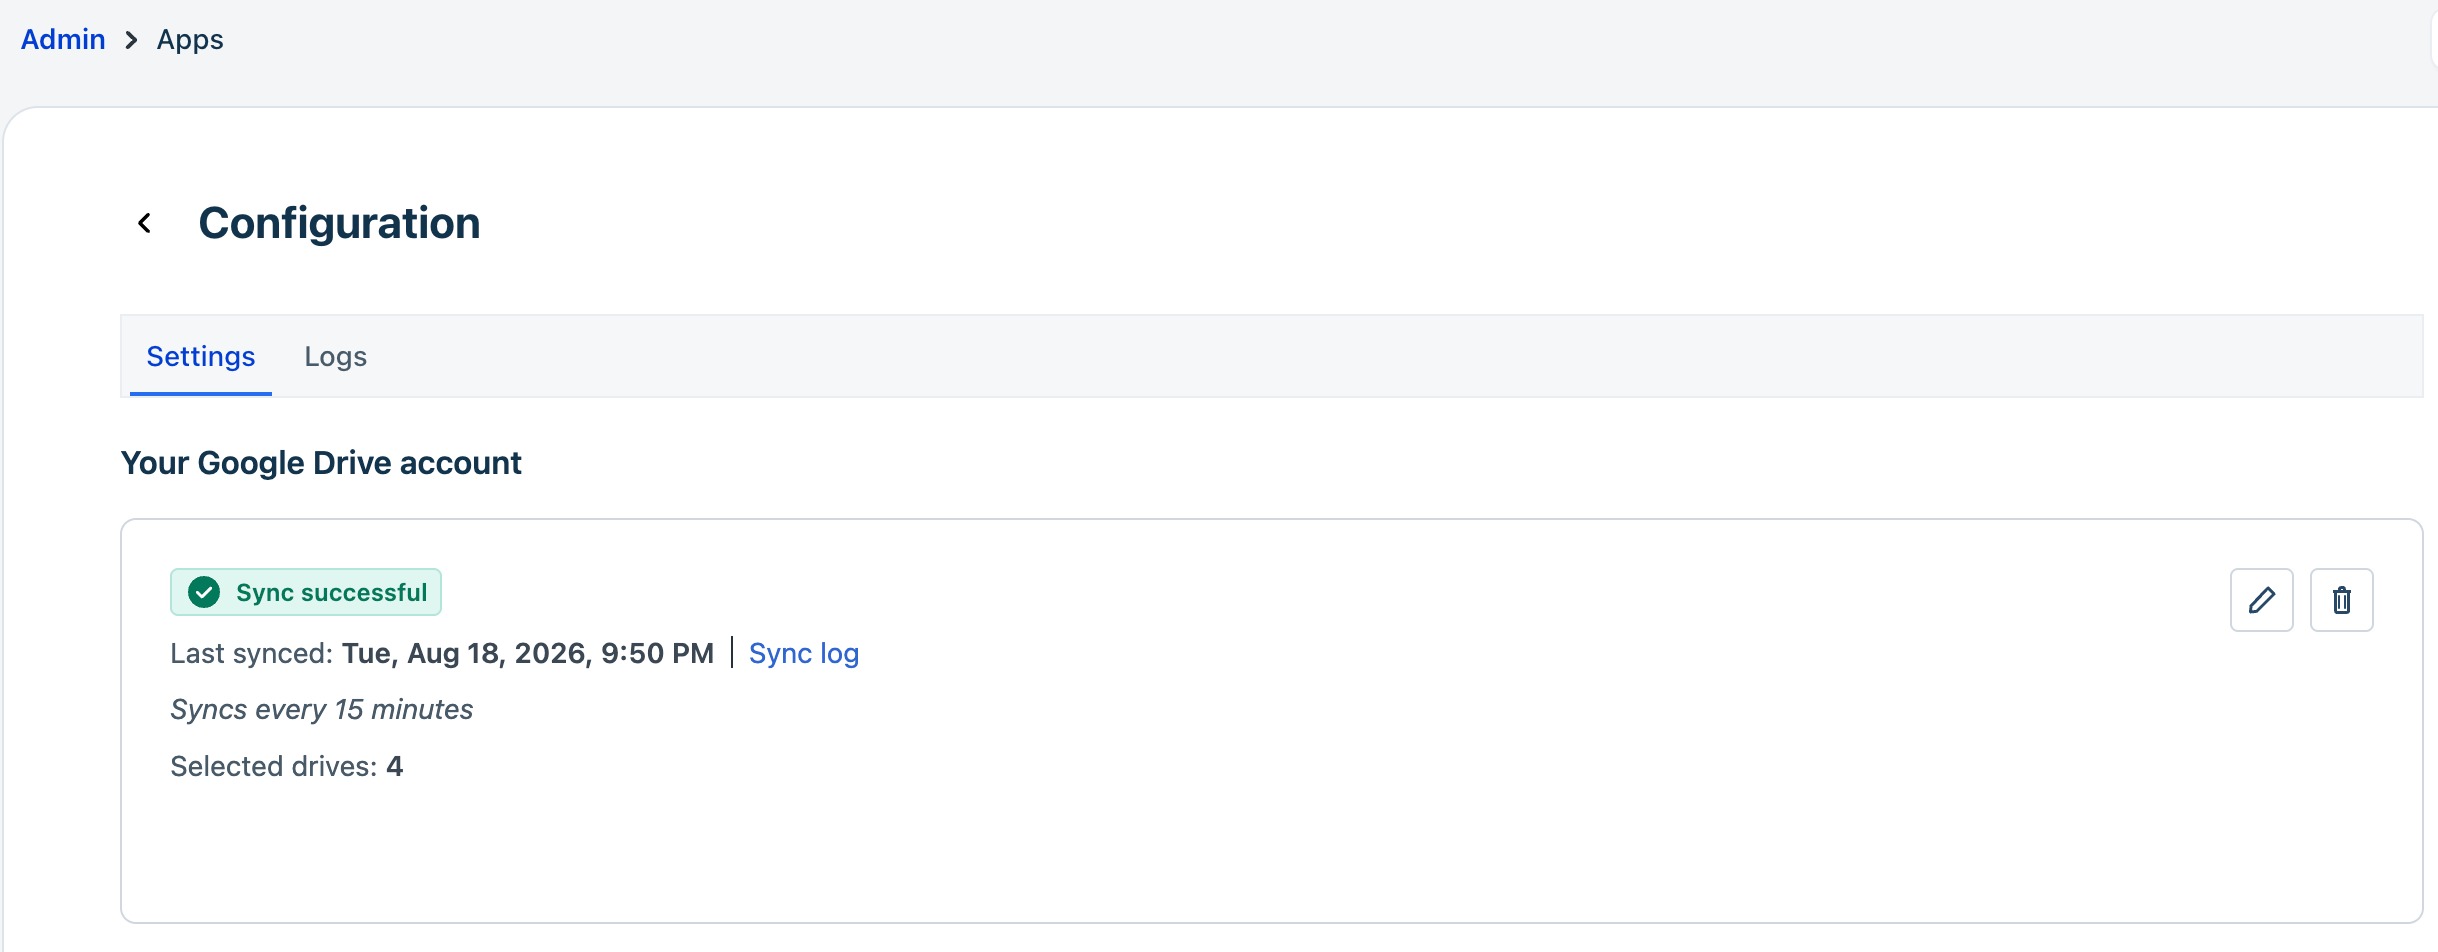
- Click Sync log next to the last synced timestamp to view sync history.
The sync log includes the sync time, status, and the number of documents or shared drives added, deleted, or modified.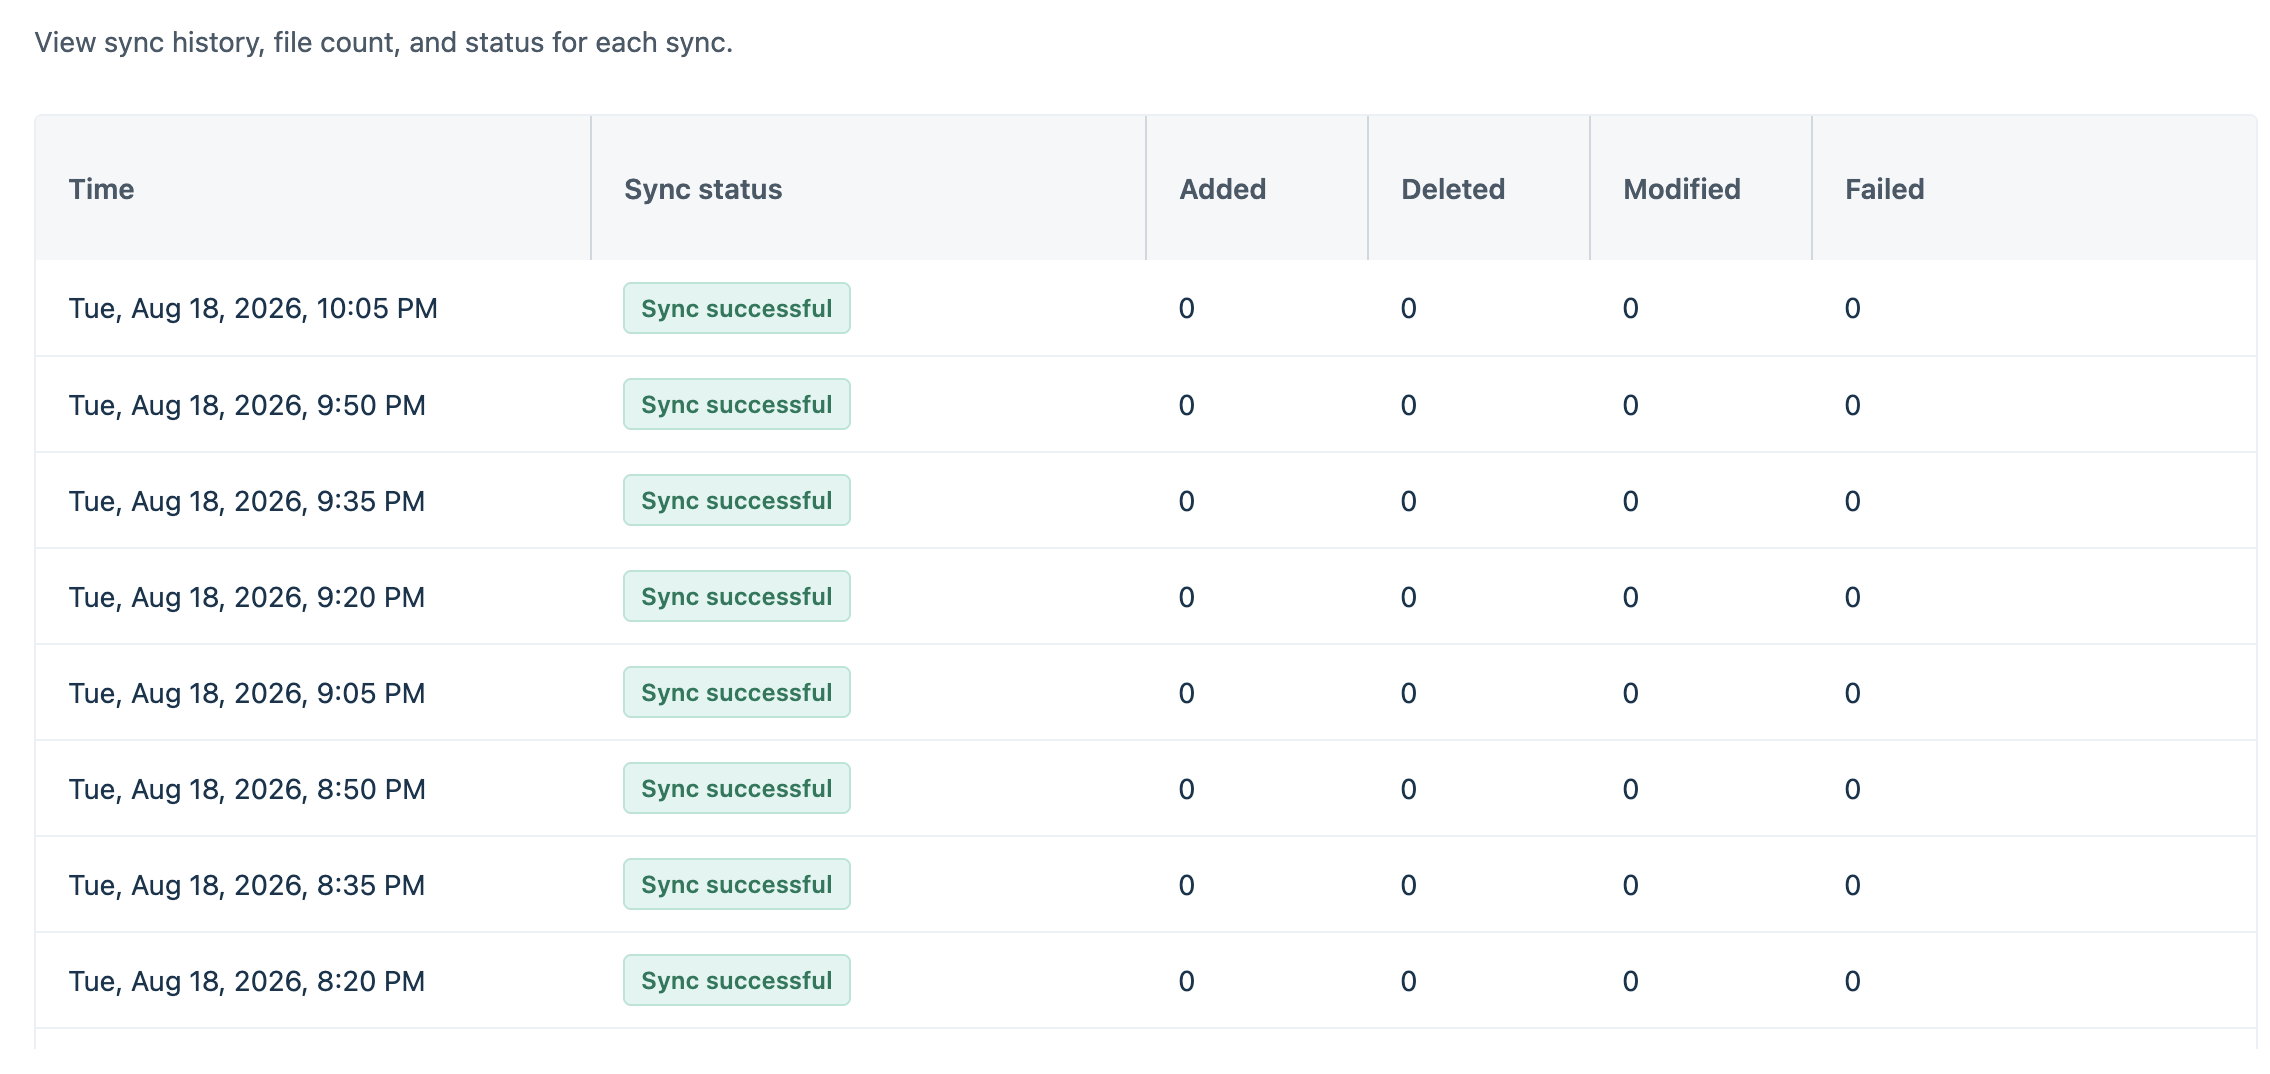
- To add more sites click on the edit icon (pencil) on the Settings tab and select the sites you want to sync additionally.
- Click Save and sync.
- Click the Logs tab to view log details for a specific time period. You can view logs from the past hour, past day, or select a custom date and time range.