API Actions) are predefined operations within a workflow that let your AI Agent in Freshdesk communicate with external Apps through APIs. Each action uses an endpoint (like a REST API URL) to send or retrieve data.
For example, when a customer asks, “Where’s my order?”, the AI Agent can automatically call the “Get Order Details” API (which is part of a Workflow that gets triggered), fetch the tracking status from your order management system, and respond with real-time updates — all without human intervention.
TABLE OF CONTENTS
Why use API Actions?
Actions are crucial for transforming your AI Agent into a smart, self-sufficient assistant capable of resolving customer requests from start to finish. Here's why:
- Autonomous Operation: Actions enable your AI Agent to complete tasks independently, eliminating the need for human intervention.
- Data-Driven Responses: By using live, contextual data from external systems, Actions ensure your AI Agent delivers accurate, personalized responses, moving beyond static scripts.
In short, Actions turn your AI Agent into a smart, self-sufficient assistant capable of resolving real customer requests end-to-end.
Access API Actions Library
To access the Actions and Authentication page,
- On the left navbar, click AI Agent Studio > Library > API Actions.
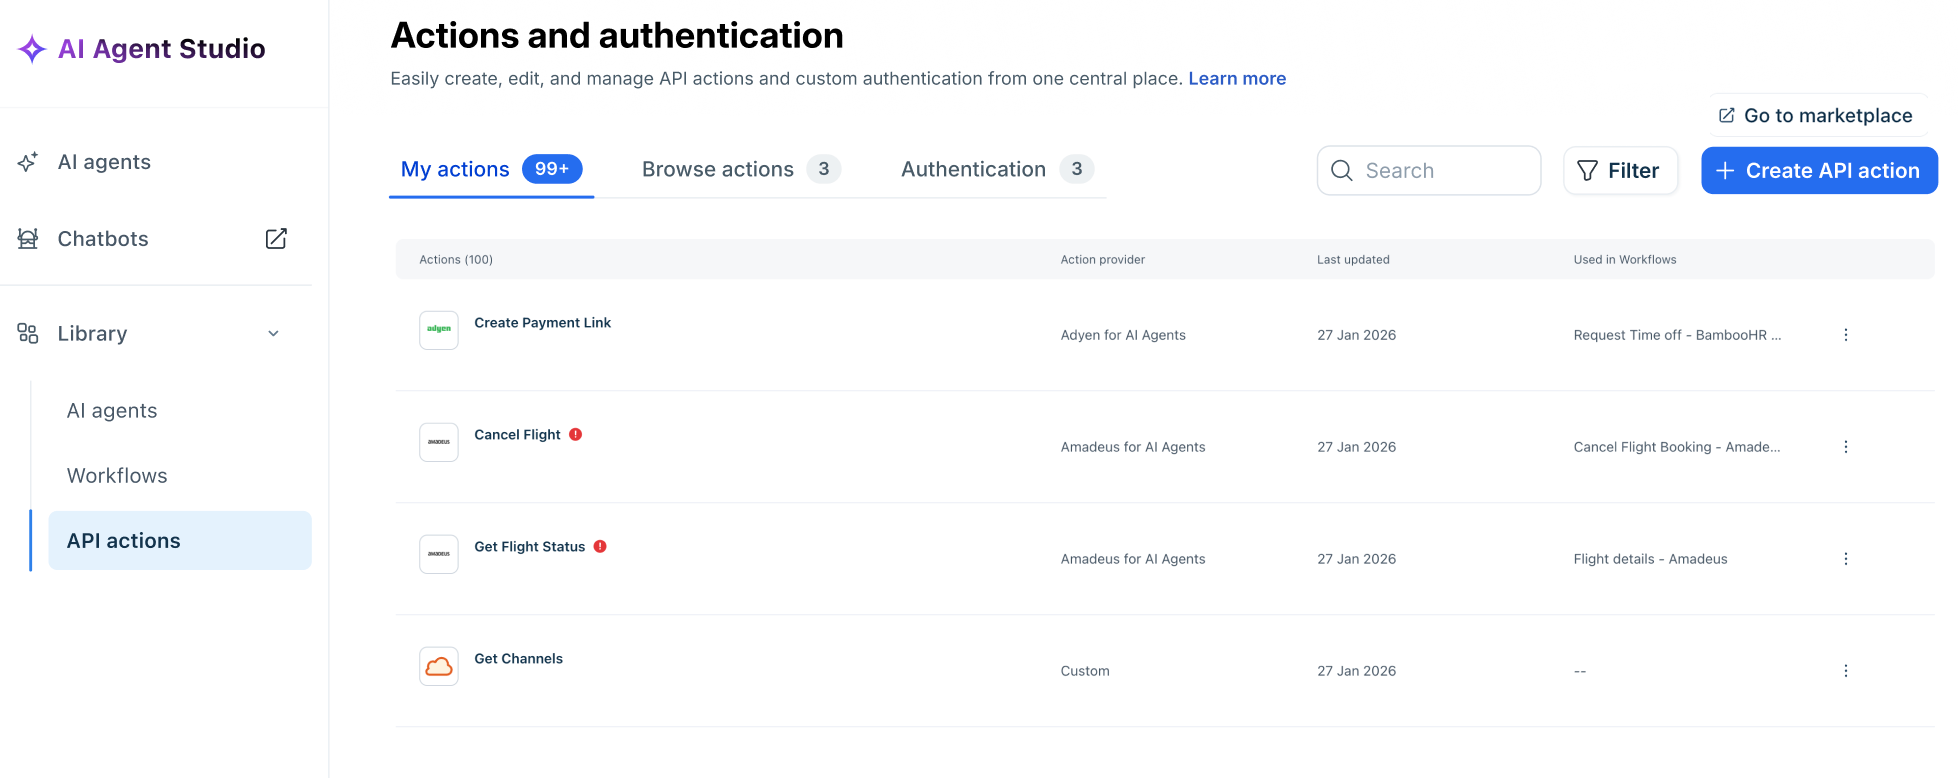
- On the Actions and authentication page, you'll find the Go to marketplace link to review your installed apps and manage them.
- You’ll also find the following tabs that help you manage and create API Actions efficiently:
- My actions: This tab lists the Actions linked to Workflows. You can view the Action Provider (for example, Shopify, Shiprocket, Fresdesk), along with the Workflow/s (for example, Order management, Shipping tracker, etc.) the Action is used in.
- Browse actions: Choose the Action that you want to use from a list of Actions provided by default.
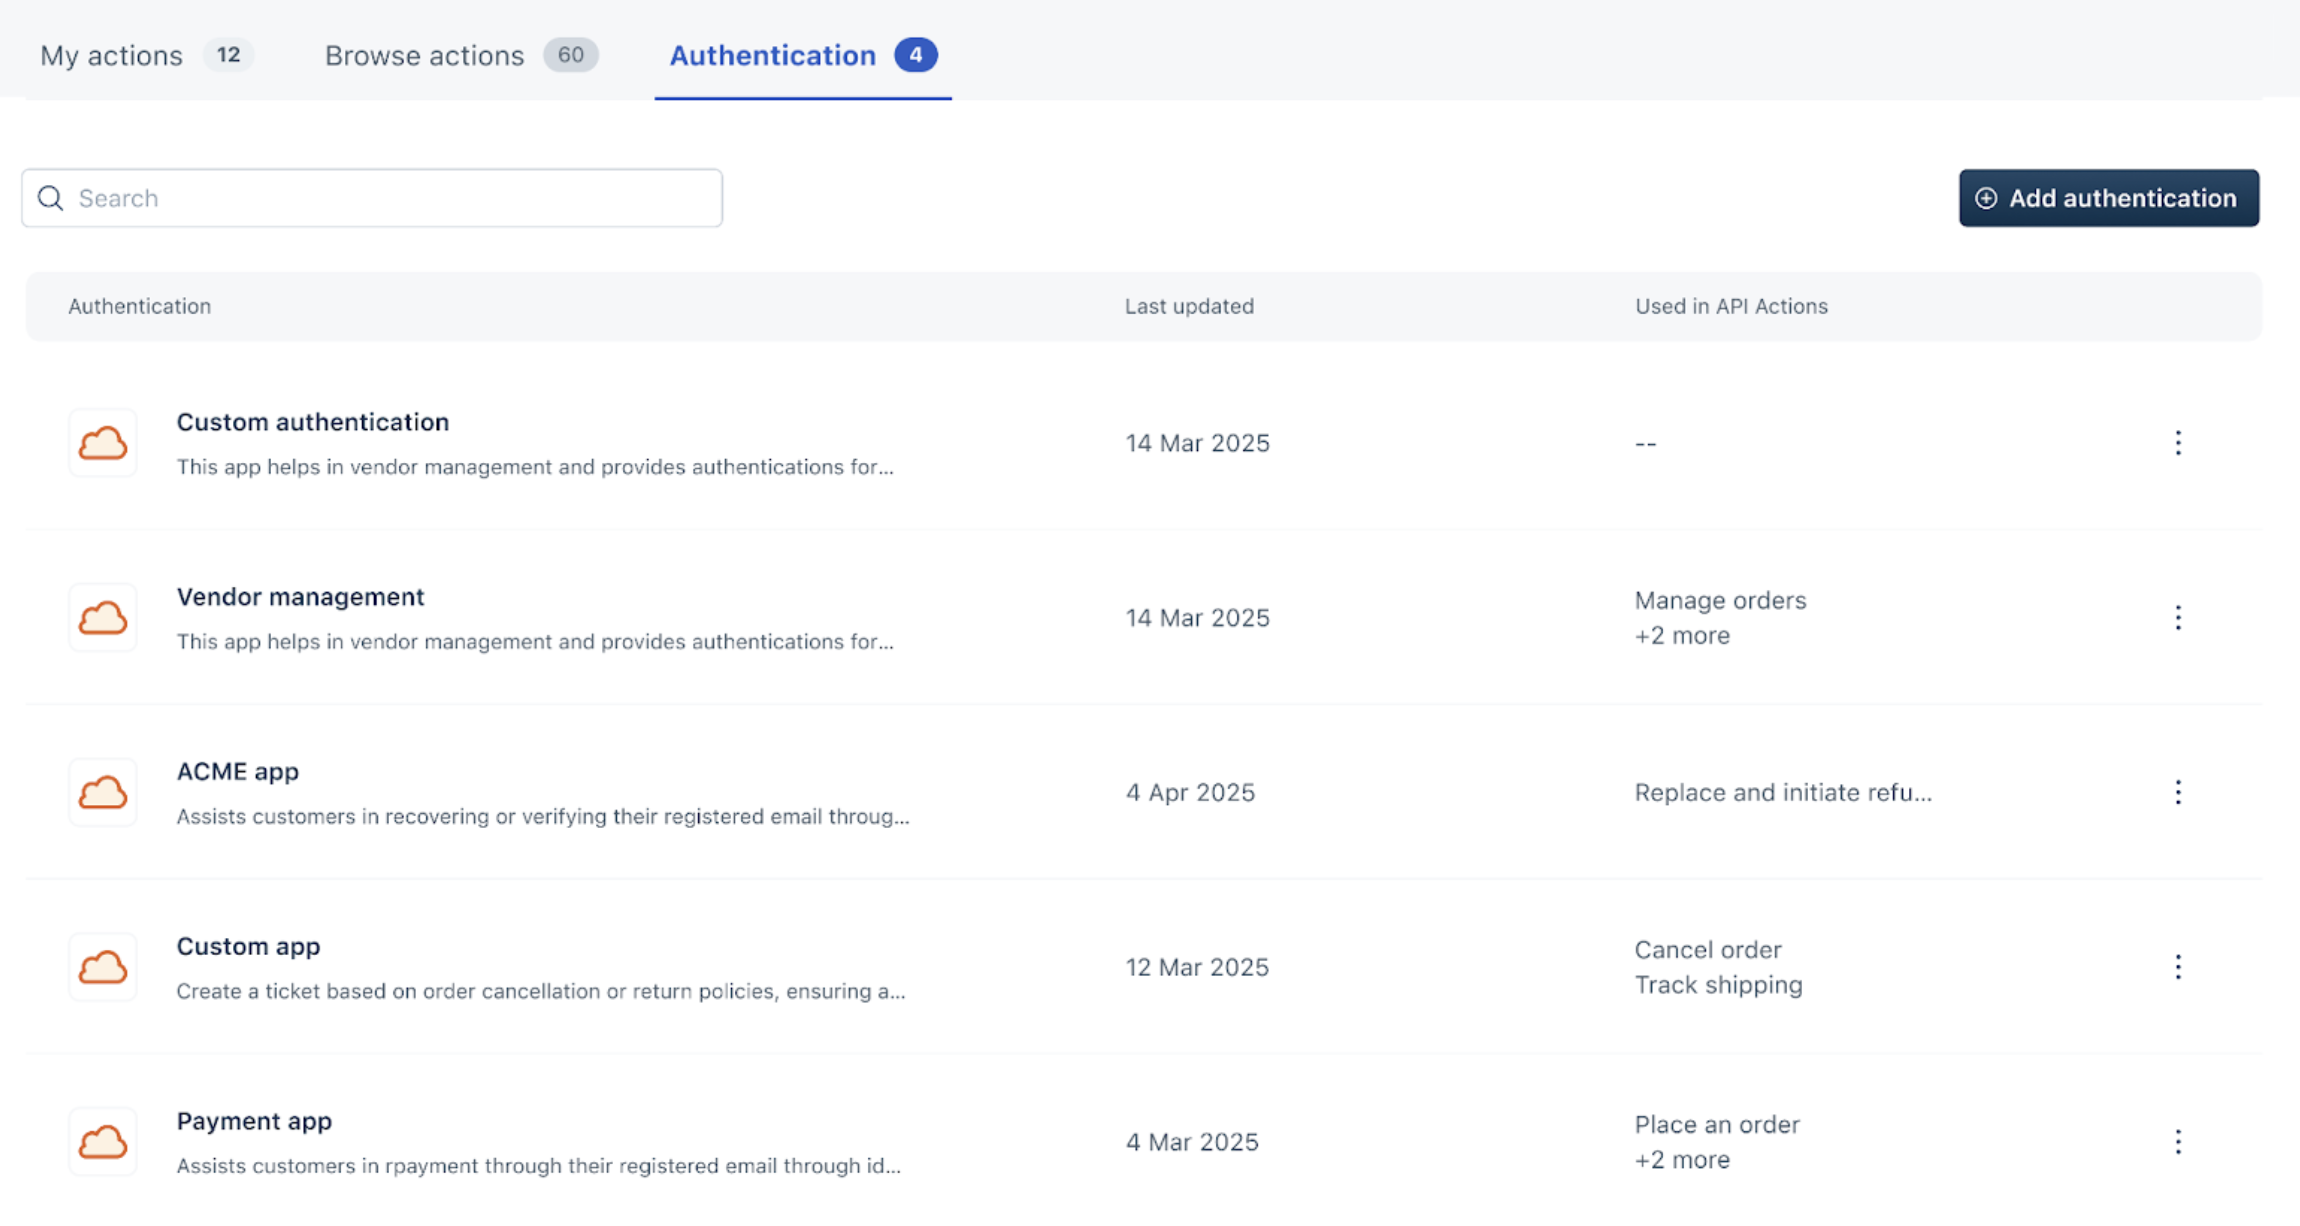
- Authentication: Choose the Authentication required for Actions to confirm the user’s identity when retrieving details from an external app.
Manage API Actions
You can manage default API Actions that are ready to use, or create an Action from scratch.
View, Edit, Clone, and Delete Pre-built or Default API Action.
To manage a pre-built or Default Action,
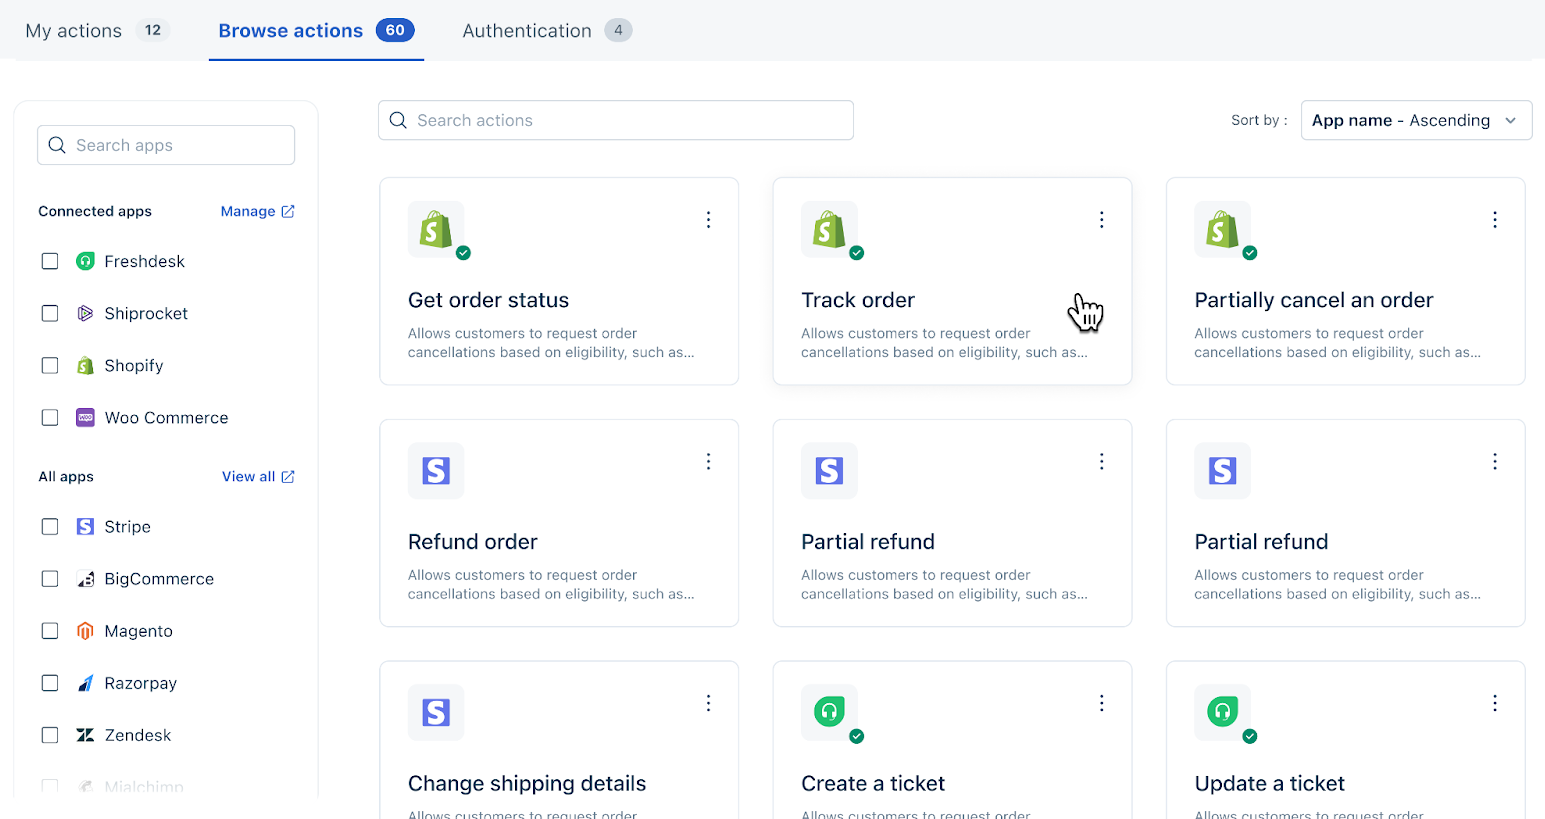
- On the Actions and Authentication page, click Browse actions
- Here, you can select the API Action that you want for a particular app. You can search by Action (for example: Get order details) or app name (for example: Shopify). You can also filter by specific apps on the left, so Actions related to those apps appear.
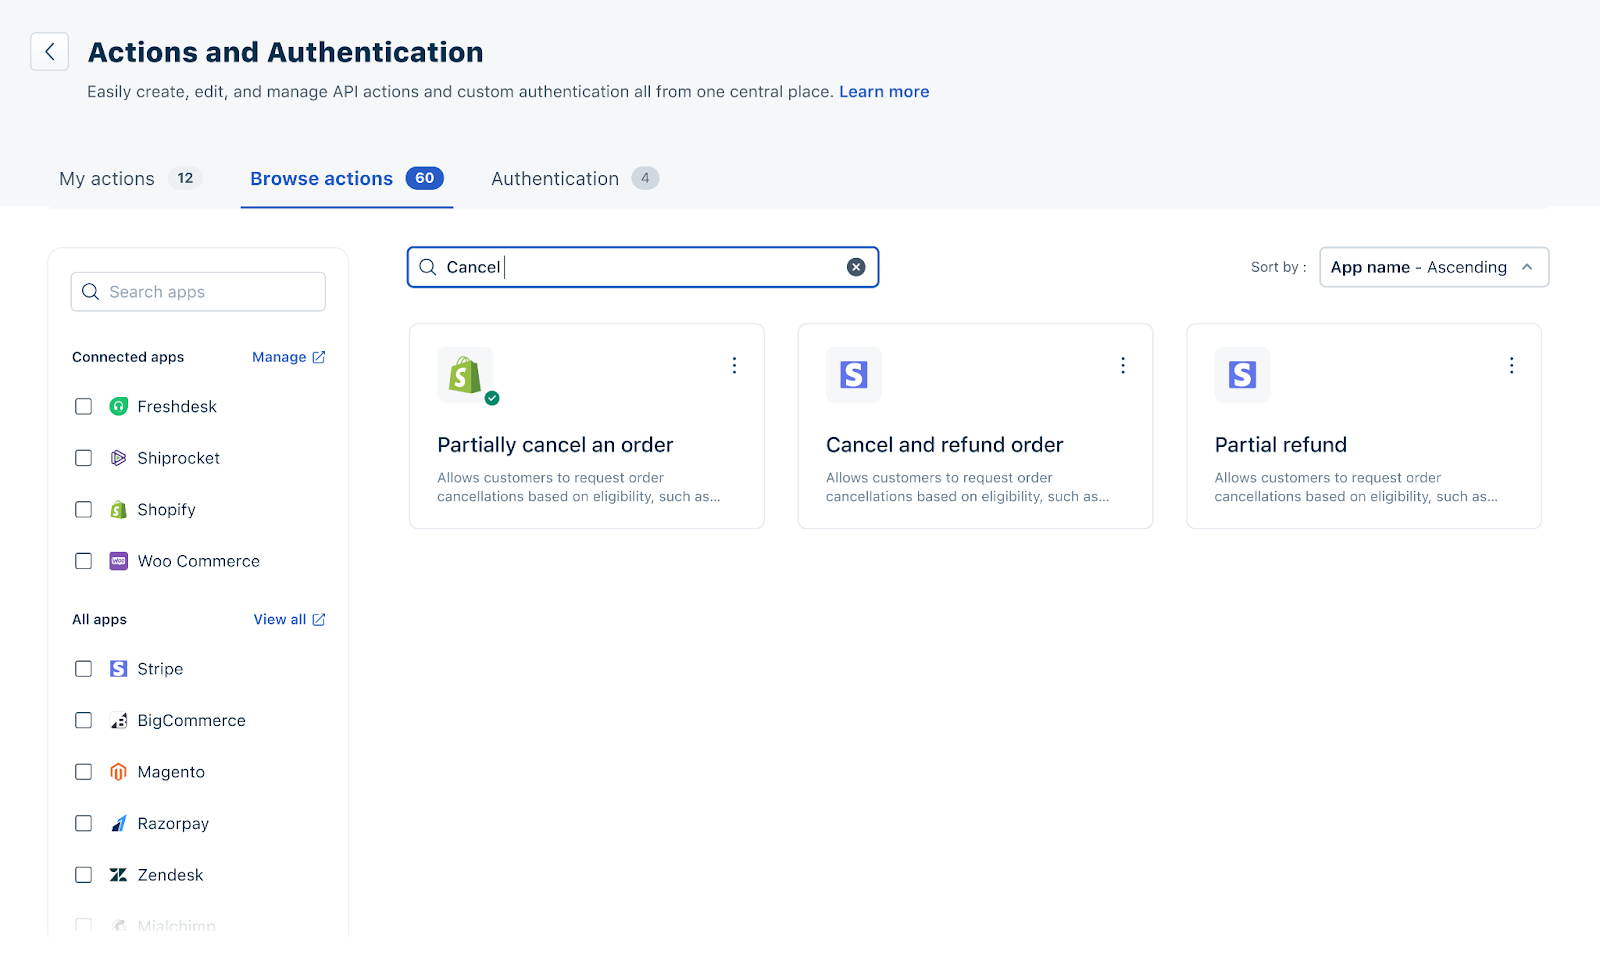
- You can also sort by App name or actions in either ascending or descending order.
- Click on the ellipses icon to the right of an Action. Here you can:
- Edit - Choose to edit the original or make a copy and edit in case the Action is tied to Workflow/s. Here, you can make changes to the name, description, input parameters, API connection parameters and authentication, and API response outputs.
- Clone - Make a copy of the Action and make changes on top of the cloned Action
- Delete - You can delete an Action if it is not used in a Workflow.
Creating a new Action
To create a new Action:
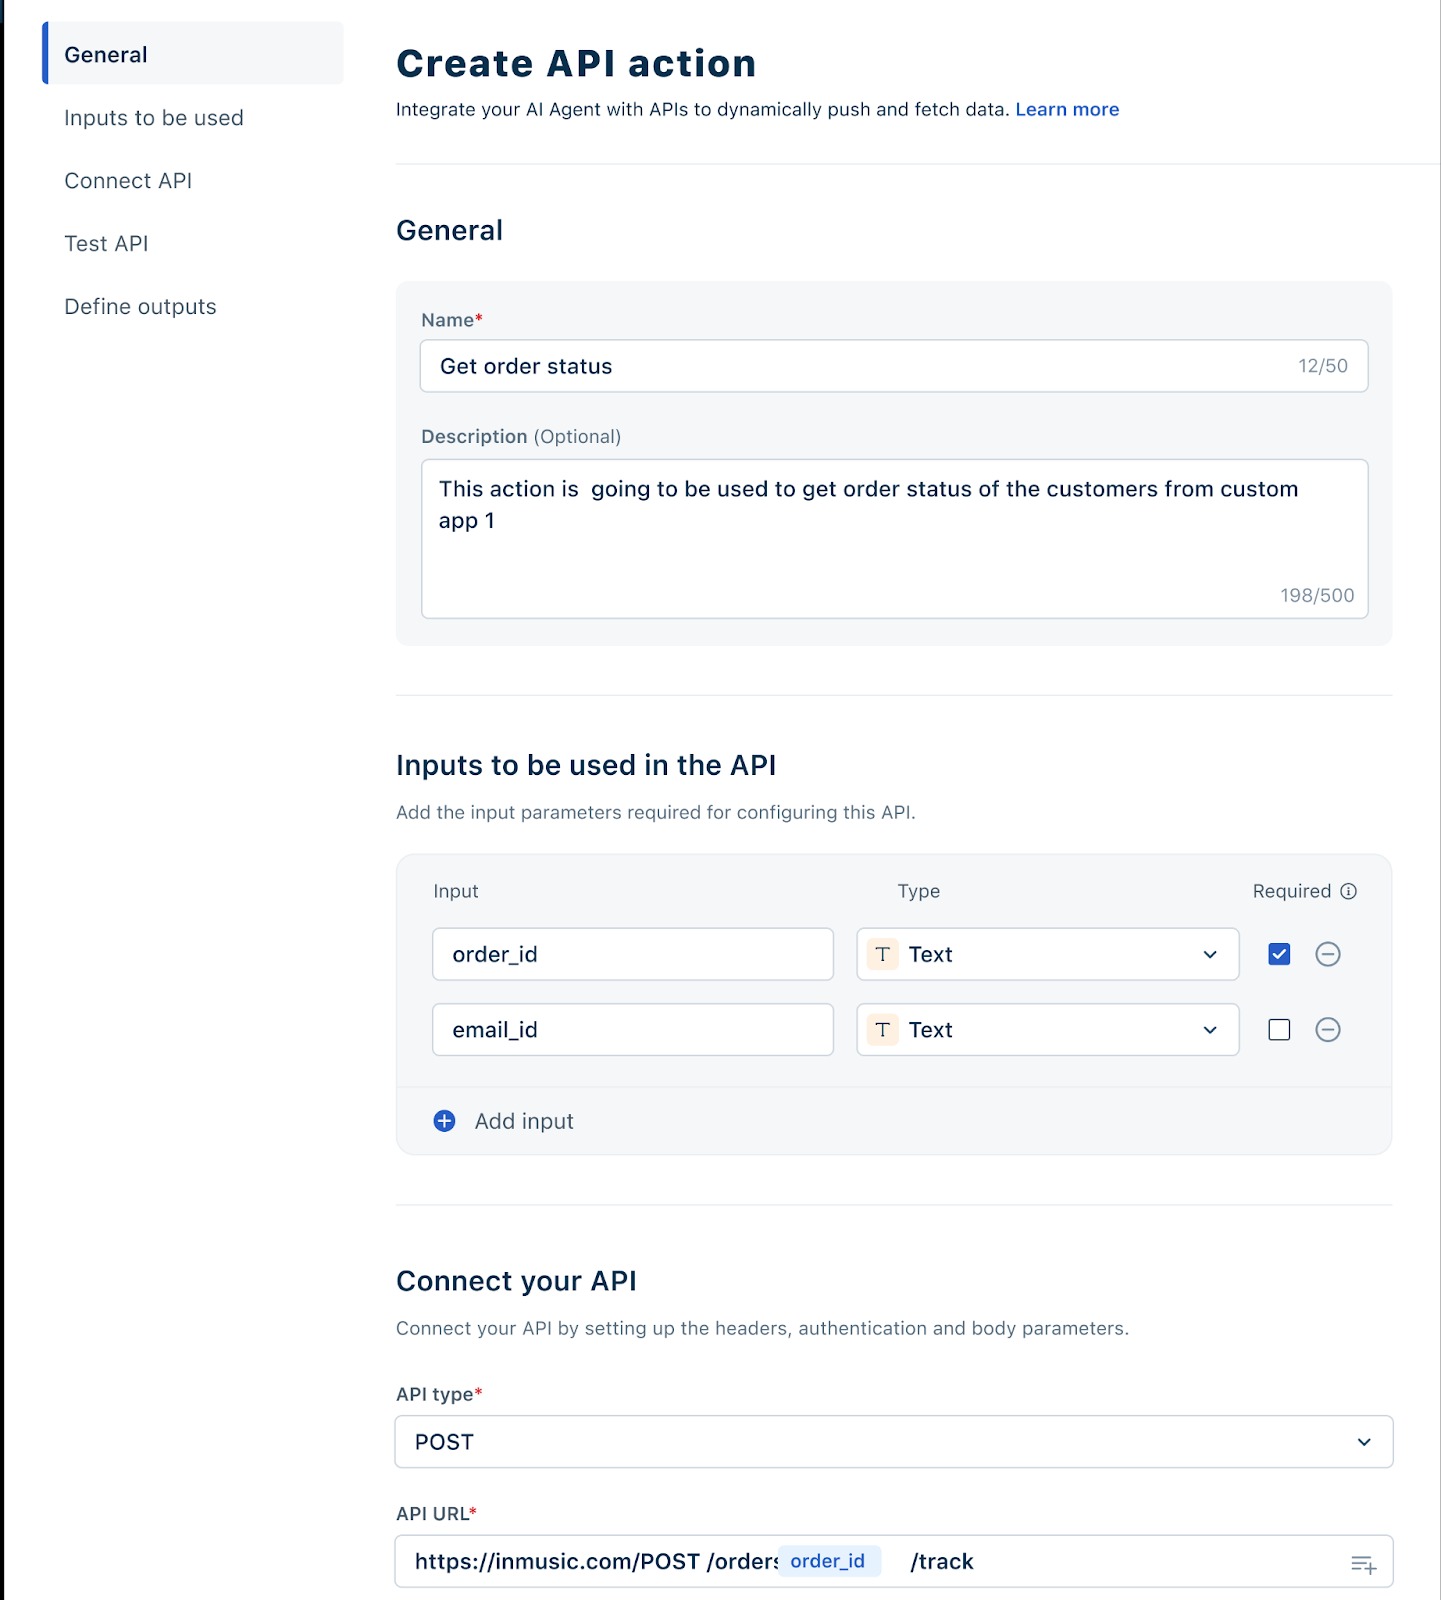
- On the Actions and Authentication page, under the My Actions tab, click Create API action.
- In the Create API action overlay, under the General section, provide a name for your API and a brief description of its function.
- Under Inputs to be used, add the input parameters required for configuring this API. For example, order_id. You can also choose the input type (Text, Number, etc.) and mark it as Required if needed.
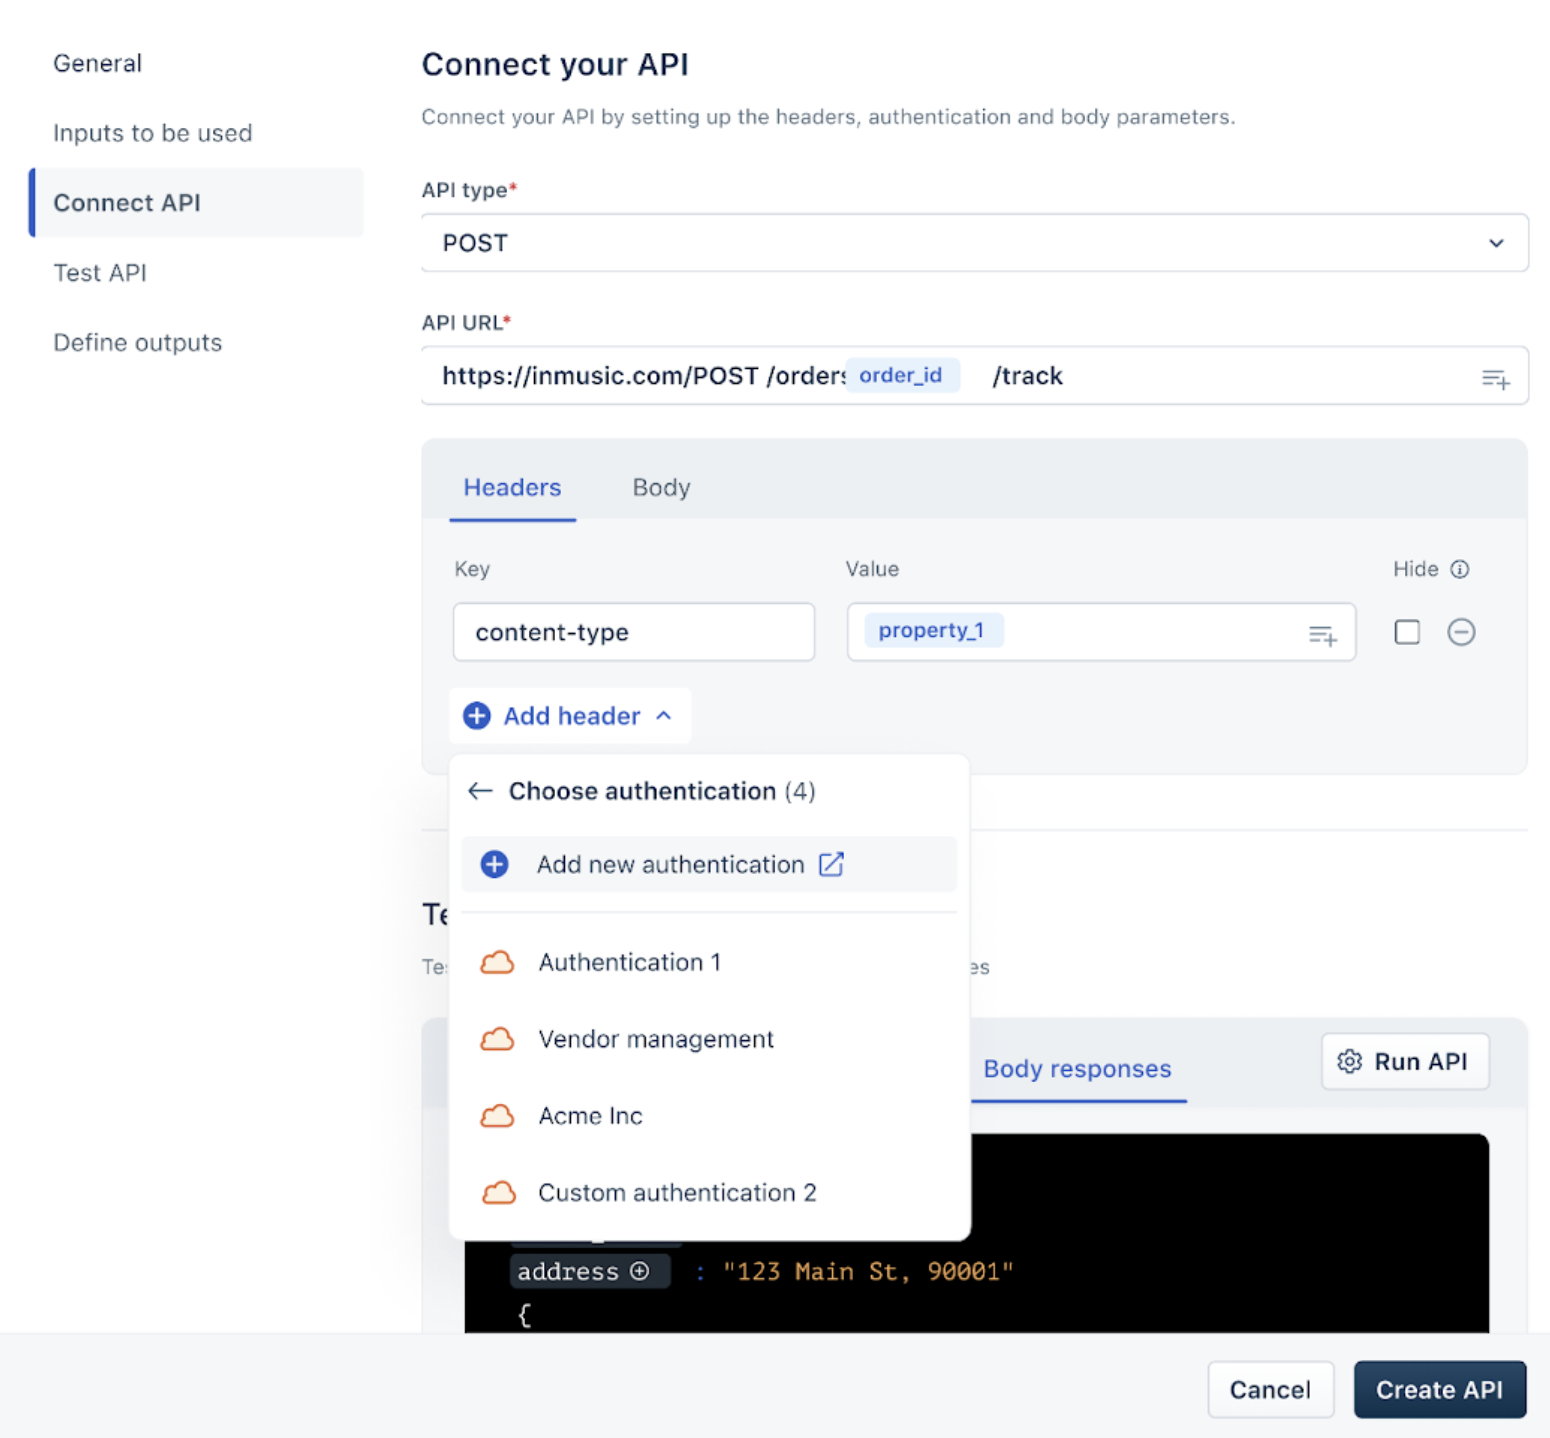
- In the Connect your API section, choose your API type (GET, POST, PUT, DELETE, etc.) from the dropdown and enter the API URL.
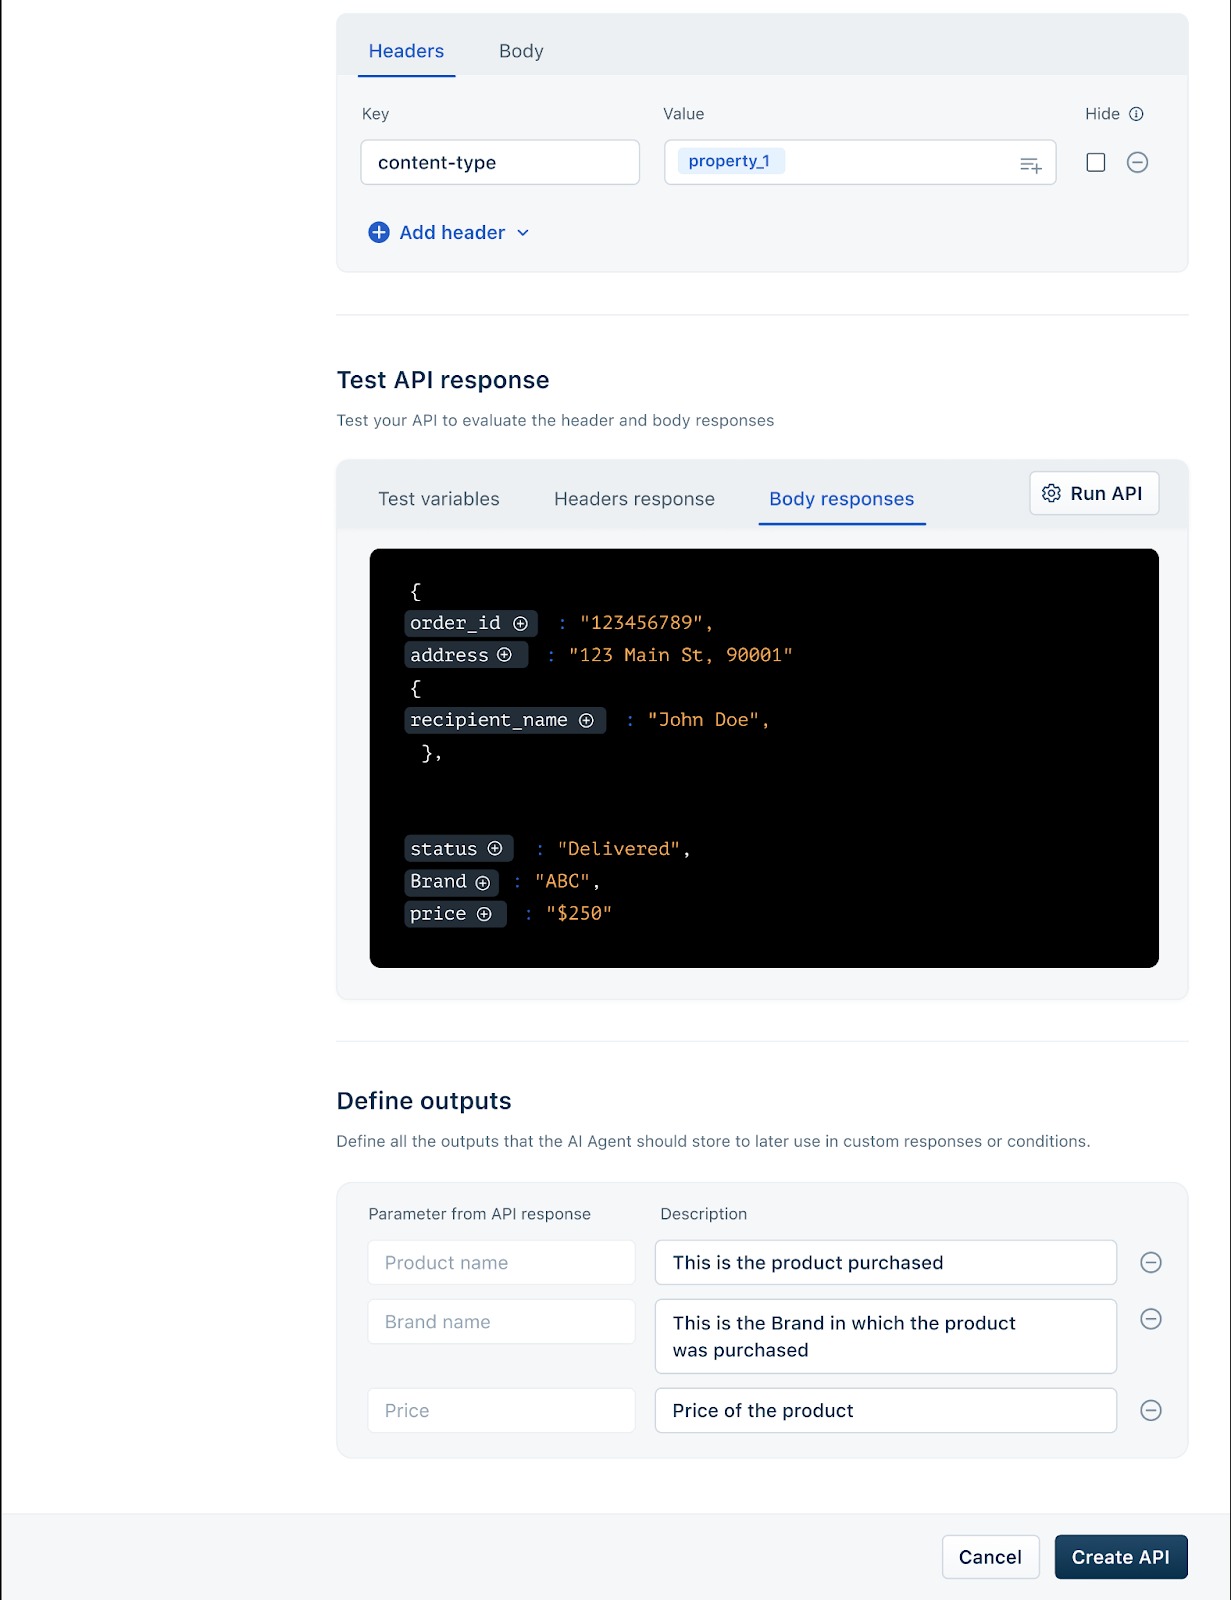
- Add any Headers or Body parameters required for authentication or API configuration by clicking Add header or switching to the Body tab.
- Scroll down to Test API response. Here, you can input sample variables and click Run API to verify if the connection is working correctly. You’ll see the live response displayed under Body responses.
- Under Define outputs, map the output parameters from your API response. For example, order_id or status, and provide a short description to explain what each value represents.
- Once all fields are filled and tested, click Create API to save your Action. Your new Action is now ready to be used within a Workflow.
Now that you have an Action ready to use, you can add it to a Workflow in the API Action Block section. Learn more about adding an Action to a Workflow.
What is Authentication?
Authentication lets your AI Agent securely connect with external applications or systems using credentials like API keys, tokens, or login details. It ensures that when your AI Agent makes a call to an external API (for example, to fetch order details or update records), the target system recognizes and trusts the request.
Without authentication, APIs would reject requests because there’s no way to confirm that the requester has permission to access the data.
Authentication is essential for:
- Secure access – It prevents unauthorized users from retrieving or modifying sensitive data.
- Controlled communication – Ensures that only verified systems can exchange data.
- Reusability – You can create one authentication setup and reuse it across multiple Actions within the same system.
Create a New Authentication
- Go to AI Agent Studio > Library > API Actions > Actions and Authentication page > Authentication tab.
- Click New Authentication.
- Provide the following details:
- Name – Give your authentication a recognizable name (e.g., Order Management API Auth).
- Description – Briefly describe its purpose (e.g., Used for connecting Freshdesk AI Agent with the order management system).
- Headers– Enter the required authentication parameters, such as:
- Authorization: Bearer <your_api_token>
- Content-Type: application/json
- Click Save to create the authentication setup.
Example
Let’s say you want your AI Agent to fetch a customer’s recent order details from your e-commerce app.
- The e-commerce API requires an Authorization Token to verify your identity.
- You create an authentication named Ecom Orders Auth, where the header looks like this:
Key: Authorization
Value: Bearer abcd1234xyz
- Once saved, this authentication can be selected in your Action setup (under Connect API) so that every API call your AI Agent makes is verified automatically.
Add an Authentication to an API Action
When you create an API Action, you can choose an existing Authentication setup from the dropdown in the Connect API section.
This ensures that every request sent by the Action carries valid credentials — meaning your AI Agent can fetch or update data securely without requiring you to manually enter authentication details for every API call.
Note: You can add only 1 Authentication per Action.
Edit or delete an Authentication
To edit an Authentication,
- Go to AI Agent Studio > Library > API Actions > Actions and Authentication page > Authentication tab.
- Click the ellipsis icon to the right of the Authentication and Edit.
- In the pop-up that talks about the API Actions that are using this Authentication, click Proceed.
To delete an Authentication,
- Go to AI Agent Studio > Library > API Actions > Actions and Authentication page > Authentication tab.
- Click the ellipsis icon to the right of the Authentication and Delete
- In the confirmation pop-up that appears, click Delete Authentication.