TABLE OF CONTENTS
- Overview of Chat AI Agent
- Create a Chat AI Agent
- Test the Chat AI Agent
- Deploy the Chat AI Agent
- Analyze Chat AI Agent performance
- Archive and restore AI Agents
Chat AI Agents automate customer support conversations by understanding customer queries, providing relevant answers, and resolving requests without requiring agent intervention. They can also perform actions through workflows and direct customers to additional support when needed.
This article explains how to create, configure, test, deploy, and manage Chat AI Agents.
Prerequisites
Before creating a Chat AI Agent, ensure that:
- AI Agent Studio is enabled for your account.
- You have administrator access to AI Agent Studio.
- You have configured the relevant chat channel or web chat widget.
- You have at least one knowledge source to configure and test the agent.
Overview of Chat AI Agent
Chat AI Agents help businesses automate customer support by handling customer queries in real time. They use configured knowledge sources to provide relevant answers, execute workflows to complete customer requests, and direct customers to additional support when required. This helps reduce repetitive support interactions and allows human agents to focus on more complex issues.
You can deploy Chat AI Agents across different channels depending on your Freshdesk product. The following table summarizes the differences in Chat AI Agent capabilities across the two products.
Capability | Freshdesk Omni | Freshdesk standalone |
Supported channels | Web chat, WhatsApp, Facebook Messenger, Instagram, and other supported messaging channels | Web chat only |
Handover | Transfer conversations to a human agent or group. You can also configure auto-resolution and handover outside business hours. | Direct customers to a configured support email address. Live transfer to a human agent is not supported. |
Post-handover behavior | The conversation continues with a human agent in the supported channel. | The chat conversation ends. Further communication takes place through email. |
Note: The Chat AI Agent on Freshdesk standalone is currently available for new signups only.
Create a Chat AI Agent
You can create a Chat AI Agent in the following ways:
- From the AI Agent library: Choose a pre-built agent template designed for common customer support scenarios. You can use the existing configuration as a starting point and customize it to meet your requirements. For more information, see AI Agent library.
- Start from scratch: Build an agent manually by configuring its knowledge sources, workflows, instructions, and behavior based on your business requirements.
Create from scratch
To create a Chat AI Agent, follow these steps:
- Go to AI Agent Studio from the left navigation.
- Select AI Agents and click Create new.
- Select Chat AI Agent and click Create new.
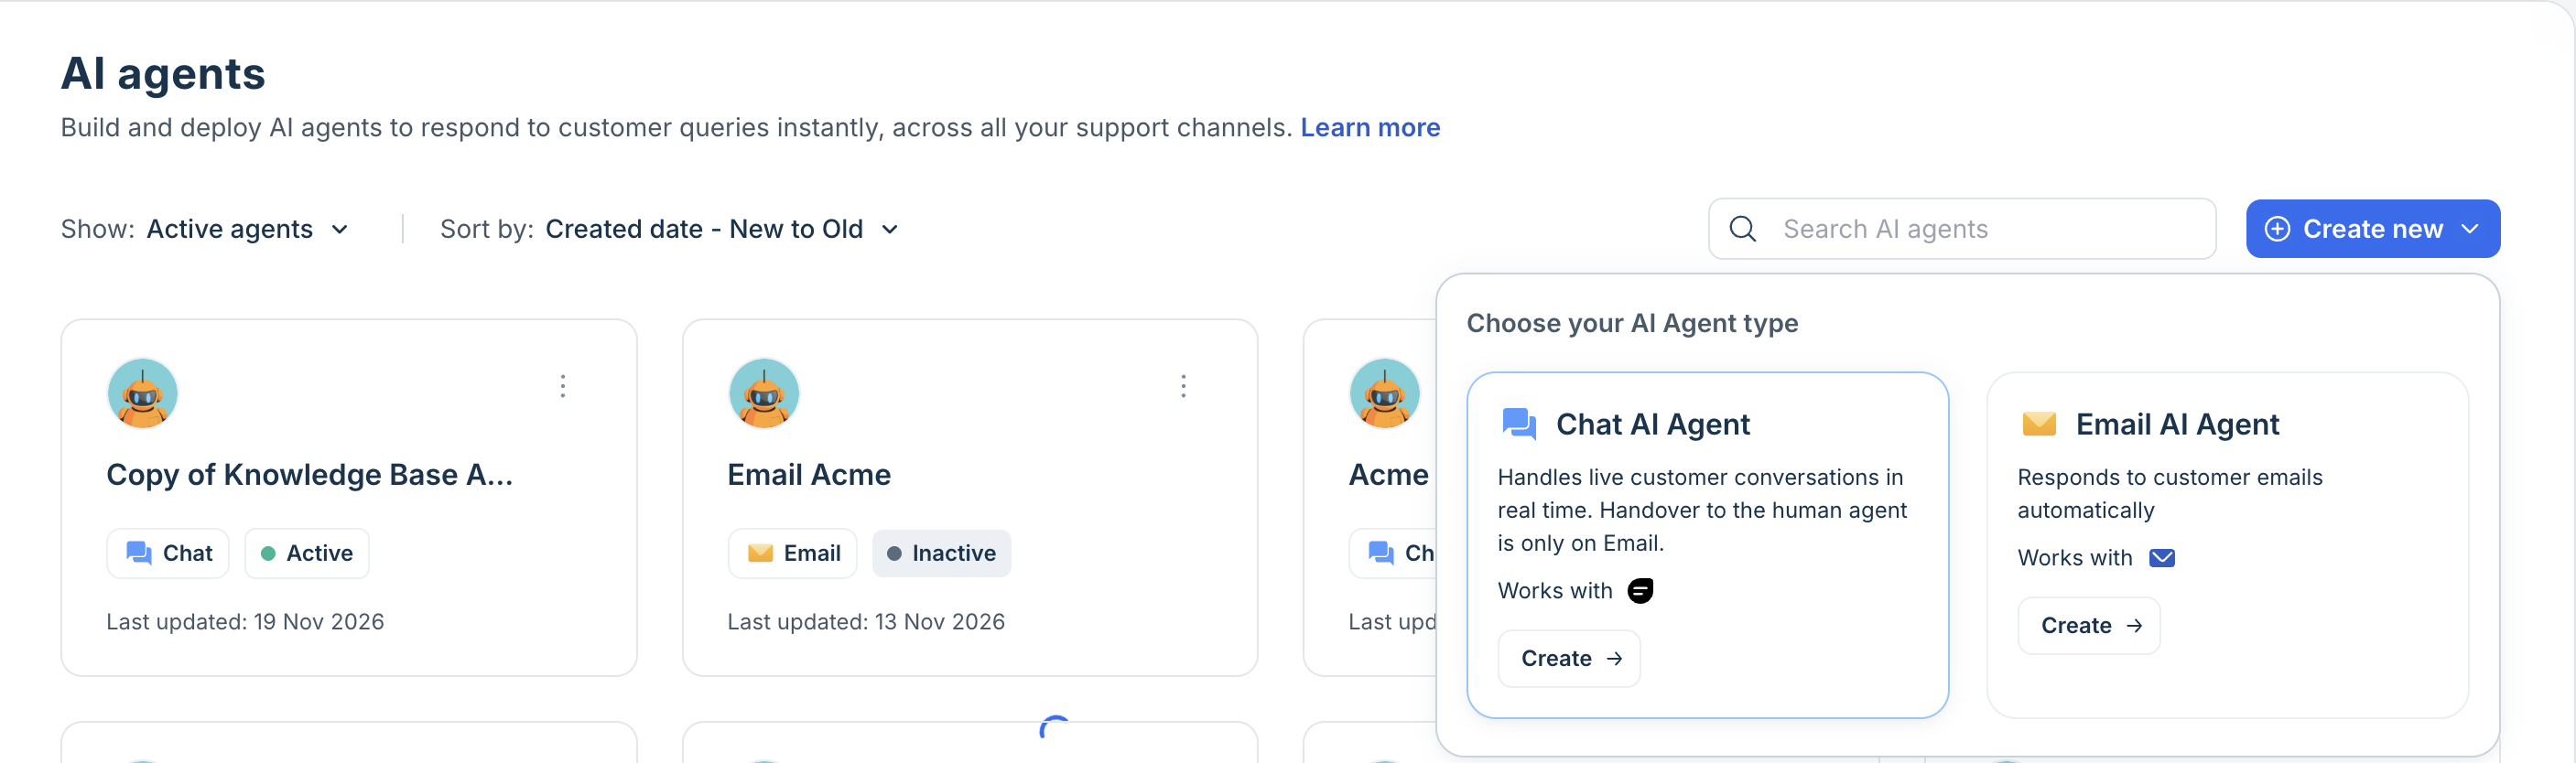
- Choose Start from scratch.
- Enter the agent name, select an avatar, and choose the primary language.
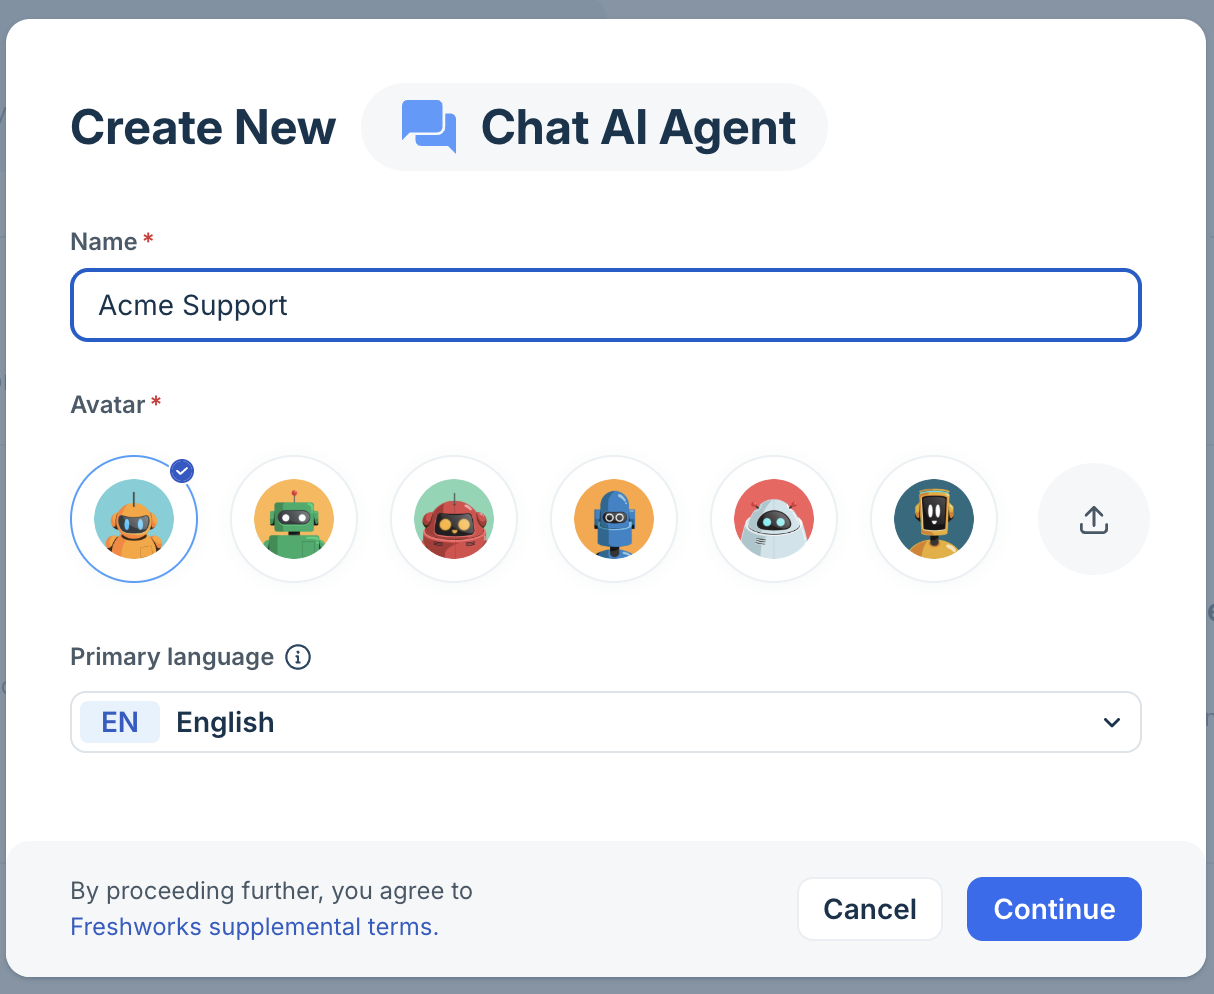
- Click Create New.
Once the agent is created in Draft state, you are automatically redirected to the agent configuration page. From here, you can configure different settings, such as knowledge sources, instructions, workflows, and other settings to define how the agent responds to and handles customer queries. If you created the agent using a ready-to-use template, its existing configurations are pre-populated. The following sections explain each configuration and its settings.
Add knowledge
Knowledge sources provide the information the agent uses to understand and respond to customer queries. You can add solution articles, upload files, provide URLs, create custom question-and-answer pairs, or link third-party apps.
Choose the sources that contain relevant information about your products, services, policies, and support processes to help the agent provide accurate and relevant responses.
For more information, see Build and curate knowledge for AI Agents.
Configure instructions
Instructions define the agent's role, business context, and response behavior. Specify the topics the agent should handle, the queries it should address, and how it should communicate with customers.
You can also add custom instructions to guide the agent's tone, response style, and behavior in specific situations.
For more information, see Configure agent identity and instructions.
Configure workflows
Workflows allow the agent to perform actions and handle customer requests that require more than a conversational response. You can create workflows from scratch or use pre-built templates from the workflow library to automate common support scenarios.
For more information, see Workflows for AI Agents.
Configure agent behavior settings
Use the configuration settings to customize how the agent interacts with customers and handles conversations. Here, you can set and configure the following:
Multilingual support
Configure the languages the agent can use to communicate with customers. You can enable language detection and specify the supported languages so the agent can respond in the customer's preferred language.
To configure multilingual support:
- Go to Build > Configurations > Multilingual support.
- Under Select languages, choose the languages you want the agent to support. The primary language selected during agent creation is displayed by default.
- Click Save.
Conversation behavior
Customize the agent's behavior during customer interactions. You can configure introductory messages, fallback responses for queries the agent cannot resolve, customer feedback collection, and customer detail collection. For more information, see Conversation behavior.
Handover settings
Handover settings define the conditions under which the Chat AI Agent transfers a conversation to a human agent. This includes queries the agent cannot resolve, customer requests for additional assistance, or situations that require human intervention.
The configuration options differ between Freshdesk Omni and Freshdesk standalone as they support different handover experiences. For more details, see Configure handover settings.
| Freshdesk Omni | Freshdesk standalone |
|---|---|
Configure the conditions for transferring conversations to a human agent or group. You can also set up automatic conversation resolution and define how handovers are handled outside business hours. | Configure email handover through web chat channel. Select the support email address to which customers should be directed when they need further assistance. Note: Live transfer to a human agent is not supported in Freshdesk standalone. |
Agent identity
Customize how the Chat AI Agent appears to customers by configuring its display name and avatar. These details are displayed alongside the agent's responses during chat interactions.
For configuration details, see Configure agent identity and instructions.
Test the Chat AI Agent
Test the agent before deployment to validate its responses, knowledge retrieval, and workflow execution. You can use the following testing options:
- Preview: Simulate individual customer conversations and review the agent's responses.
- Evaluate: Run a set of queries in bulk to assess response quality and identify gaps.
For more information, see Test AI Agents.
Preview the Chat AI Agent
Once you have configured and tested your AI Agent, use the Preview AI Agent option to view it as you configure it, or open it in a new tab.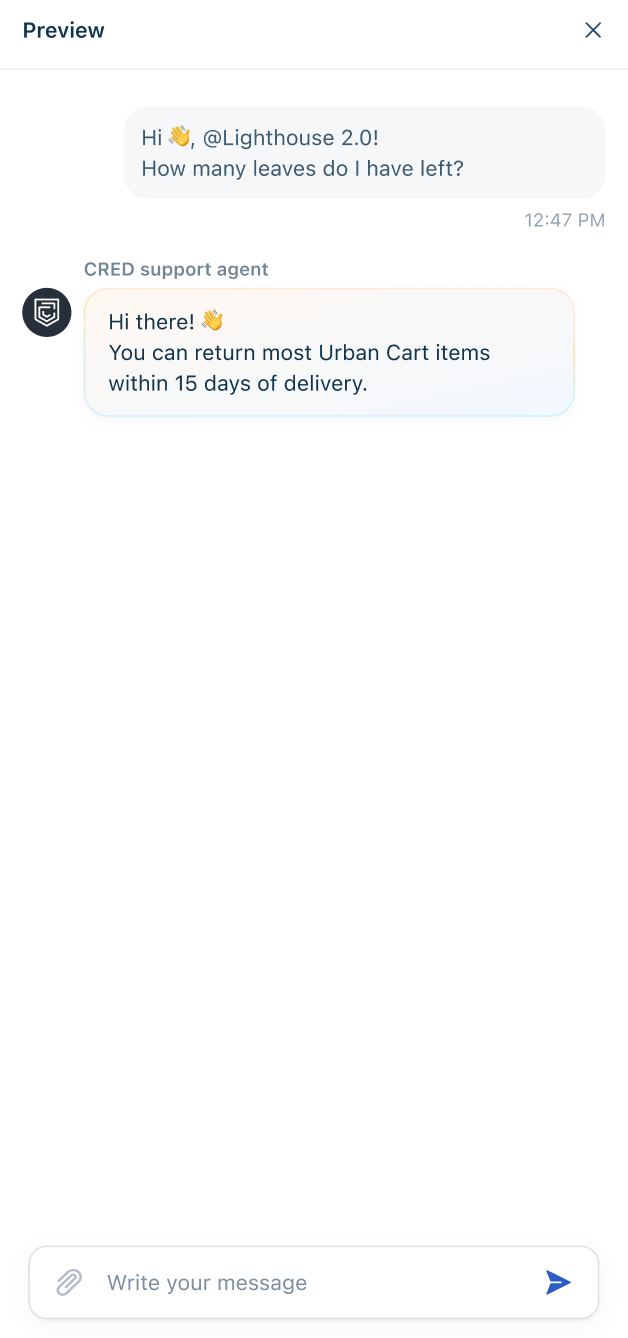
Note: In preview mode, Agent transfers will not be performed for unanswered queries or when human agent support was requested.
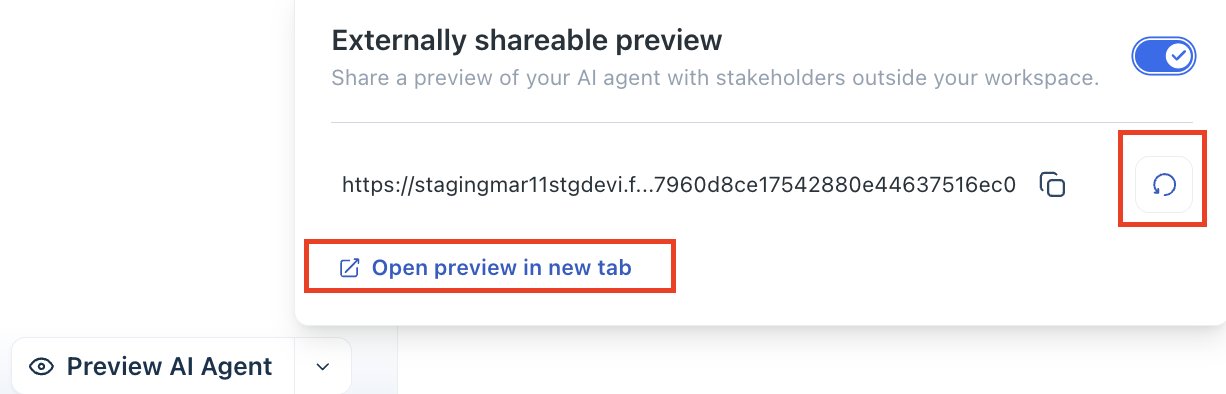
You can also create an externally shareable preview link for your AI Agent so that internal teams or stakeholders without agent licenses can test and provide feedback.
- On the AI Agent Studio page, click the dropdown next to Preview AI Agent.
- Toggle the Externally shareable preview option.
- Copy the generated link and share it with the stakeholders.
- Use the redo button to generate a different link.
Deploy the Chat AI Agent
Deploy the configured and tested agent to make it available to customers on the supported channels. The available channels and deployment process depend on your Freshdesk product.
| Freshdesk Omni | Freshdesk standalone |
|---|---|
| Deploy the agent on supported messaging channels, including Web Chat, WhatsApp, Facebook Messenger, and Instagram. | Deploy the agent only on Web Chat. You must also configure the Web Chat widget and add its embed code to your website. |
Note: If a Published AI agent is archived, it becomes unpublished and unmapped.
To deploy the AI Agent into channels:
- On the AI Agent Studio page, click Deploy.
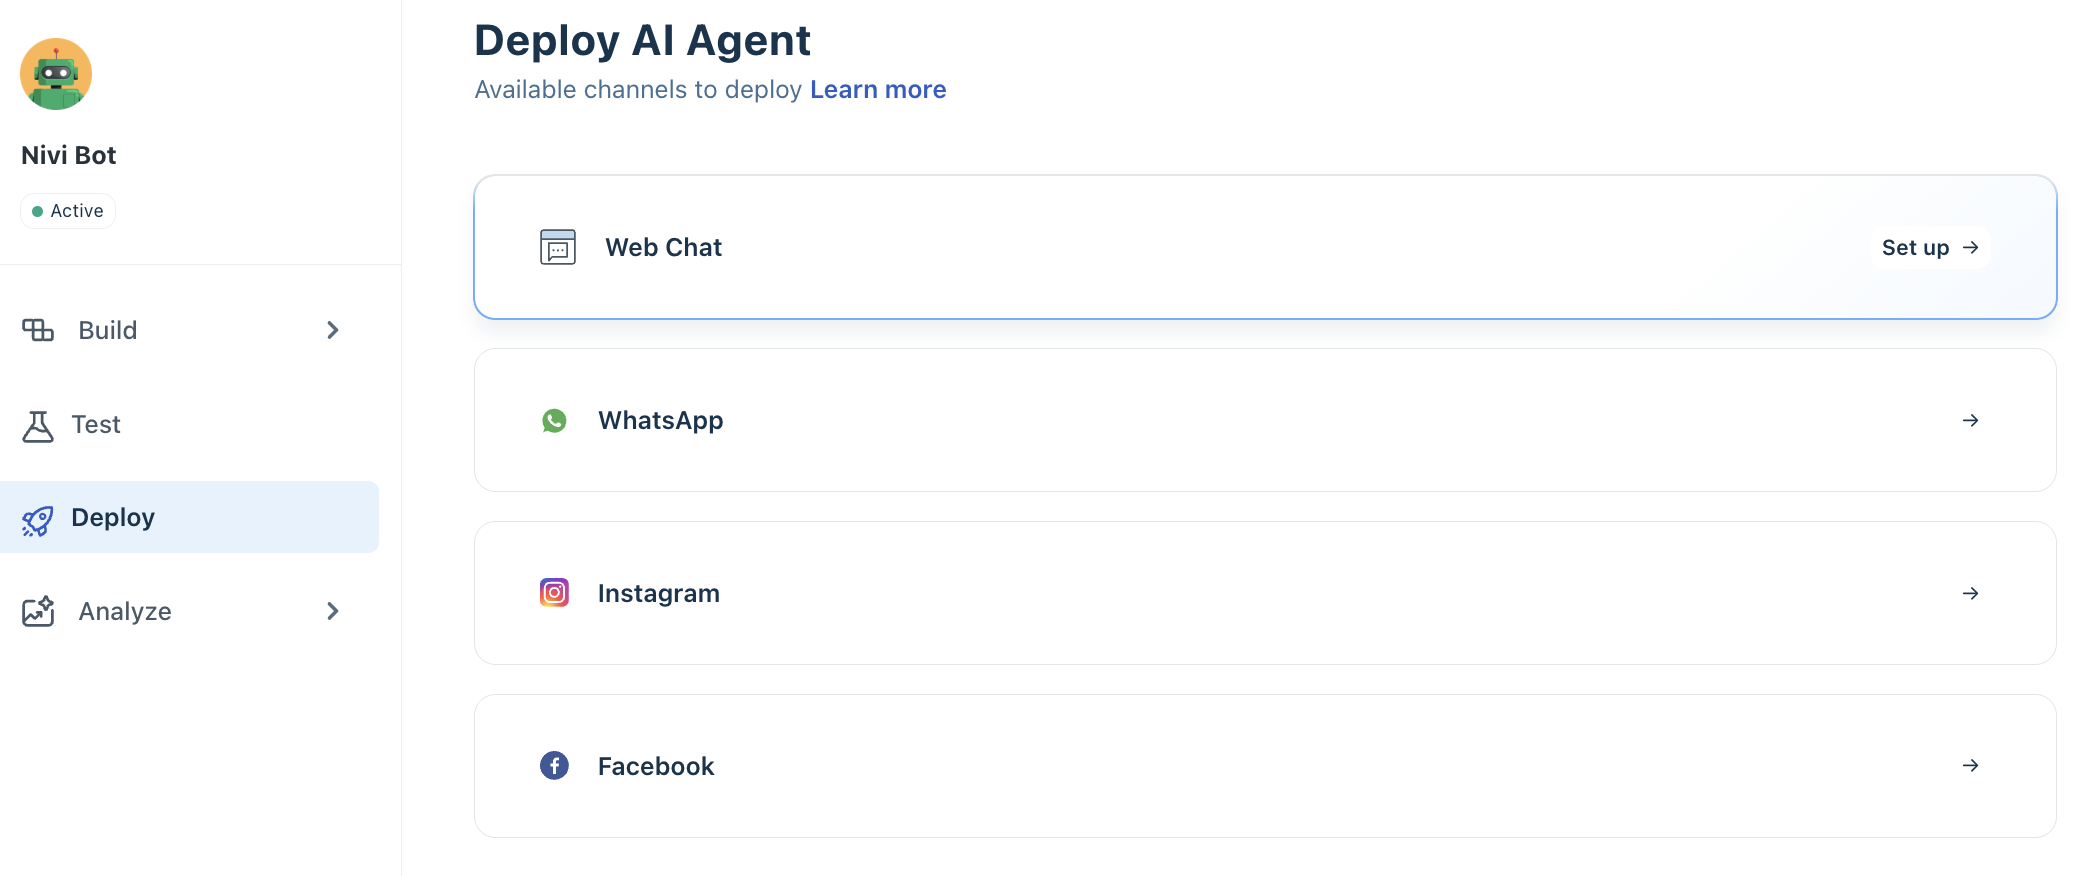
- Select the channel where you want to deploy the AI Agent, then click Set up. You will be redirected to the respective channel configuration page for the selected channel.
For example, if you choose Web Chat, you will be redirected to the Web Chat Topic Configuration page.
- Choose the Web Chat topic on which you want to deploy the AI Agent.
- Click Configure and enable Start with AI Agent.
- Choose the AI Agent to map.
- Click Publish.
The AI Agent will now be linked to the Web Chat widget associated with the Web Chat Topic. You can then deploy the widget on your website or product portal. For more details, see Create Web Chat Topics.
Image-based query resolution
When deployed across channels, the AI Agent can interpret image-based queries. This helps customers who prefer not to type or find it difficult to describe a problem in words.
Customers can send screenshots, such as error messages, through direct messages on WhatsApp or Facebook, or on any channel where the AI Agent is active. AI Agent analyzes the image and responds with relevant troubleshooting steps or policy links, without needing a text query. Supported formats are .png, .jpg, and .jpeg.
Analyze Chat AI Agent performance
Monitor the agent's performance after deployment to assess its effectiveness in handling customer queries. AI Agent Studio provides performance metrics, conversation insights, and improvement recommendations to help identify knowledge gaps and optimize the agent's responses.
You can also review individual conversation logs to investigate customer interactions and identify areas for improvement.
For more information, see Analyze and monitor AI Agent performance.
Archive and restore AI Agents
Over time, you may have AI Agents that are no longer in use. Archiving helps you declutter your workspace, improve performance, and manage your AI Agent inventory more efficiently—without immediately losing data.
To archive an AI agent,
- Go to AI Agent Studio from the left nav bar.
- Click the three-dot ellipsis menu next to the AI Agent.
- Select Archive and confirm.
Once archived,
- The AI Agent is removed from all channels
- It is moved to the Archived view
- It no longer appears in the active list
Archived AI Agents are not deleted immediately and can be accessed separately. To view and restore the archived AI agents,
- Go to the Show filter section.
- Select Archived from the dropdown.
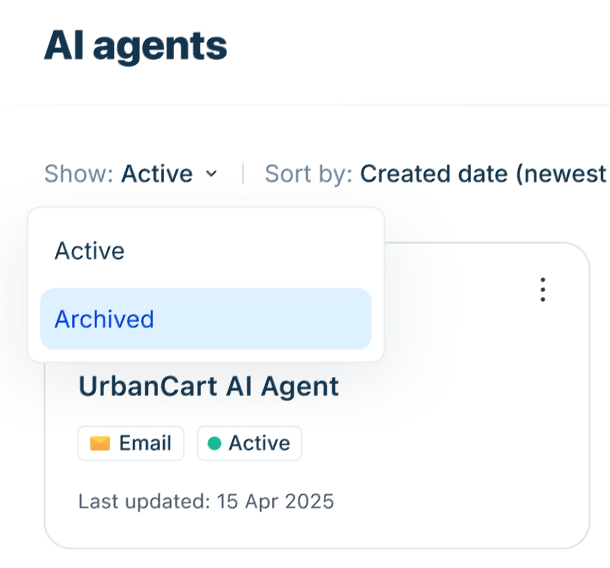
- Click the three-dot menu next to the AI Agent.
- Select Restore and confirm.
After restoration,
- The AI Agent moves back to the active list
- You must republish the AI Agent
- Reconfigure channel mappings, as they are not restored automatically
Key considerations
- Retention period: Archived AI Agents are permanently deleted after 30 days
- Data impact: Bot configurations are deleted after 30 days; analytics and past conversations remain unaffected
- Access: Users with AI Agent permissions can archive and restore
- Limits: If you’ve reached the AI Agent limit, you may need to archive an active agent before restoring another