How to create custom fields for contacts, accounts and deals?
Modified on: Thu, 15 Feb, 2024 at 4:20 PM
Apart from the fields provided in the product (default fields), you can create new fields to capture any additional information about your contacts, accounts, and deals. Before you begin, decide on the type of field you want to create.
The type of custom fields you create depends on the kind of business data you want to store. Below is a description of each custom field type.
Type of field | Description |
Text field | Used for single-line text. For example: Contact’s middle name |
Text area | Used for multi-line text. For example: a short description about the contact or their company |
Number | Used for numeric value. For example: Number of units in stock |
Checkbox (stand-alone) | Used for enabling or disabling a single option. For example: If you want any field to be required or not |
Radio button | Allows users to choose an option from a set of options. For example: The subscription plan that you opt for
You can also add up to 300 options/choices while setting up a radio button field. Learn more about them here |
Drop-down | Allows users to choose an option from a set of options. For example: Years of experience
You can also add up to 300 options/choices while setting up a radio button field. Learn more about them here |
Date picker | Allows users to enter dates in the format dd/mm/yyyy & of the user’s time zone. For example: the sign-up date of a contact |
Multi-select | Allows users to enable more than one option. For example: When you have more than one competitor for the product you are selling You can also add up to 300 options/choices while setting up a radio button field. Learn more about them here |
Formula field | Auto-calculated fields that derive their value from an expression assigned by the admin. For example: create a field that determines sales commissions based on deal value |
Lookup | Allows users to create relationships between different modules and enable users to display related lists of a record For example: create a contact field lookup ‘Primary Decision Maker’ on a Deal so that relevant contacts can be found on the Deal landing page. |
Auto-number | Allows users to create unique system-generated numbers that can be assigned to records. For example: create a student ID field with prefixes like STU or #ID - #ID0001,#ID0002,#ID0003and so on. |
To create custom fields,
Go to Admin Settings  and under Leads, Contacts & Accounts, locate Contact/Account modules.

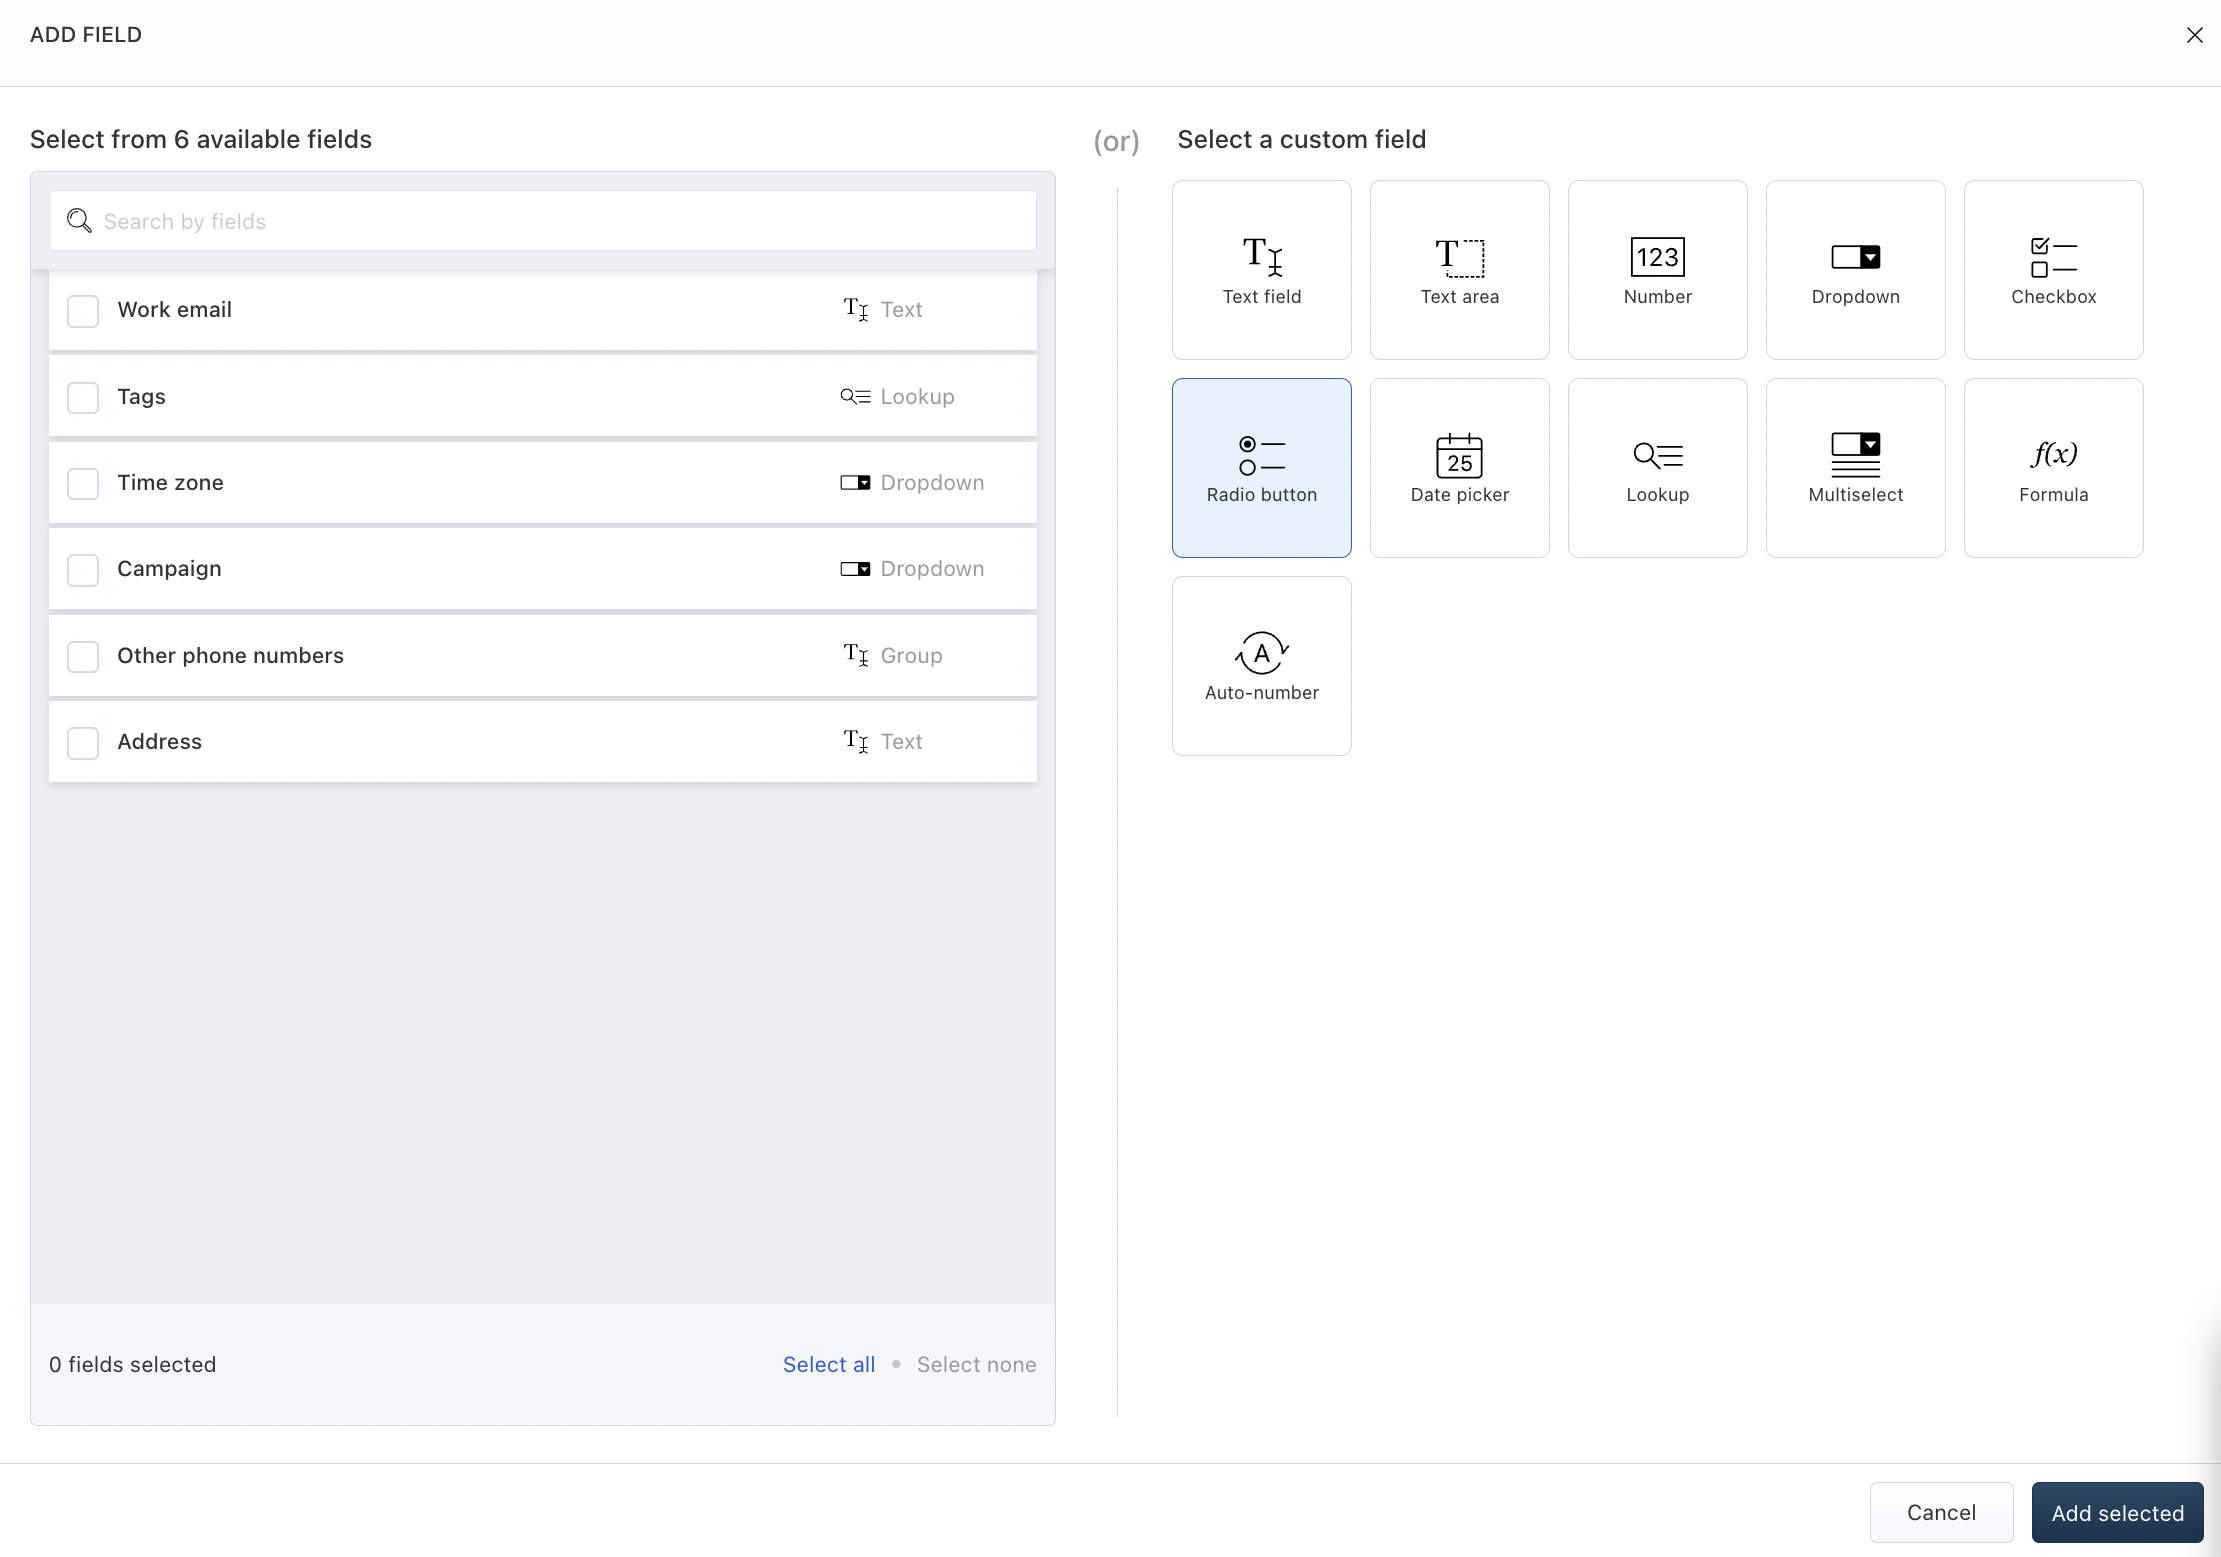
Click  . This brings up the Add field overlay. Choose the type of field you wish to create.
Click  to configure the new field. This brings up the field overlay where you can configure the field properties.
In the Add field overlay, perform the following actions:
Assign a Label for the field.
Add a placeholder text to provide users with a better context about the information to be filled on the field.
Add a tooltip to help users get better context about the field
Select a Group or Subgroup under which the field will be placed.
Configure the field properties by clicking the relevant checkboxes. You can make the field required, unique, or add it to the quick-add view. You can also make it a read-only field. This will prevent the field from being edited.
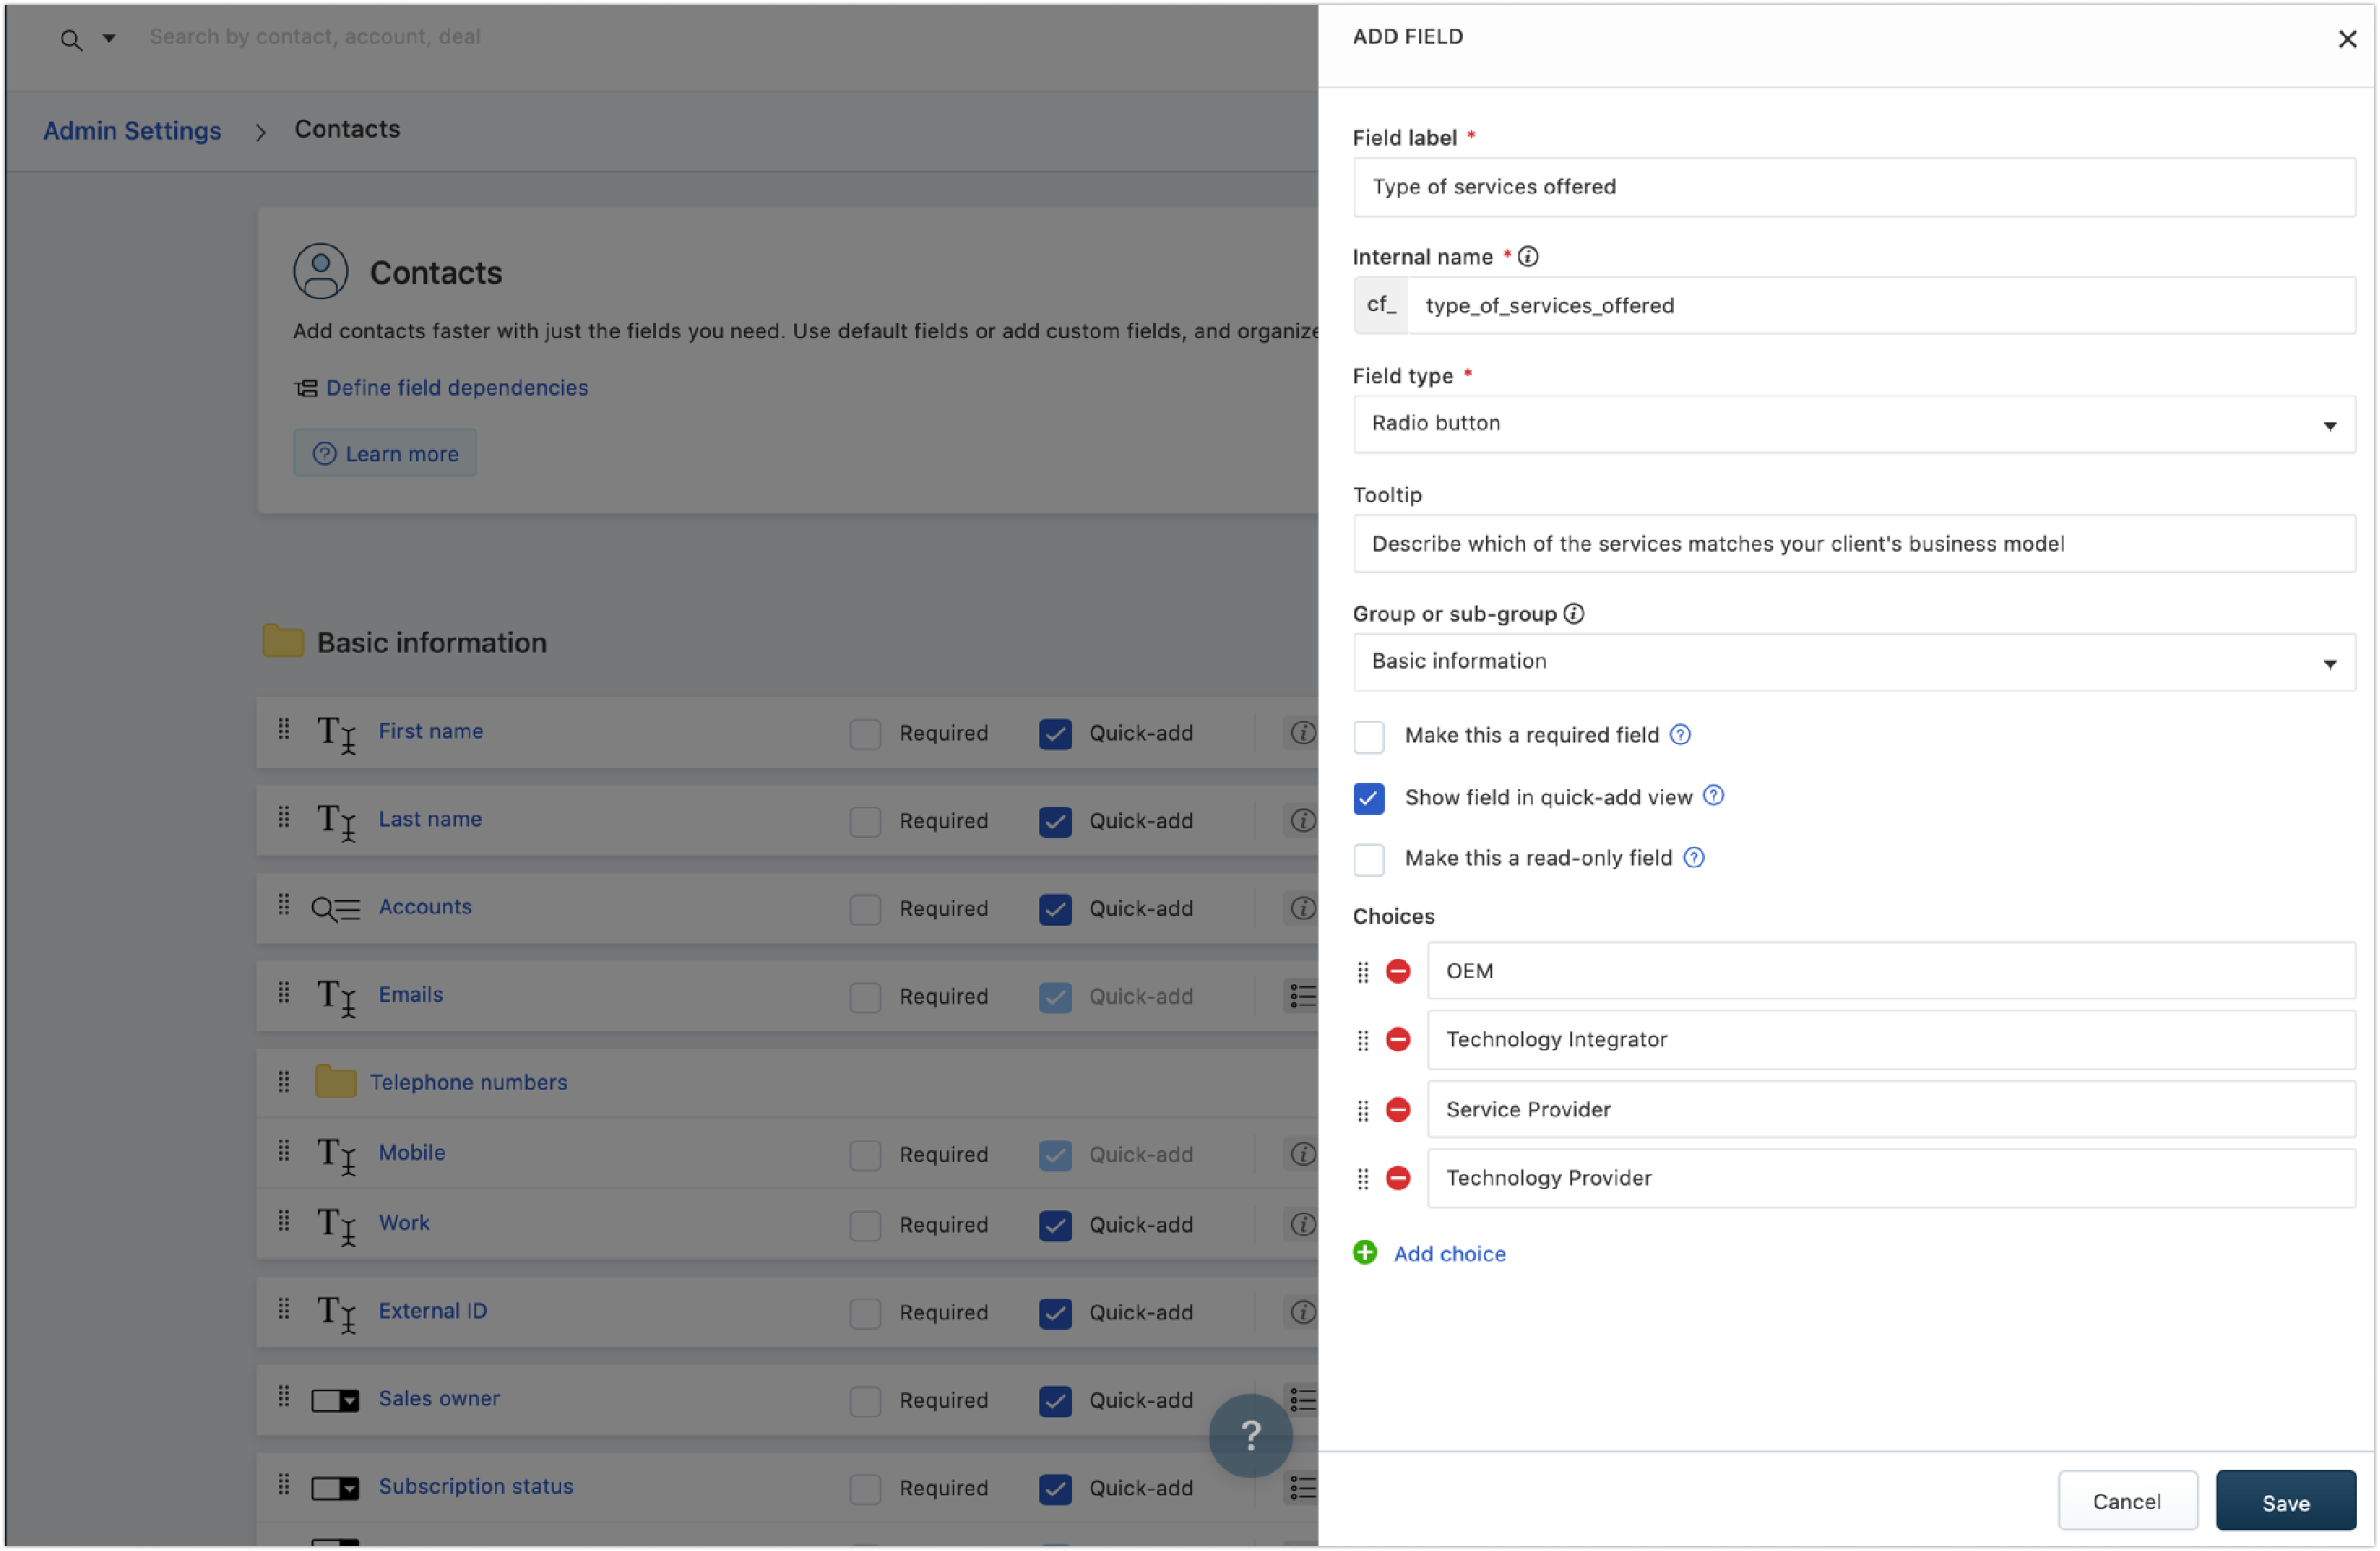
Click  to apply the changes.
The newly created custom fields can be found here:
You can populate these custom fields while adding records during import, and also through our CRM Code Library.
AVAILABILITY OF CUSTOM FIELDS (per module)
Free | Growth | Pro | Enterprise |
No | 150 | 250 | 630 |
Note:
- You can create custom fields from CRM Code Library as well.
- The custom field limit varies for each plan.
- You can reorder custom fields in the way you want them to appear in the add form.
- You can also sort and filter records using custom fields.
- You can create contact scoring rules using custom fields.
Did you find it helpful?
Yes
No
Can you please tell us how we can improve this article?
Articles in this folder -