TABLE OF CONTENTS
- Understanding functions
- Define custom functions in the bot builder
- Define custom functions on your website
This article provides information about creating and using custom JavaScript (JS) functions in bots.
Prerequisites:
Before you use functions, ensure that the following requirements are met:
- Ensure you have access to the chatbot you intend to configure.
- You have a basic understanding of JavaScript if you plan to create custom functions manually.
Understanding functions
Functions enable you to transform and process data within AI Agent workflows using JavaScript.
You can use default functions for common bot operations, and custom functions for specific business requirements.
Custom JavaScript (JS) functions let you extend the capabilities of the bot builder by defining and calling your own functions within bot flows.
You can implement custom JS functions in two ways:
- Define the function in the bot builder: Create and manage the function within Freshdesk and call it directly from your bot flow.
- Define the function on your website: Create the function in your website code and configure Freshdesk to call it from your bot flow.
Choose the approach based on where you need the function to run and the channels where you want to use it.
Define custom functions in the bot builder
You can create a custom JS function directly in the bot builder and call it as an action from your bot flow. This approach is useful when you need to use custom functions in channels that don't support JS functions, such as WhatsApp, Instagram, or Facebook Messenger.
Configure the custom function
You can create a custom function from a dialog or from the custom functions configuration.
- Open the dialog where you want to use the function.
- Select the + icon at the bottom right.
Alternatively, go to Flows > Configure > Custom functions > New function.
- Enter the name and description for the JS function.
- Review the output type. The function output is provided as JSON. This is particularly useful when you need to transmit or store data in a structured format, such as when sending data to a web server or storing data in a database.
- Use the code editor to define the function based on your requirements. Use dynamic values from dialogs, APIs, properties, or other functions as required. You can also pass properties from any dialog to the function.
Example: Process API response data
You can use a custom function to process an API response and return specific values to the bot.
For example, suppose an API returns customer and order information, and you want to identify orders with a total value greater than $160 and return their order IDs and item names.
{

"customer": {

"id": "cust_123456789",

"name": "John Doe",

"phone": "+1234567890",

"email": "john.doe@example.com"

},

"orders": [{

"order_id": "123456789",

"created_at": "2024-06-18T12:00:00Z",

"order_status": "shipped",

"payment_status": "paid",

"total_price": "300.00",

"currency": "USD",

"order_tracking_url": "https://app.orders.com/track/123456789",

"items": [{

"item_id": "item_2001",

"name": "Bluetooth Headphones",

"quantity": 1,

"price_per_unit": "150.00",

"total_item_price": "150.00",

"currency": "USD"

},

{

"item_id": "item_2002",

"name": "Air Pods",

"quantity": 1,

"price_per_unit": "150.00",

"total_item_price": "150.00",

"currency": "USD"

}

],

"payment_info": {

"payment_id": 10101,

"payment_type": "Gift Voucher",

"payment_gateway": "GV",

"amount": "300.00",

"currency": "USD"

}

},

{

"order_id": "987654321",

"created_at": "2024-06-19T15:30:00Z",

"order_status": "processing",

"payment_status": "pending",

"total_price": "200.00",

"currency": "USD",

"order_tracking_url": "https://app.orders.com/track/987654321",

"items": [{

"item_id": "item_3001",

"name": "Smartwatch",

"quantity": 1,

"price_per_unit": "200.00",

"total_item_price": "200.00",

"currency": "USD"

}],

"payment_info": {

"payment_id": 20202,

"payment_type": "Cards",

"payment_gateway": "AmEx",

"amount": "200.00",

"currency": "USD"

}

}

]

}
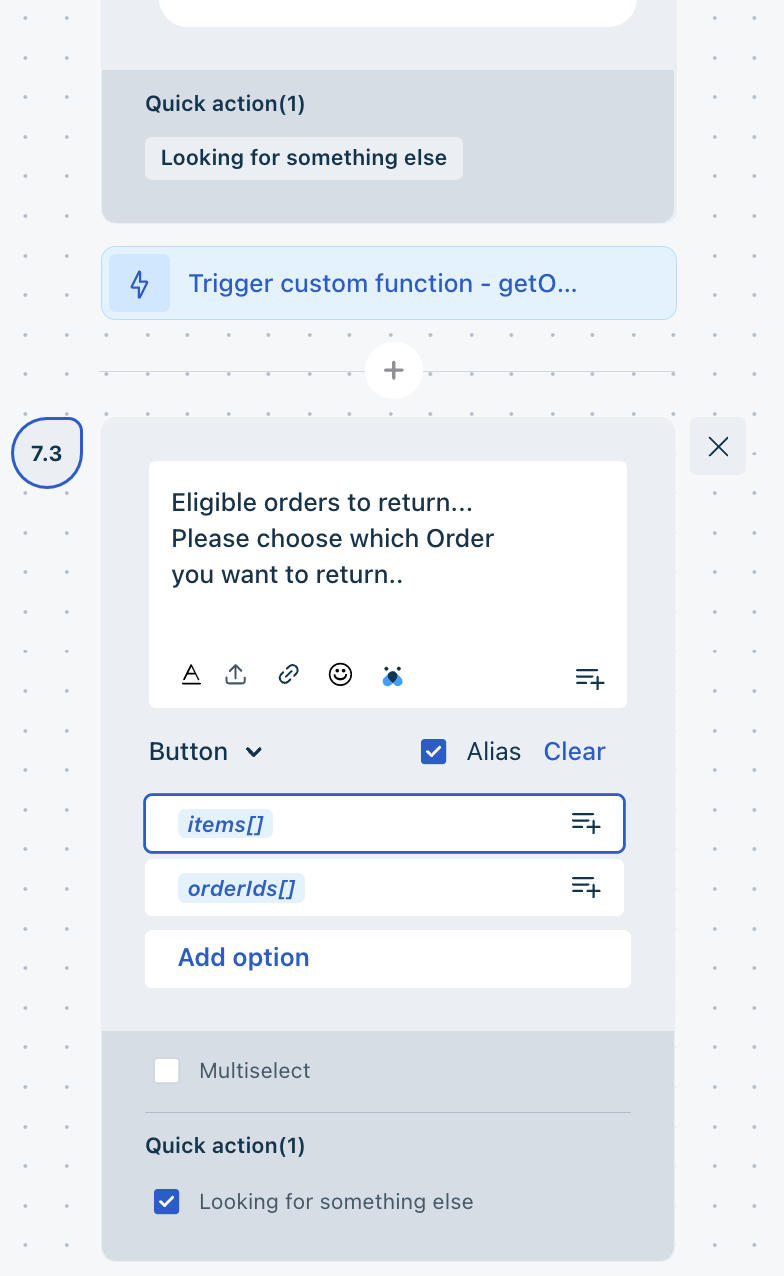
You can save the returned OrderIds[] value as a response from the custom function and use it as a button input option in the bot.
functionisJSONString(str){

try{

JSON.parse(str);

returntrue;

}catch(error){

returnfalse;

}

}

functiongetOrderIdsAndItemsWithHighTotalPrice(jsonData, priceThreshold){

let inputData;

if(typeof jsonData ==="string"&&isJSONString(jsonData)){

inputData =JSON.parse(jsonData);

}else{

inputData = jsonData;

}

const orderIds =[];

const items =[];

if(inputData && inputData.orders && Array.isArray(inputData.orders)){

inputData.orders

.filter(order=>parseFloat(order.total_price)> priceThreshold)

.forEach(order=>{

orderIds.push(order.order_id);

const itemNames = order.items.map(item=> item.name).join(", ");

items.push(itemNames);

});

}

return{

orderIds,

items

};

}

const inputValue = data['Response_body'];

const highPriceOrders =getOrderIdsAndItemsWithHighTotalPrice(inputValue,160);

console.log("Order IDs with total price greater than 160:", highPriceOrders.orderIds);

console.log("Items for each order:", highPriceOrders.items);

return{

 orderIds: highPriceOrders.orderIds,

 items: highPriceOrders.items

};
Note: Make sure you add the API and save its response body before using the response body as an input to the custom function.
You can also test the function from the custom function configuration page and review the response parameters and console logs.
Configure a dialog to trigger the function
After you define the custom function, you can call it from a bot flow by configuring an action in a dialog.
- Open the flow where you want the function to run.
- Select New Action > Trigger custom function.
- Select the custom function you configured.
Limitations
The following limitations apply to custom functions defined within the bot builder:
- The maximum supported output size is 5 KB.
- The maximum supported code size is 10 KB.
- You can create a maximum of 20 custom functions for a bot.
- The total size of all input parameters from dialogs, APIs, properties, and functions must be less than 200 KB.
- The following keywords and libraries aren't supported within custom functions:
eval
exec
export
import
execfile
evalfile
open
os.system
dir
path
child_process
new Function
require
rimraf
shelljs
mv
spawn
fork
dns
promisify
pickle
process.*
subprocess
input
context.*
fs.*
util.*
vm.*
.prototype
eval,
exec,
export,
import,
execfile,
evalfile,
open,
os.system,
dir,
path,
child_process,
new Function,
require,
rimraf,
shelljs,
mv,
spawn,
fork,
dns,
promisify,
pickle,
process.*,
subprocess,
input,
context.*,
fs.*,
util.*,
vm.*,
.prototype,
setTimeout,
setInterval,
new Error,
runinthiscontext,
constructor.constructor,
sub.constructor
Define custom functions on your website
You can define JS functions on your website and trigger them using the Execute JS action in your bot flows.
This approach is useful when you need to call functions that are deployed on your website. The action passes parameters to the script function and returns the response to the bot.
For example, you can define a JS function that accepts multiple arguments and performs an action when the function is called.
<script> print: function (a, b, c) { console.log("print called: a:" + a + " b: " + b + " c: " +c); } </script>

JavaScript
Note: You can use this approach to implement the logic required for your specific use case. The example above is only intended to demonstrate the function structure.
Configure the function in the bot builder
First, configure the custom JS function as an API in the bot builder.
- Go to Flows > Configure > API Library > Add new.
- Enter a name for the API.
- Select JS Function as the method.
- Select JSON as the payload type.
- Enter a name for the JS function.
- In URL / JS function name, enter the function name. The name must match the name used to reference the custom JS function elsewhere, such as in the widget embed script. Function names are case-sensitive.
- Enter the argument values that you want to pass in the payload as single-line JSON values.
- Use the + button to add dynamic values when required.
- In Required response parameters, enter the success and failure response parameters.
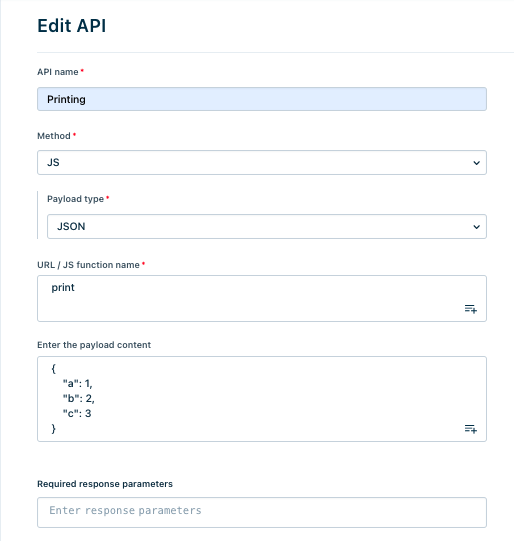
The bot passes the configured inputs to the script when it calls the custom JS function. The function then returns the response parameters based on the result of the action.
You can use the returned values in other parts of the bot flow. For example, you can insert the result of the JS function into a customer-facing message or question.
Trigger the API in dialogs
After configuring the function as an API, configure a dialog action to trigger it.
- Open the flow where you want the function to run.
- Select New Action > Trigger API.
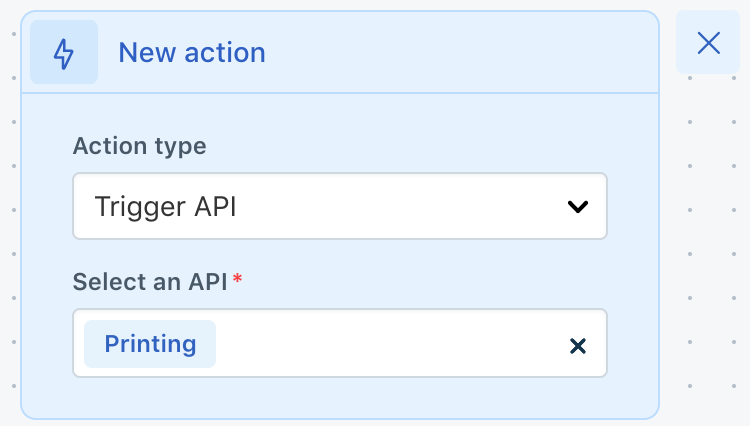
- Select the API you configured for the JS function.
The action triggers the API, which then calls the configured JS function.
Add the function to the widget script
After configuring the function in the bot builder, add it to the widget script.
- Open your bot and make sure it uses the latest version.
- Select Publish and click Deploy.
- Select Save.
- Copy the widget deployment script.
- Open the script in a script editor.
- Add the custom JS function after the getClientParams function is defined.
The following example shows how to define custom JS functions in the widget initialization code. The example includes two functions, one that returns a value without parameters and another that accepts parameters from the bot flow and returns user details.
window.fdWidget.init({

  token: '<YOUR_TOKEN>',

  host: '<YOUR_HOST>',

  widgetId: '<YOUR_WIDGET_ID>',

  jsFunctions: {

    // Example 1: Function without parameters

    getAppVersion() {

      console.log('[jsFunction] getAppVersion called');

      return '2.4.1';

    },


    // Example 2: Function that accepts parameters

    getUserDetails(params) {

      console.log('[jsFunction] getUserDetails called with params:', params);


      return {

        user_name: 'Test User',

        user_email: params.email || 'fallback@example.com',

        account_tier: params.plan || 'free'

      };

    }

  }

});
Once you define this function in the bot script, you can call it anywhere in the bot flow.