This article is outdated.
Please refer this link to learn more about automating the double opt-in process.

https://crmsupport.freshworks.com/en/support/solutions/articles/50000009450-how-to-automate-email-double-opt-in-
Double opt-in in your marketing campaigns ensures that your subscribers really want to receive emails from your company while adhering to GDPR compliance. Here is how you can achieve that with the web application:
|
Creating Transactional Email Campaign
1. Locate Transactional Emails under Marketing Automation in the left nav.

2. Click on Create Transactional Email and choose from existing templates or create your own from scratch.

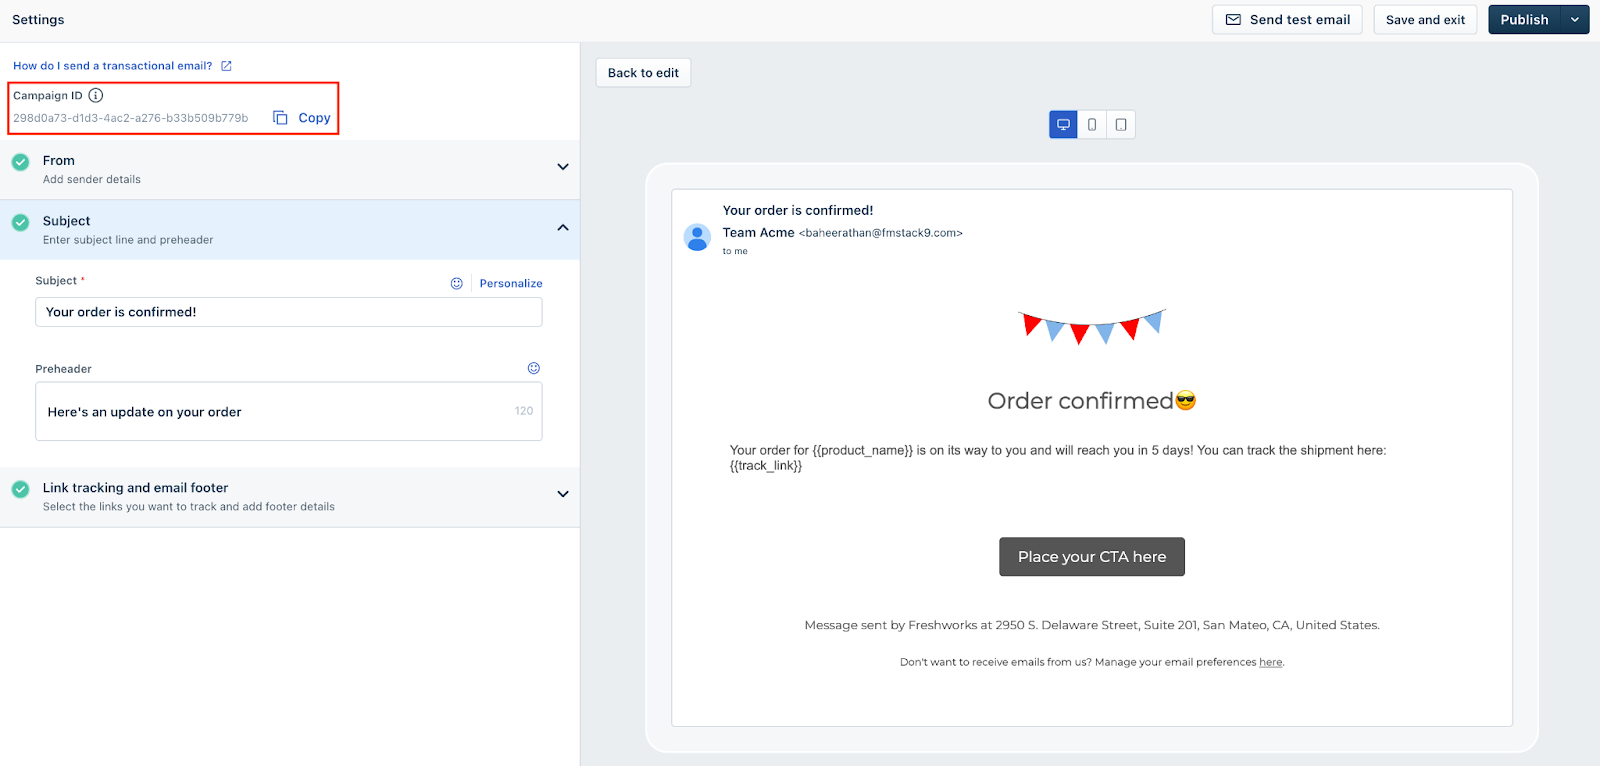
3. Input the content for the email and add a text with hyperlink so your users can consent to receive your emails and select their subscription preferences. Hyperlink “https://{{subscriber::unsubscribe_all}” in your content. This link opens up the subscription management center in the web application, where your contacts can then choose their preferences/type of emails they’d like to receive from your company.

4. In the next step, configure your Campaign Settings including sender and reply-to email address, subject line, and audience. Review your content, make a note of the campaign ID and publish your campaign.
Creating a Marketing Journey to trigger the Campaign
1. Navigate to Journeys under Marketing Automation and click on Create a New Journey

2. Add the trigger “Added to List” and select the List of contacts you want to enable Double opt-in for.
Note: The subscription status for the contacts in this list needs to be “not subscribed.” This can be done while importing data as Lists or through Custom APIs. 3. Drag-and-drop “Webhooks” from Actions and click on “Create a new Webhook.”
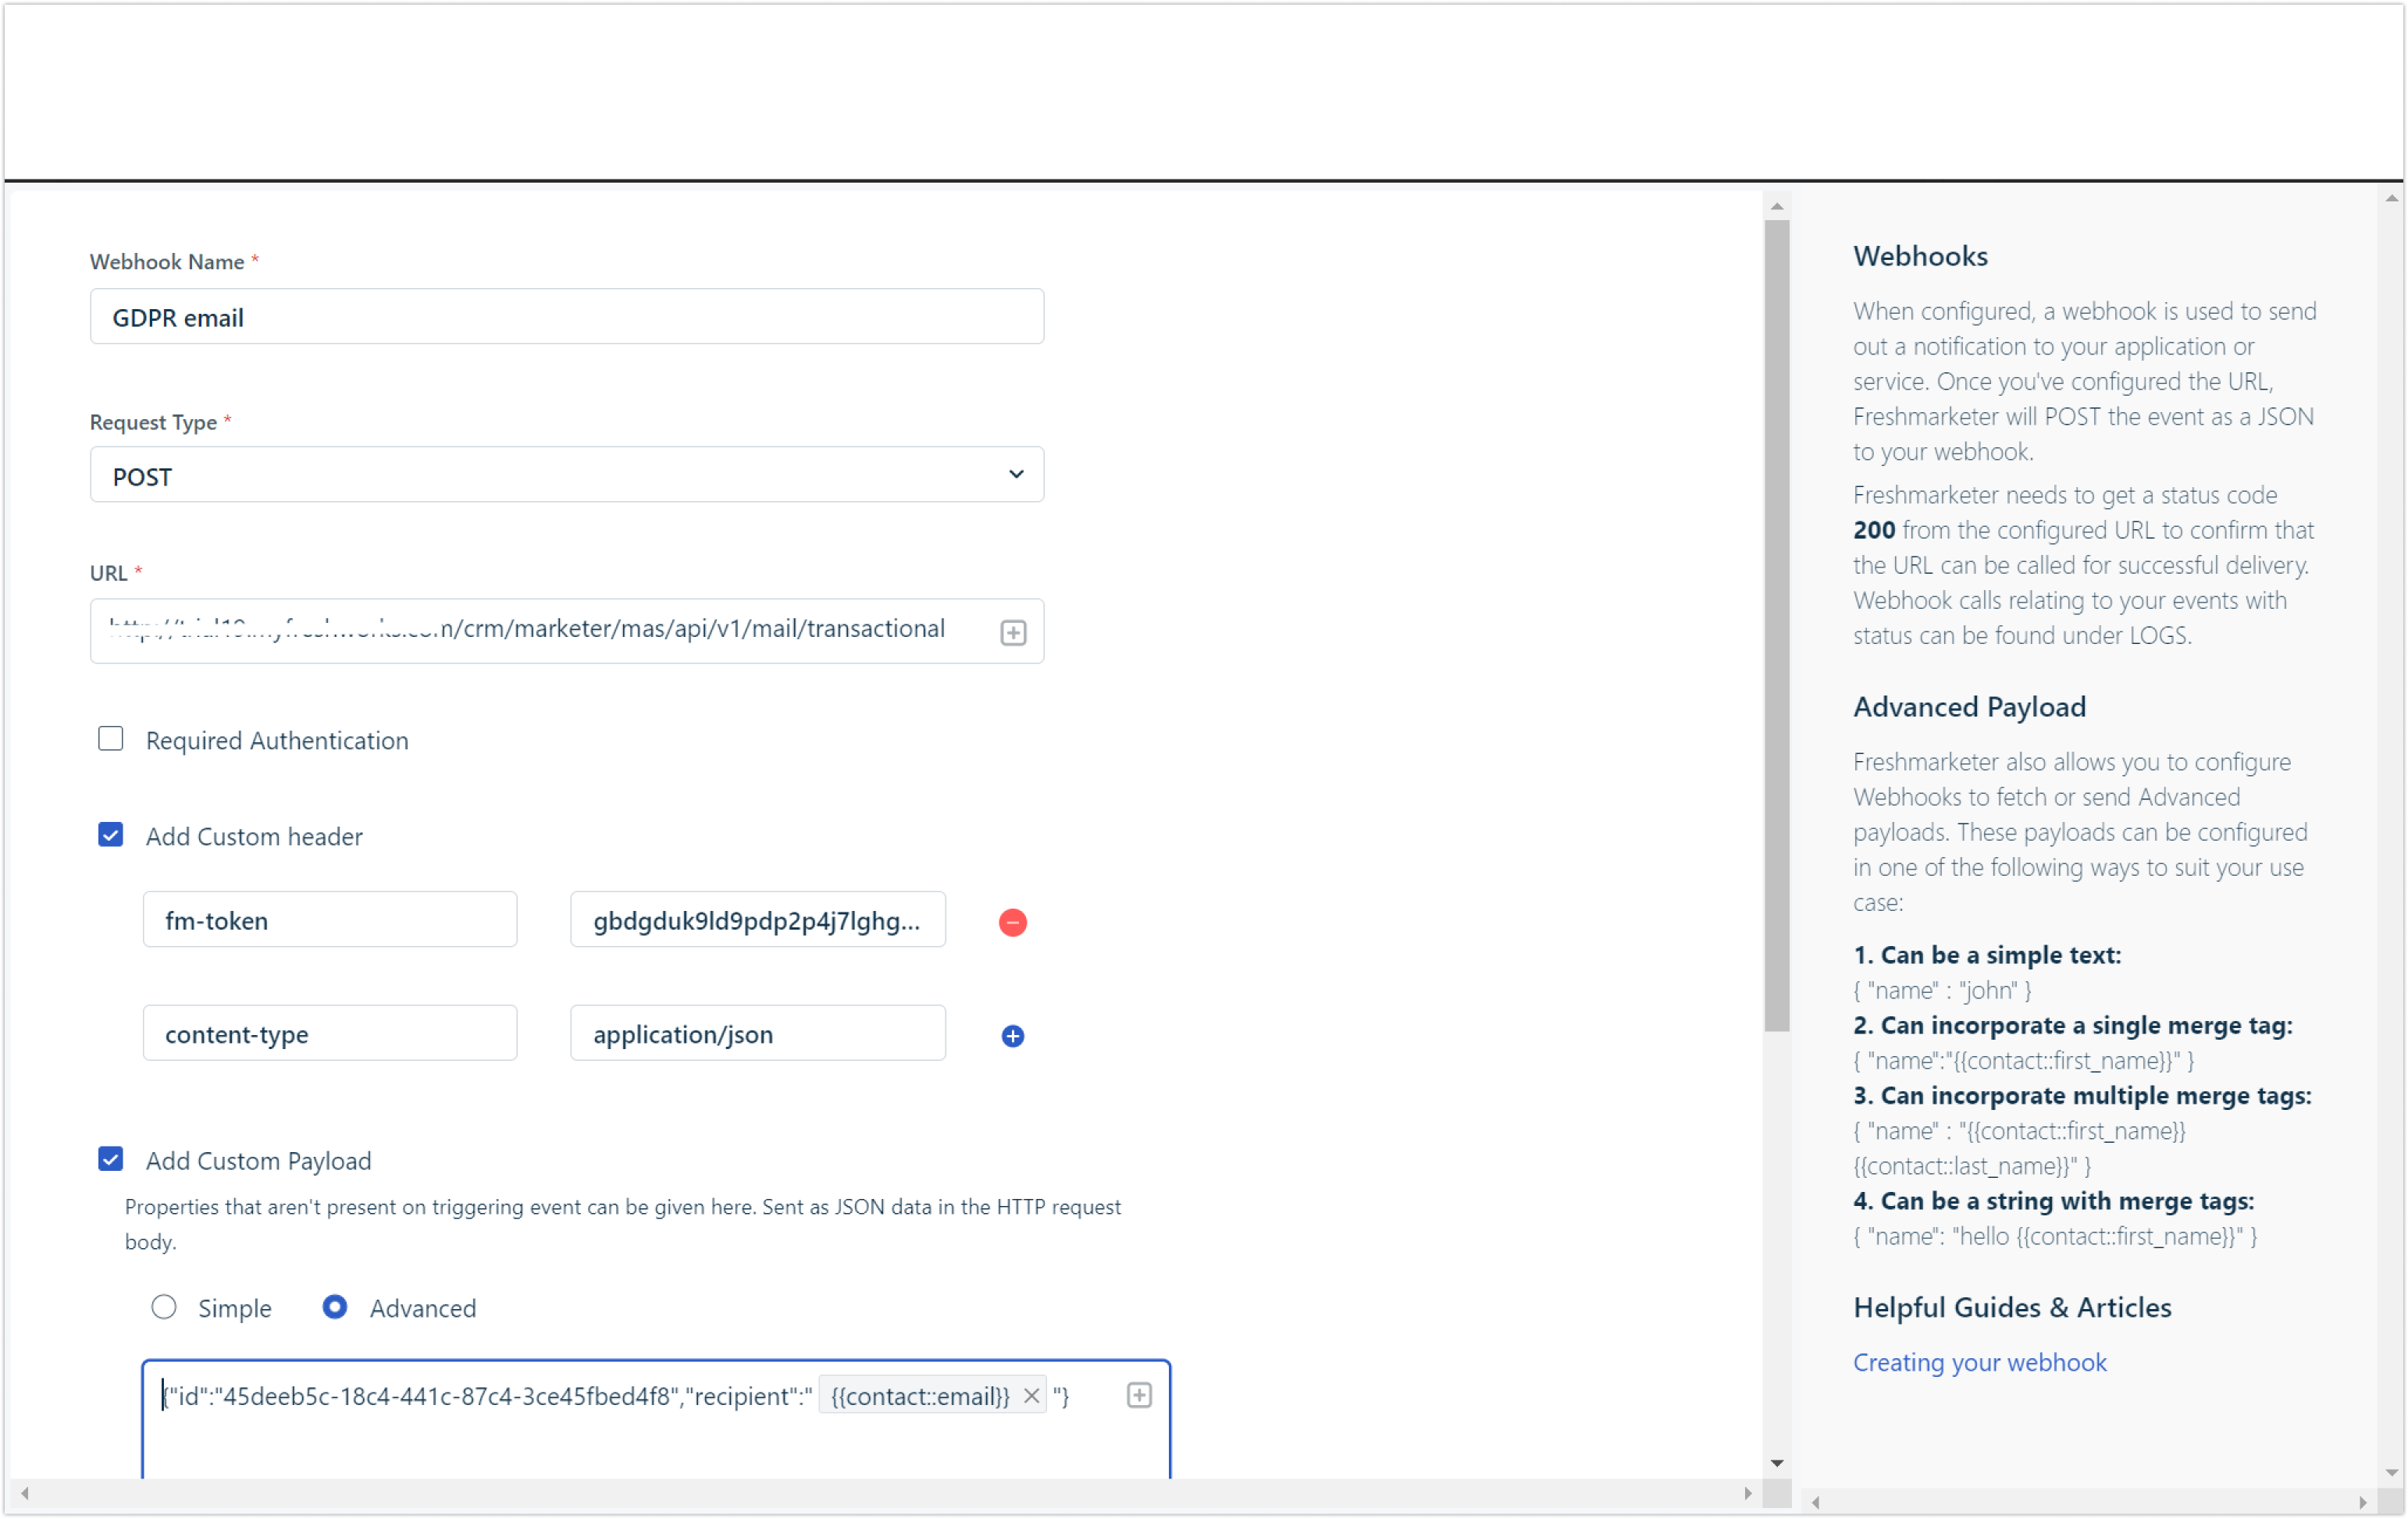
4. Provide the Webhook name, select the Request Type as “Post” and provide the URL. This URL should be http://Yourdomain.com/crm/marketer/mas/api/v1/mail/transactional

5. Next Add Custom Header:
Fm-token: “Your API Key”
Content-type: application/JSON
You can find your API key under Profile Settings ->API Settings


6. Then Add Custom Payload. Select the Advanced option and input your payload information. This should be in the below format:
{"id":"transactional-campaign-id","recipient":"{{contact::email}}"}
7. Enter the ID that we made a note of while creating the transactional email campaign, and click on Create a Webhook
8. Start your Journey, to enable double opt-in for your marketing campaigns.