TABLE OF CONTENTS
You can deploy AI Agents across multiple channels like WhatsApp, Web Chat, Facebook, Instagram, and so much more, so customers can get help wherever they are.
AI agents can:
- Deliver instant, personalized answers based on your knowledge base and uploaded content.
- Enhance customer experience with natural, multi-turn conversations and multilingual support.
- Automate routine queries and free up your support team for complex issues.
- Maintain brand consistency with configurable personas, tone, and instructions.
Set up AI Agent
You can go live with AI agent in a few easy steps:
- Create a new AI agent
- Build the capabilities of the AI agent (Add knowledge, Configure agent messages, and other settings)
- Test the AI Agent
- Preview and generate an external shareable link for the AI Agent
- Deploy the AI agent on a channel to go live
- Analyze the AI Agent's performance
Create a new AI Agent
- As an admin, navigate to AI Agent Studio on the left navigation bar.
- In the AI Agent Studio overlay, select AI agents and click Create AI Agent.

- In the Create pop-up, provide a name, avatar, and select the Primary language. Click Create AI agent.

Build the capabilities of the AI Agent
After creating the AI agent, configure its capabilities using the options below:
A. Add knowledge:
In the Knowledge section, use the Build tab to add the knowledge sources from which you want the bot to learn. Learn more about enabling Knowledge.
Knowledge upload guide:
Files | Type |
|
AI agent level limits |
| |
Account level limits |
| |
URLs | Type |
|
AI agent level limits |
| |
Account level limits |
|
B. Build Workflows
Workflows extend your AI Agent’s ability to think, reason, and act—automating complex workflows like order cancellations or subscription updates. You can create and manage Workflows using:
- Workflow builder - giving you complete control to build workflows from scratch
- Workflow library - enabling you to integrate pre-existing templates easily
Learn more about Workflows for AI agents.
C. Provide Instructions
You can set clear directions for your AI agent to understand your business and deliver seamless, context-aware interactions. This page has two sections,
- Define your business context: Describe your products, services, and typical customer scenarios. This ensures AI responses are accurate and tailored to your operations.
- Set custom instructions: Provide high-level rules shaping how the AI thinks, acts, and responds in every interaction. Include precise guidelines and key terminology to guide responses.
Learn more about defining Instructions.
D. Set up Configurations
You can fine-tune your agent’s conversation behavior and escalation flow using these advanced configurations.
- Multilingual support: Manage the languages in which the AI agent will respond from the list of supported languages.
- Conversation behaviour: Specify how the agent interacts, including the introductory message, tone, response length, fallback handling, feedback, and user details collection.
- Handover settings: Set options for closing conversations, transferring to a human agent, auto-resolution timing, and transferring outside of business hours.
- Agent Identity: Customize your agent's name and avatar that your users will see.
Learn more about Configurations.
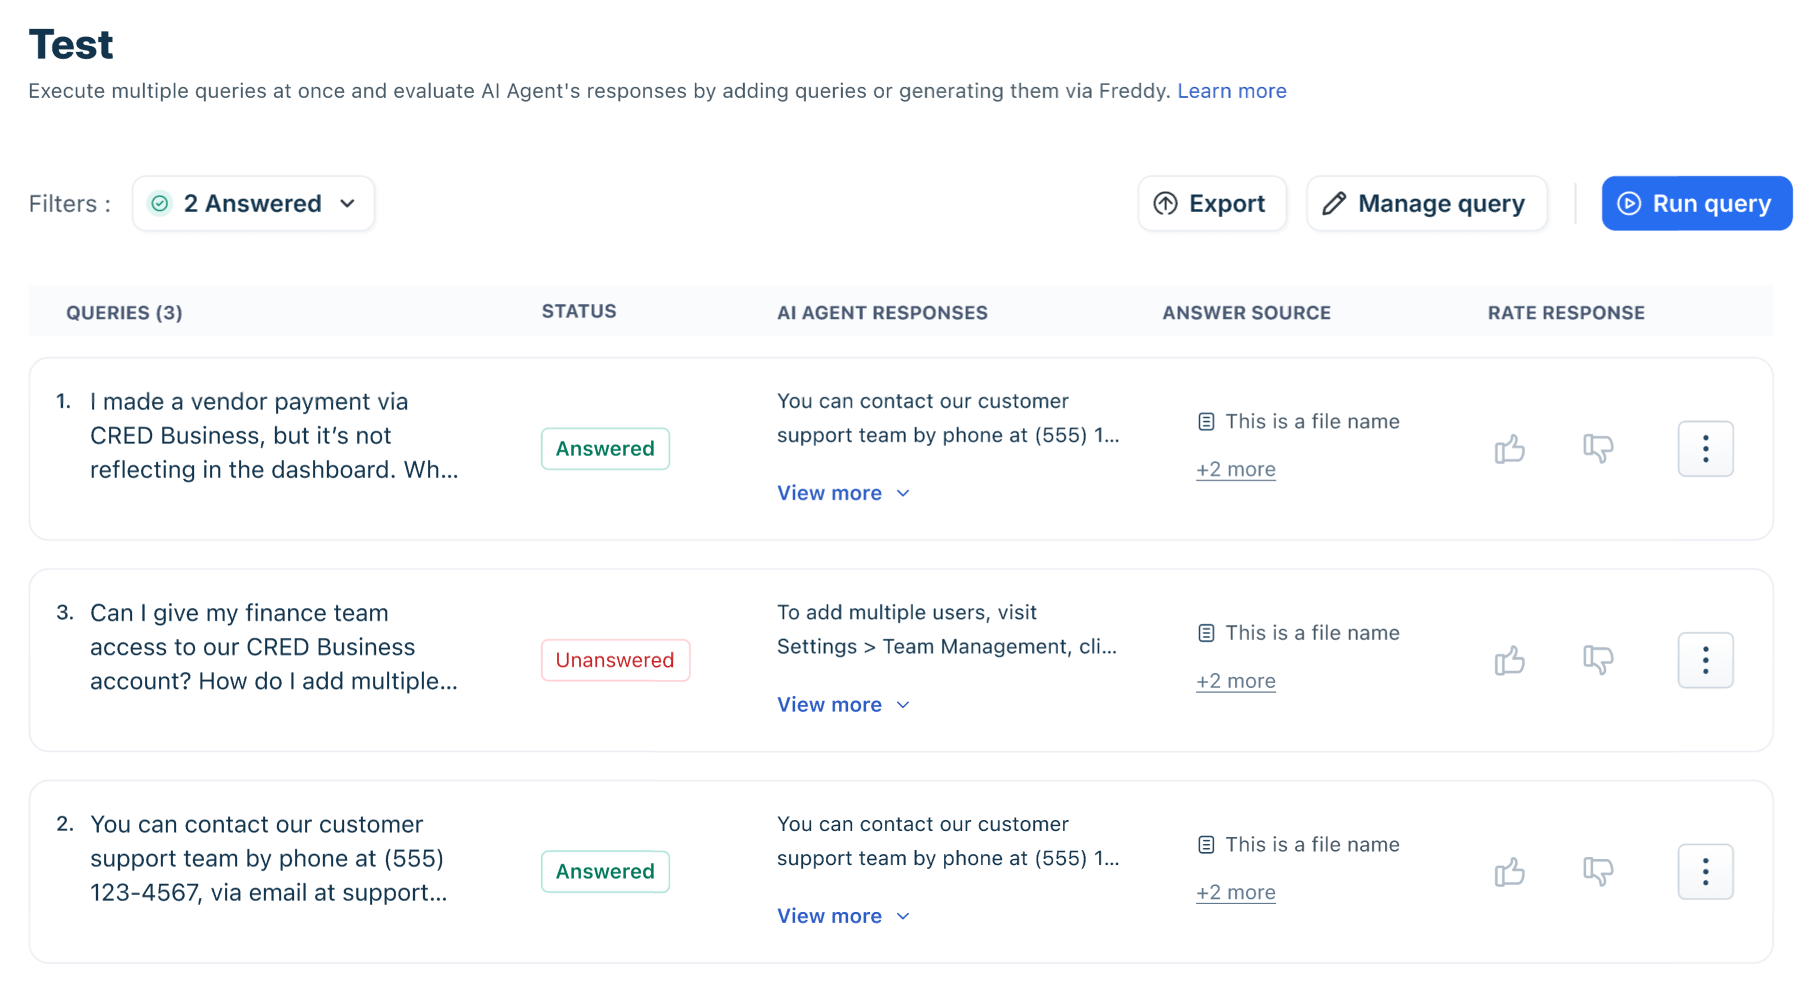
Test the AI Agent
Test and refine your AI agent's responses to evaluate bot performance and meet customer expectations. Whether you're deploying or fine-tuning, this feature enables admins to simulate real-world scenarios.
For more details, see Test AI Agents.
Preview and generate an external shareable link for the AI Agent
Once you have configured and tested your AI Agent, use the Preview AI Agent option to view it as you configure it, or open it in a new tab.
Note: In preview mode, Agent transfers will not be performed for unanswered queries or when human agent support was requested.
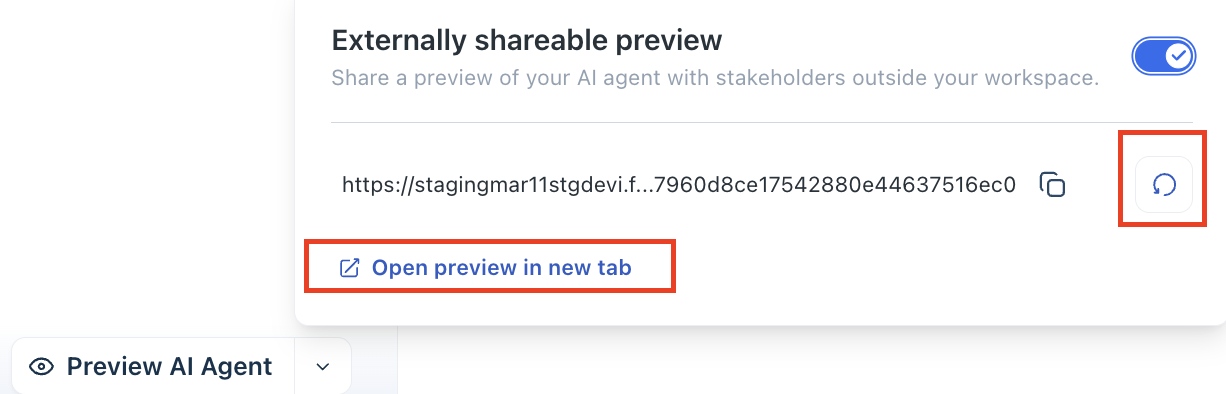
You can also create an externally shareable preview link for your AI Agent so that internal teams or stakeholders without agent licenses can test and provide feedback.
- On the AI Agent Studio page, click the dropdown next to Preview AI Agent.
- Toggle the Externally shareable preview option.
- Copy the generated link and share it with the stakeholders.
- Use the redo button to generate a different link.
Deploy the AI Agent
Once you’ve configured your AI Agents, you can deploy and map them to communication channels where your customers engage with you.
Mapping your AI Agent to channels ensures it can respond to customer queries in real time, maintain consistent conversational experiences, and provide immediate assistance. You can deploy your AI Agent on the following channels:
- Web Chat
- Instagram and many more
Note: If a Published AI agent is archived, it becomes unpublished and unmapped.
To deploy the AI Agent onto channels:
- On the AI Agent Studio page, click Deploy.
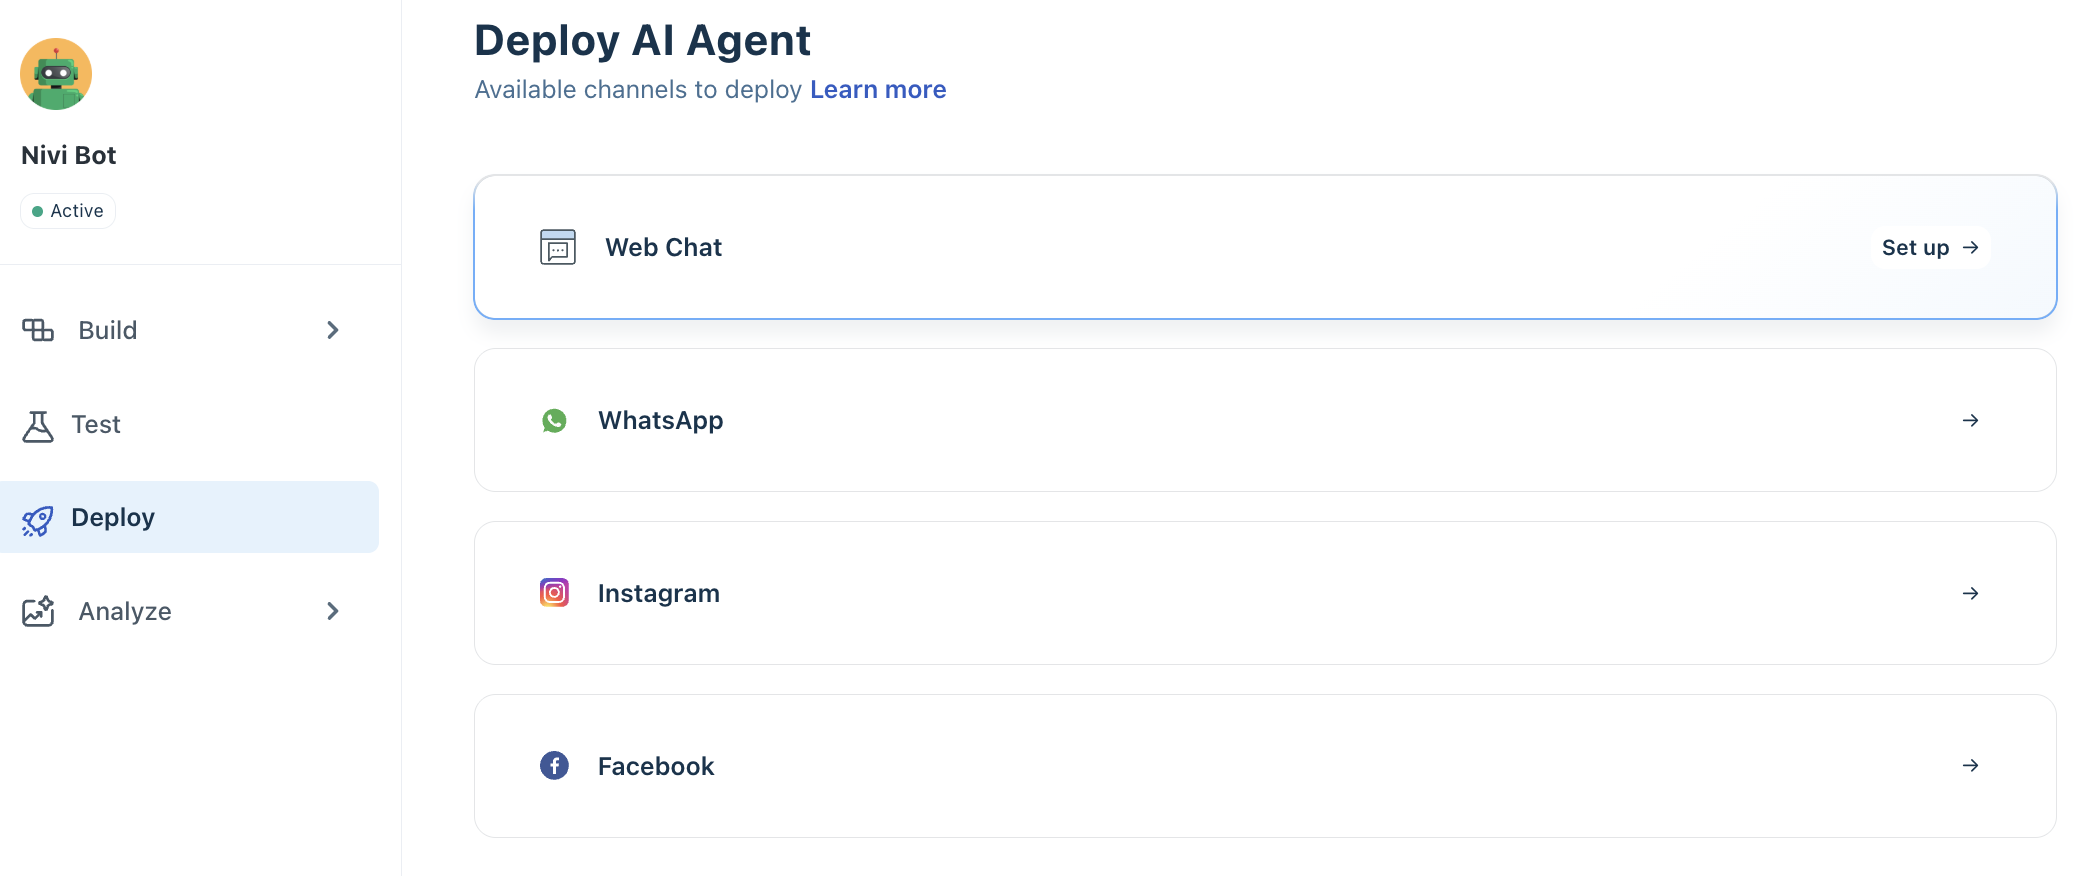
- Select the channel where you want to deploy the AI Agent, then click Set up. You will be redirected to the respective channel configuration page for the selected channel.
For example, if you choose Web Chat, you will be redirected to the Web Chat Topic Configuration page.
- Choose the Web Chat topic on which you want to deploy the AI Agent.
- Click Configure and enable Start with AI Agent.
- Choose the AI Agent to map.
- Click Publish.
The AI Agent will now be linked to the Web Chat widget associated with the Web Chat Topic. You can then deploy the widget on your website or product portal. For more details, see Create Web Chat Topics.
Analyze the AI Agent's performance
Track and improve your AI Agent’s performance using the Analyze tab. The tab includes the following:
- Performance: View key metrics like engagement and performance metrics here.

- Improve: We’re building a smarter Improve experience with actionable insights, skill diagnostics, and content recommendations — all in one place. Keep watching this space for further updates.
- Ticket logs: Access detailed logs, including customer names, timestamps, Ticket IDs, and links to the respective conversations.

For more details, see Analyze and monitor AI Agent performance.
Agent Studio Library
Access pre-built, ready-to-go components in the Library section of AI Agent Studio. This no-code interface enables Admins to create new AI Agents, Agentic Workflows, and pre-built API Actions without writing a single line of code.—
- AI Agents,
- Workflows, and
- API Actions

These libraries accelerate setup for common business needs and save development time.
Archive and restore AI Agents
Over time, you may have AI Agents that are no longer in use. Archiving helps you declutter your workspace, improve performance, and manage your AI Agent inventory more efficiently—without immediately losing data.
To archive an AI agent,
- Go to AI Agent Studio from the left nav bar.
- Click the three-dot ellipsis menu next to the AI Agent.
- Select Archive and confirm.
Once archived,
- The AI Agent is removed from all channels
- It is moved to the Archived view
- It no longer appears in the active list
Archived AI Agents are not deleted immediately and can be accessed separately. To view and restore the archived AI agents,
- Go to the Show filter section.
- Select Archived from the dropdown.

- Click the three-dot menu next to the AI Agent.
- Select Restore and confirm.
After restoration,
- The AI Agent moves back to the active list
- You must republish the AI Agent
- Reconfigure channel mappings, as they are not restored automatically
Key considerations
- Retention period: Archived AI Agents are permanently deleted after 30 days
- Data impact: Bot configurations are deleted after 30 days; analytics and past conversations remain unaffected
- Access: Users with AI Agent permissions can archive and restore
- Limits: If you’ve reached the AI Agent limit, you may need to archive an active agent before restoring another
Monitor AI Agent Session Consumption
You can view the percentage of AI bot sessions consumed directly in the AI Agents Studio page. This gives you a quick snapshot of the number of sessions used and remaining.
Click the usage indicator to see a detailed breakdown of:
- Total sessions allocated
- Sessions consumed
- Sessions remaining
To get deeper insights, click View report to open the Chatbot Overview Report.
For a detailed view of session consumption, click View Report to access the Chat Bot Overview Report. Based on the sessions used, you can purchase additional sessions from the Billing page or contact your customer success manager. For more details on session consumption, see Freddy AI Agents and Chatbot Session FAQs.