The Facebook lead ads integration helps you to automatically bring in the leads from your Facebook forms into the CRM.
How to connect Facebook pages to the web application?
1. Go to Admin Settings > Integrate Social Media with CRM
2. On the Integrate Social Media with CRM page, you can connect your Facebook account with the CRM using the Connect Facebook account option.

3. The next screen displays all Facebook pages that are associated with the Facebook account. Select the pages required from the list.

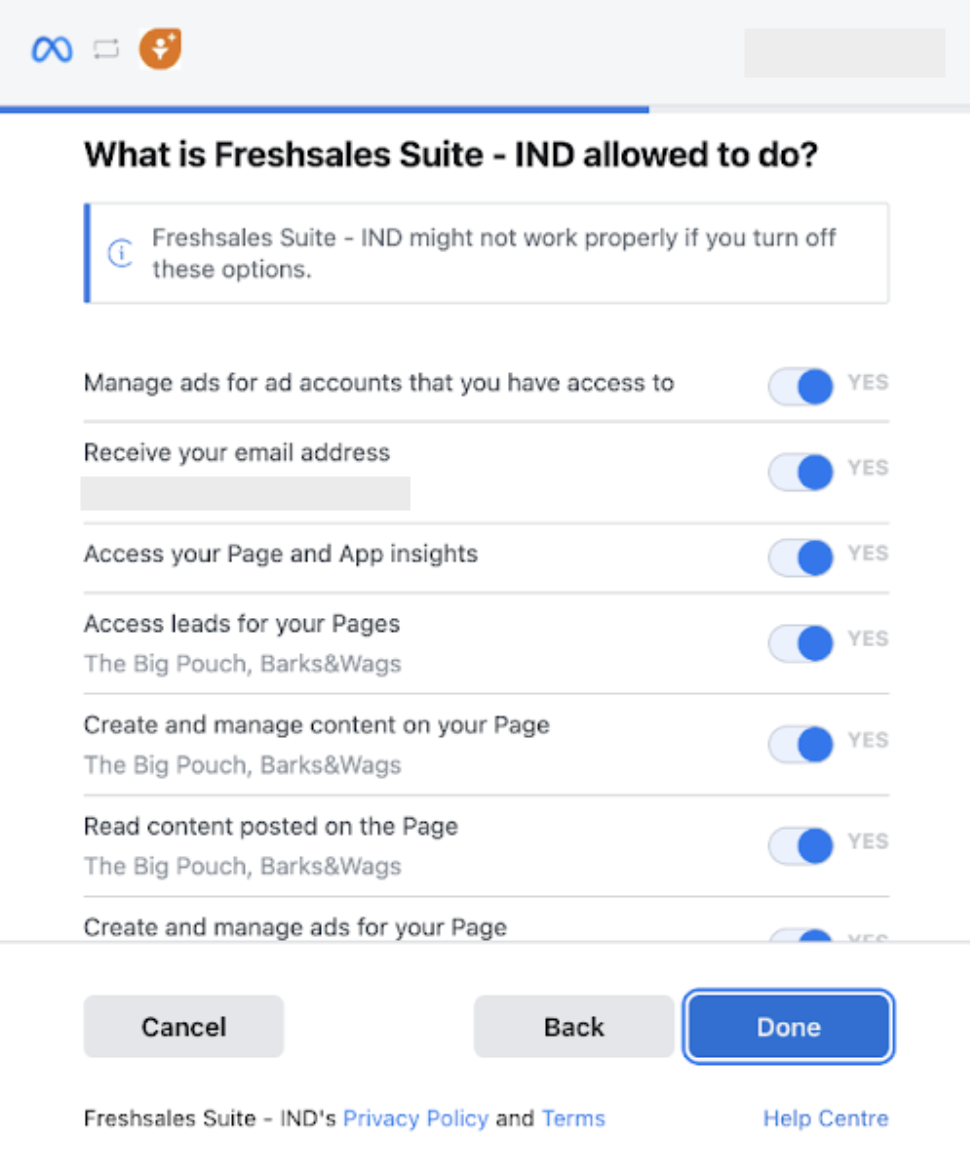
4. The CRM will require access to the pages and permissions set in place. Grant the permissions shown in the list and click done. If any of the permission is denied, the integration will not work as expected.

5. The page is successfully connected to the CRM. 
6. Once the Facebook account is set up, it will be displayed in the list on the Integrate Social Media with CRM page.
Note:
1. A user who is connecting the web application with the Facebook page should be an admin of the Facebook page.
2. It is recommended to grant access to all the necessary permissions for the connection to be successful.
3. One CRM user/admin can connect only one Facebook account. All the pages and forms which the Facebook account has admin access can be connected to the CRM.1. Click Add forms.
2. In the Add Facebook or Instagram overlay, select the page and the respective form.
3. Click Next. Here, you can map Facebook or Instagram form fields to Contact fields in the web application.
Note: All required fields needed to create a contact should be mapped.

4. Click Add and select New form. The new form will now show under the Forms tab.

You can also use it as a condition to check if a contact was created from a Facebook lead form.
Note: A CRM user can access only the forms they added in the journey blocks.1. Head over to the Integrate Social Media with CRM page and under the Accounts tab, click the delete icon near the account name
2. In the pop-up box that appears, click Yes
3. You can now connect the CRM to another account of your choice
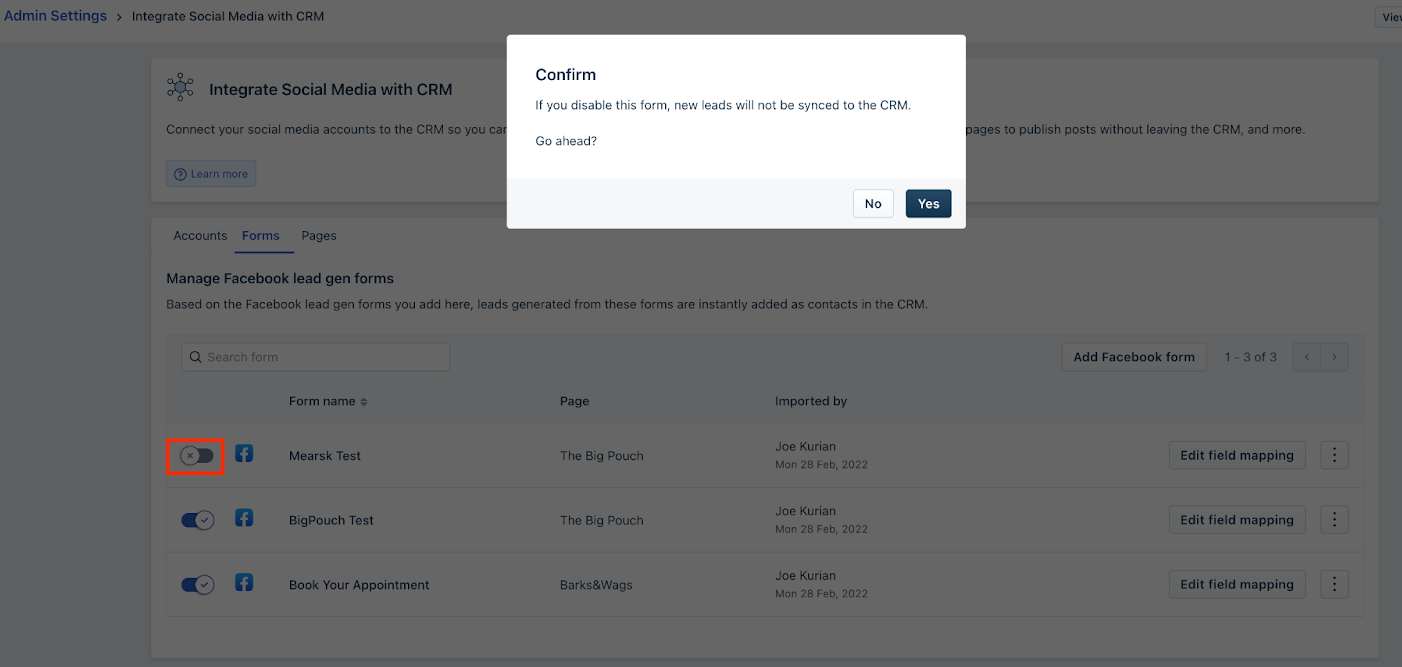
How to disable the form sync?
Users can temporarily disable lead sync from specific forms using the sync toggle.

How to remove a form?
Users can permanently remove the forms from the CRM. To remove, click on the ellipsis icon and choose the "Remove" option.

- Grant access in your Facebook account under Settings > Security and login > Business integrations.
- To add the permissions go to https://www.facebook.com/settings?tab=business_tools&ref=settings..
- You will see Freshsales app in the active tab.
- Click View and edit.

- Go to each permission and tick the page you have added in the CRM.


