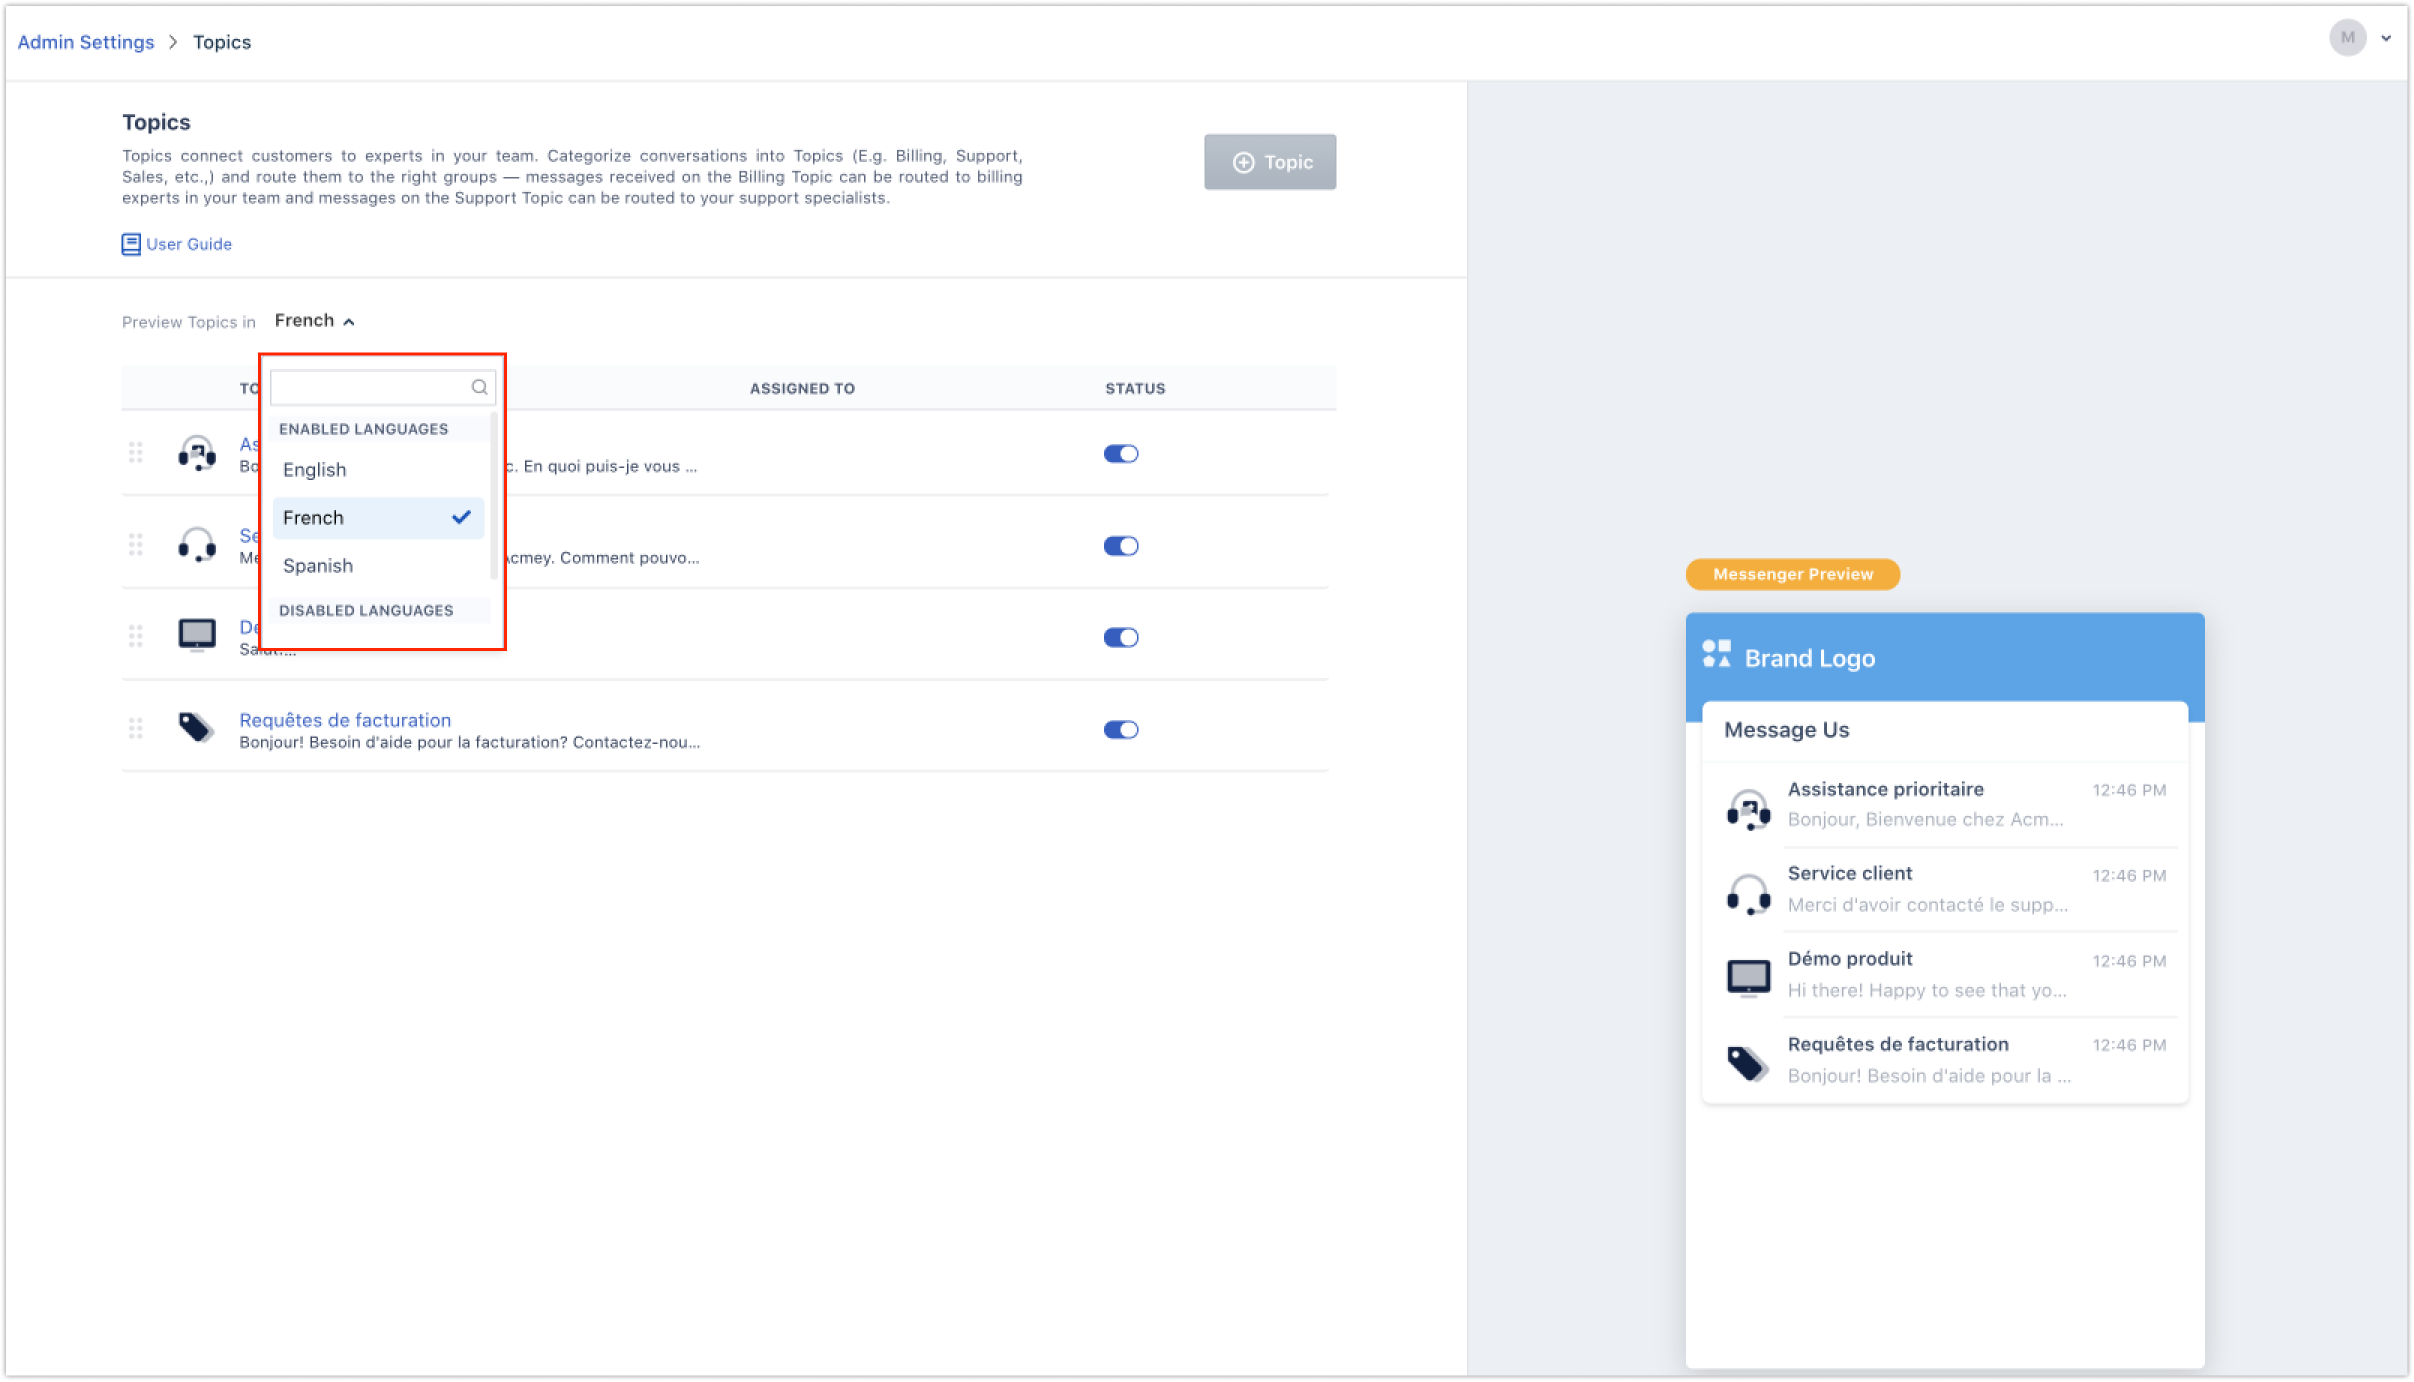
Once you configure your chat account to support multiple languages, you can translate your Topics into these languages. For example if you have added support for French and Spanish languages you can translate each Topic into these two languages.
Now your Topics will be displayed to your users based on their browser locale(language) settings provided it is supported by your chat account, else it’ll be displayed in the default language.

How to add a new language to your account?
1. Navigate to Admin settings > Channels > Chat Settings > Conversation Languages
2. Click on the "Add language" button on top and choose the language of your choice from the dropdown.
 3. Once the language is added, click on the toggle to the right to enable the language.

How to translate Topics into multiple languages
1. Go to Admin Settings > Topics and choose a Topic for translation
2. Click on the language code at the top.

Note: Languages for which the translated Topic content is yet to be added will have be marked with an asterisk, as shown in the above screen.Let’s translate the customer support Topic to French. Add the Topic name and welcome message in French. Select the Group (team) to which you want to route messages incoming through this Topic. For example new conversations incoming from your French Customer Support Topic can be routed to your French support team. You can choose to Trigger a Bot on the Topic. Configure your Advanced Options and Publish.

Note: If you’ve set the Topics to Public in your primary (default) language it’ll applicable to all your Topic translations. The same rule applies for tags as well.You can see a preview of all the translated languages in a specific language by selecting the language from the ‘Preview Topics in’ drop-down.