Chat SDK contains a slice for arm64 architecture and supports only iOS 8.0 and above. Follow the below steps to integrate your web application with your iOS app
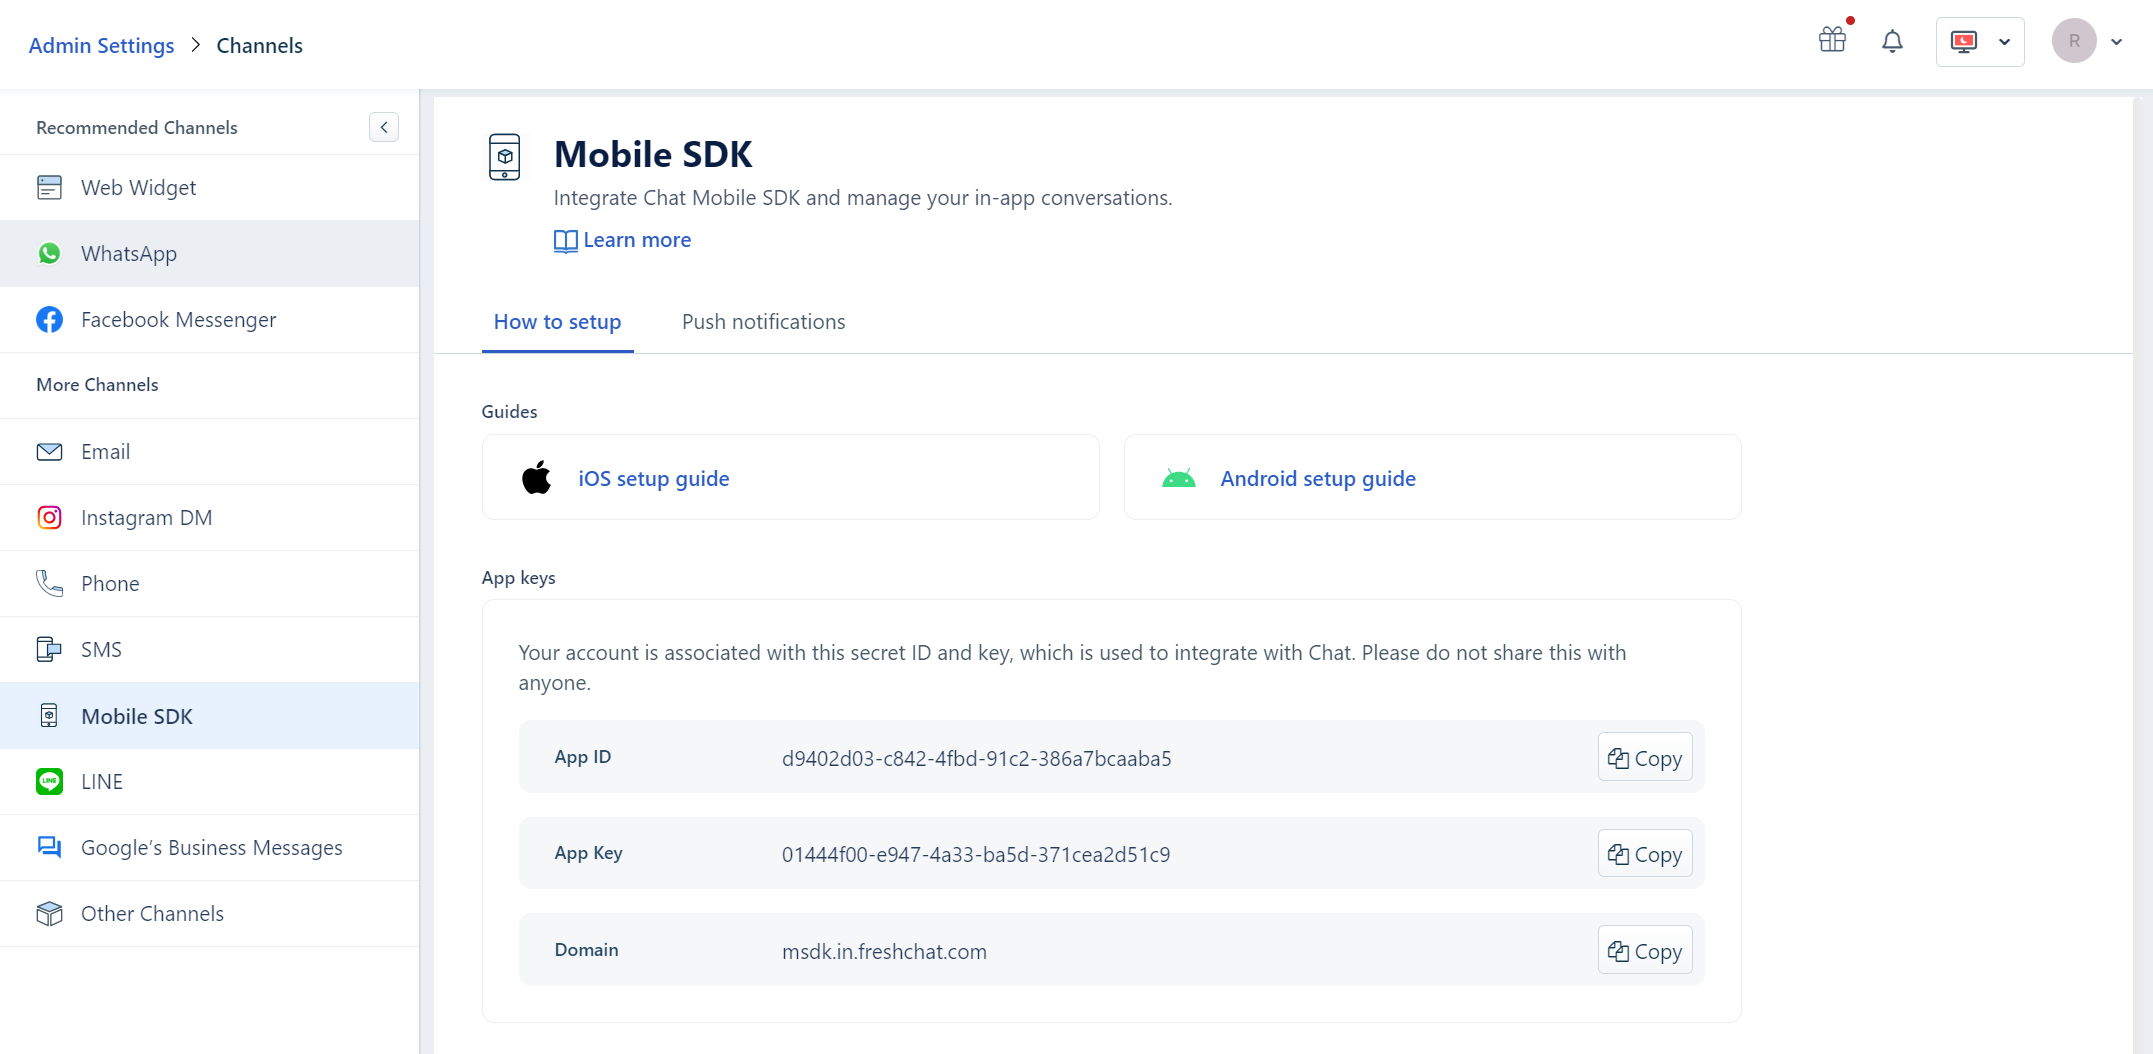
Get your APP ID and APP Key
Your Chat account is associated with a unique APP ID and APP key which is used to integrate your mobile SDK with Chat.
Go to Admin Settings > Channels > Chat & Messaging > Mobile SDK. You can find your APP ID and APP Key here.
1. Add Chat SDK to your project
Add Chat to your project in a single step by updating your podfile to include Chat.
source 'https://github.com/CocoaPods/Specs.git'
platform :ios, '8.0'
target 'Your project target' do
use_frameworks!
pod 'FreshchatSDK'
end
Objective C
Import "FreshchatSDK.h" in your AppDelegate.m file
Swift
Import "FreshchatSDK.h" in your bridging header file.
Or, if you are not using cocoapods then you can add Chat SDK by drag and drop. Addition of frameworks required for drag and drop are,
Foundation, AVFoundation, AudioToolbox, CoreMedia, CoreData, ImageIO, Photos, SystemConfiguration, Security
Please set "-all_load", "-objC" flags in Project Settings, General > Build Settings > Other Linker flags.
Note: Header file has been updated from Freshchat.h to FreshchatSDK.h for naming consistency from version v1.3.02. Initialize SDK
Initialize Chat by pasting the following snippet in your didFinishLaunchingWithOptions in AppDeleage.m or AppDelegate for ObjC and Swift respectively.
Objective C
#define SYSTEM_VERSION_GREATER_THAN_OR_EQUAL_TO(v) ([[[UIDevice currentDevice] systemVersion] compare:v options:NSNumericSearch] != NSOrderedAscending)
- (BOOL)application:(UIApplication *)application didFinishLaunchingWithOptions:(NSDictionary *)launchOptions{
/* Initialize Freshchat*/
FreshchatConfig *config = [[FreshchatConfig alloc]initWithAppID:@"<YOUR-APP-ID>" andAppKey:@"<YOUR-APP-KEY>"];
[[Freshchat sharedInstance] initWithConfig:config];
return YES;
}
Swift
func application(_ application: UIApplication, didFinishLaunchingWithOptions launchOptions: [UIApplicationLaunchOptionsKey: Any]?) -> Bool {
let freschatConfig:FreshchatConfig = FreshchatConfig.init(appID: "AppId", andAppKey: "AppKey")
Freshchat.sharedInstance().initWith(freschatConfig)
return true
}
Note: If your Chat account is not part of Chat US servers, you must specify domain based on your server location. Please contact our support team to know your account's server location.

Following are the server location to domain mapping
US2 - "https://msdk.us2.freshchat.com"
EU - "https://msdk.eu.freshchat.com"
AU - "https://msdk.au.freshchat.com"
IN - "https://msdk.in.freshchat.com"

iOS - Objective C Sample code
config.domain = @"msdk.in.freshchat.com";
iOS - Swift Sample code
config.domain = "msdk.in.freshchat.com"
2.1. Initialize Config options
You can turn-on/turn-off features like picture messaging at initialization. Use the below snippet before calling the initWithConfig: method to configure Chat features as needed.
Objective C
config.gallerySelectionEnabled = YES; // set NO to disable picture selection for messaging via gallery
config.cameraCaptureEnabled = YES; // set NO to disable picture selection for messaging via camera
config.teamMemberInfoVisible = YES; // set to NO to turn off showing team member avatar. To customize the avatar shown, use the theme file
config.showNotificationBanner = YES; // set to NO if you don't want to show the in-app notification banner upon receiving a new message while the app is open
config.responseExpectationVisible = YES; //set NO to hide it if you want to hide the response expectation for the channel
Swift
freschatConfig.gallerySelectionEnabled = true; // set FALSE to disable picture selection for messaging via gallery
freschatConfig.cameraCaptureEnabled = true; // set FALSE to disable picture selection for messaging via camera
freschatConfig.teamMemberInfoVisible = true; // set to FALSE to turn off showing a team member avatar. To customize the avatar shown, use the theme file
freschatConfig.showNotificationBanner = true; // set to FALSE if you don't want to show the in-app notification banner upon receiving a new message while the app is open
freshchatConfig.responseExpectations = true; //set to FALSE if you want to hide the response expectations for the message channels
3. User Information
3.1 Update user information
You can get basic user information at any point to give you more context on the user when your support agents are messaging back and forth with them.
/*
* Following three methods are to identify a user.
* These user properties will be viewable on the Chat web dashboard.
*/
Objective C
// Create a user object
FreshchatUser *user = [FreshchatUser sharedInstance];
// To set an identifiable first name for the user
user.firstName = @"John";
// To set an identifiable last name for the user
user.lastName = @"Doe";
//To set user's email id
user.email = @"john.doe.1982@mail.com";
//To set user's phone number
user.phoneCountryCode=@"00";
user.phoneNumber = @"9999999999";
[[Freshchat sharedInstance] setUser:user];
Swift
// Create a user object
let user = FreshchatUser.sharedInstance();
// To set an identifiable first name for the user
user?.firstName = "John"
// To set an identifiable last name for the user
user?.lastName = "Doe"
//To set user's email id
user?.email = "john.doe.1982@mail.com"
//To set user's phone number
user?.phoneCountryCode="00"
user?.phoneNumber = "9999999999"
Freshchat.sharedInstance().setUser(user)
3.2 Update User Properties (Meta Data)
You can capture and send additional metadata about the user and the events in the app, all of which also becomes a way to segment your users to later push messages to them.
Objective C
//You can set custom user properties for a particular user
[[Freshchat sharedInstance] setUserPropertyforKey:@"customerType"
withValue:@"Premium"];
//You can set user demographic information
[[Freshchat sharedInstance] setUserPropertyforKey:@"city" withValue:@"San Bruno"];
//You can segment based on where the user is in their journey of using your app
[[Freshchat sharedInstance] setUserPropertyforKey:@"loggedIn" withValue:@"true"];
//You can capture a state of the user that includes what the user has done in your app
[[Freshchat sharedInstance] setUserPropertyforKey:@"transactionCount" withValue:@"3"];
Swift
//You can set custom user properties for a particular user
Freshchat.sharedInstance().setUserPropertyforKey("customerType", withValue: "Premium")
//You can set user demographic information
Freshchat.sharedInstance().setUserPropertyforKey("city", withValue: "San Bruno")
//You can segment based on where the user is in their journey of using your app
Freshchat.sharedInstance().setUserPropertyforKey("loggedIn", withValue: "true")
//You can capture a state of the user that includes what the user has done in your app
Freshchat.sharedInstance().setUserPropertyforKey("transactionCount", withValue: "3")
3.3 Log User Events in Timeline
Tracking user events will give you more insight and context about the user(s) in your application. Events like user actions, failure/error cases can be tracked using this API. Tracked events are listed under Events Timeline at agent side.
Objective C
[[Freshchat sharedInstance] trackEvent:"Event_Name" withProperties:PropertiesDictionary];
Swift
Freshchat.sharedInstance()?.trackEvent("Event_Name", withProperties: PropertiesDictionary)
Note: 1. Chat allows only 121 unique events per account.
           2. Event name accepts strin value (max 32 chars).
           3. Property key name should be of string type (max 32 chars).
           4. Property value can be of any primitive object type (max 256 chars).
           5. Chat allows sending a maximum of 20 properties per event.
3.4 Reset User Data
Reset user data at logout or when deemed appropriate based on user action in the app by invoking the resetUser API.
Objective C
[[Freshchat sharedInstance] resetUserWithCompletion:^{
//Completion block code here
}];
Swift
Freshchat.sharedInstance().resetUser(completion: { () in
//Completion code
})
3.5 Restore user conversations across browsers/devices
For retaining chat messages across devices/sessions/platforms, the mobile app needs to pass the same external id and restore id combination for the user. This will allow users to seamlessly pick up the conversation from any of the supported platforms - Android, iOS and Web.
External ID - This should (ideally) be a unique identifier for the user from your system like a user id or email id etc and is set using the identifyUserWithExternalID: API
Note: External ID cannot be changed once it id set for a userRestore ID - This is generated by Chat for the current user, given an external id was set and can be retrieved anytime using the [FreshchatUser sharedInstance].restoreID API.
Note: Restore Id should be stored at your backend and you can implement logic to retrieve it to restore conversations back.
The app stores the combination of external id and restore id in the Chat SDK to continue the conversation across sessions on the same device or across different devices and platforms.
Note: Notifications are supported in only one mobile device at any point in time. At present it is the last restored device or device with last updated push token.
Objective C
To set external id:
[[Freshchat sharedInstance] identifyUserWithExternalID:@"externalId" restoreID:nil];
To lookup and restore user by external id and restore id:
[[Freshchat sharedInstance] identifyUserWithExternalID:@"externalId" restoreID: @"restoreId"];
To retrieve the restore id:
[FreshchatUser sharedInstance].restoreID;
To listen to restore id generated event:
// Register for local notification
[[NSNotificationCenter defaultCenter] addObserver:self
selector:@selector(userRestoreIdReceived:)
name:FRESHCHAT_USER_RESTORE_ID_GENERATED
object :nil];
- (void) userRestoreIdReceived:(NSNotification *) notification{
NSLog(@"Your restore id is - %@",[FreshchatUser sharedInstance].restoreID);
NSLog(@"Your query external id is - %@",[FreshchatUser sharedInstance].externalID);
}
//Unregister
[[NSNotificationCenter defaultCenter] removeObserver:self name:FRESHCHAT_USER_RESTORE_ID_GENERATED object:nil];
Swift
Freshchat.sharedInstance().identifyUser(withExternalID: "externalId", restoreID: nil)
To lookup and restore user by external id and restore id:
Freshchat.sharedInstance().identifyUser(withExternalID: "externalId", restoreID: "restoreId")
To retrieve the restore id:
FreshchatUser.sharedInstance().restoreID
To listen to restore id generated event:
// Register for local notification
NotificationCenter.default.addObserver(self,selector: #selector(userRestoreIdReceived),name: NSNotification.Name(rawValue: FRESHCHAT_USER_RESTORE_ID_GENERATED),object: nil)
func userRestoreIdReceived()
{
print("Your restore id is - " FreshchatUser.sharedInstance().restoreID)
print("Your query external id is - " FreshchatUser.sharedInstance().externalID)
}
//Unregister local notification
NotificationCenter.default.removeObserver(FRESHCHAT_USER_RESTORE_ID_GENERATED)
4. Launch the Support Experience
Use the following snippets to launch into FAQs or conversations based support experience from a call to action in your app. Your call to action or entry point could be an on-screen button or menu item.
4.1 Conversations
To bring up the Chat's conversation list or a single conversation overlay at any point, you need to use showConversations: API.
For example, to bring up the feedback overlay on a button press, the target method in a ViewController class could look like,
Objective C
- (IBAction)showFeedbackOverlay:(id)sender {
[[Freshchat sharedInstance] showConversations:self];
}
Swift
func presentConversation(sender: Any) {
Freshchat.sharedInstance().showConversations(self)
}
4.1.1 Filter Message Channels
Different sets of message channels can be displayed to different types of users or on different screens by using tags to filter channels. This can be configured and passed on to the ConversationsOptions() method.
Objective C
ConversationOptions *options = [ConversationOptions new];
[options filterByTags:@[ @"all", @"paiduser" ] withTitle:@"Filter_View_Title"];
[[Freshchat sharedInstance] showConversations:self withOptions: options];
Swift
let options = ConversationOptions.init()
let tags: [String] = ["all","paidUser"] //Your filter tags
options.filter(byTags: tags, withTitle: "Filter_View_Title")
Freshchat.sharedInstance().showConversations(self, with: options)
The contactUsTags can also be used to show a different set of channels when the user comes from the self help section.
Note: For non-matching channel, user will be redirected to default channel.4.1.2 Unread Count
If you want to indicate to the users that they have unread messages in their inbox, you can retrieve the unread count to display. Block returns an int indicating the number of unread messages for the user.
Objective C
[[Freshchat sharedInstance]unreadCountWithCompletion:^(NSInteger count) {
NSLog(@"your unread count : %d", (int)count);
}];
Swift
Freshchat.sharedInstance().unreadCount { (count:Int) -> Void in
print("Unread count (Async) :\(count)")
}
The app can also choose to listen to changes to unread count when the app is open.
Objective C
[[NSNotificationCenter defaultCenter]addObserverForName:FRESHCHAT_UNREAD_MESSAGE_COUNT_CHANGED object:nil queue:nil usingBlock:^(NSNotification *note) {
[[Freshchat sharedInstance]unreadCountWithCompletion:^(NSInteger count) {
NSLog(@"your unread count : %d", (int)count);
}];
}];
Swift
// Register for notification
NotificationCenter.default.addObserver(self, selector: #selector(self.methodOfReceivedNotification(notification:)), name: Notification.Name(FRESHCHAT_UNREAD_MESSAGE_COUNT_CHANGED), object: nil)
//Handling method -
func methodOfReceivedNotification(notification: Notification){
Freshchat.sharedInstance().unreadCount { (count:Int) -> Void in
print("Unread count (Async) :\(count)")
}
}
Note: From SDK v1.5.0, unread count event name has been changed from FRESHCHAT_UNREAD_MESSAGE_COUNT to FRESHCHAT_UNREAD_MESSAGE_COUNT_CHANGED
4.2. FAQs
To bring up the Chat’s FAQ overlay at any point, use showFAQs() API.
For example, if you want to bring up the feedback overlay on a button press, the target method in a ViewController class could look like,
Objective C
- (IBAction)showFeedbackOverlay:(id)sender {
[[Freshchat sharedInstance] showFAQs:self];
}
Swift
func presentFAQ(sender: Any) {
Freshchat.sharedInstance().showFAQs(self)
}
4.2.1 Filtering FAQs
You can filter and display only FAQs tagged with a specific term on certain screens or only to some users such as logged in customers versus visitors. These tags can be setup from the dashboard.
For example, to display FAQs related to payment failure, only on that page, the particular FAQs can be tagged with "payment" and "billing". They can then be filtered and displayed to the users.
FAQ article filtering
Objective C
FAQOptions *options = [FAQOptions new];
[options filterByTags:@[ @"payment", @"billing" ] withTitle:@"Filtered_View_title" andType: ARTICLE];
[[Freshchat sharedInstance]showFAQs:self withOptions:options];
Swift
let options = FAQOptions.init()
let tags: [String] = ["payment","billing"]
options.filter(byTags: tags, withTitle:"Filtered_View_title", andType :ARTICLE)
Freshchat.sharedInstance().showFAQs(self, with: options)
FAQ category filtering
You can also filter categories by tags. This will show a filtered view of categories ( under which articles would be listed). This is useful to show different sets of categories to different customers ( e.g. Paid Customers Vs Free Customers ).
Objective C
FAQOptions *options = [FAQOptions new];
[options filterByTags:@[ @"payment", @"billing" ] withTitle:@"Filtered_View_Title" andType: CATEGORY];
[[Freshchat sharedInstance]showFAQs:self withOptions:options];
Swift
let options = FAQOptions.init()
let tags: [String] = ["payment", "billing"]
options.filter(byTags: tags, withTitle:"Filtered_View_Title", andType :CATEGORY)
Freshchat.sharedInstance().showFAQs(self, with: options)
Note: When you filter an article by tags, the category(to which the article belongs) tags are also applicable.5. Send message API
The app can send a message on behalf of the user using the sendMessage: API. It will silently send a message and not launch the Chat SDK UI. This API can be helpful in setting more context for customer before starting a conversation.
Objective C
NSString *message = @"Your message here";
FreshchatMessage *userMessage = [[FreshchatMessage alloc] initWithMessage:message andTag:@"single_match_tag"];
[[Freshchat sharedInstance] sendMessage:userMessage];
Swift
let message = "Your message here"
let freshchatMessage = FreshchatMessage.init(message: message, andTag: "single_match_tag")
Freshchat.sharedInstance().send(freshchatMessage)
Note: If here are no matching channels, message will be sent to default channel. In case of multiple matches it will be added to the oldest channel.
6. Push Notifications
Chat supports .p12 certificate(s) only for sending push notification for user messages or campaigns.
You can create iOS push certificate in a few steps.
Chat SDK is capable of getting push notifications for all user conversations. To enable it, add setPushRegistrationToke API into your app delegate’s didRegisterForRemoteNotificationsWithDeviceToken method as follows.
Objective C
[[Freshchat sharedInstance] setPushRegistrationToken:devToken];
Swift
Freshchat.sharedInstance().setPushRegistrationToken(deviceToken)
To handle push notification messages in active or background state add following method in didReceiveRemoteNotification or didFinishLaunchingWithOptions delegate method respectively.
Objective C
if ([[Freshchat sharedInstance]isFreshchatNotification:info]) {
[[Freshchat sharedInstance]handleRemoteNotification:info andAppstate:app.applicationState];
}
Swift
if Freshchat.sharedInstance().isFreshchatNotification(userInfo) {
Freshchat.sharedInstance().handleRemoteNotification(userInfo, andAppstate: application.applicationState)
}
Note: isChatNotification returns a BOOL. If remote notification was not sent by Chat, it returns NO and you can insert code to handle other notifications based on this check.6.1 UNUserNotification Framework
This is the new method of configuring push notification From iOS 10.1. Older approaches will work but they are deprecated.
If you are using UserNotifications.framework for handling notifications, make sure you are handling Chat notifications in willPresent & didReceive methods as shown below.
Objective C
/* For devices running on ios 10 and above */
- (void)userNotificationCenter:(UNUserNotificationCenter *)center
willPresentNotification:(UNNotification *)notification
withCompletionHandler:(void (^)(UNNotificationPresentationOptions options))completionHandler {
if ([[Freshchat sharedInstance]isFreshchatNotification:notification.request.content.userInfo]) {
[[Freshchat sharedInstance]handleRemoteNotification:notification.request.content.userInfo andAppstate:[[UIApplication sharedApplication] applicationState]];
completionHandler( UNAuthorizationOptionSound );
} else {
completionHandler( UNAuthorizationOptionAlert | UNAuthorizationOptionSound | UNAuthorizationOptionBadge );
}
}
/* For devices running on ios 10 and above */
- (void)userNotificationCenter:(UNUserNotificationCenter *)center
didReceiveNotificationResponse:(UNNotificationResponse *)response
withCompletionHandler:(void (^)(void))completionHandler {
if ([[Freshchat sharedInstance]isFreshchatNotification:response.notification.request.content.userInfo]) {
[[Freshchat sharedInstance]handleRemoteNotification:response.notification.request.content.userInfo andAppstate:[[UIApplication sharedApplication] applicationState]];
completionHandler();
} else {
completionHandler();
}
}
Swift
//@available(iOS 10.0, *)
func userNotificationCenter(_ center: UNUserNotificationCenter,
willPresent: UNNotification,
withCompletionHandler: @escaping (UNNotificationPresentationOptions)->()) {
if Freshchat.sharedInstance().isFreshchatNotification(willPresent.request.content.userInfo) {
Freshchat.sharedInstance().handleRemoteNotification(willPresent.request.content.userInfo, andAppstate: UIApplication.shared.applicationState) //Handled for freshchat notifications
withCompletionHandler([.sound])
} else {
withCompletionHandler([.alert, .sound, .badge]) //For other notifications
}
}
//@available(iOS 10.0, *)
func userNotificationCenter(_ center: UNUserNotificationCenter,
didReceive: UNNotificationResponse,
withCompletionHandler: @escaping ()->()) {
if Freshchat.sharedInstance().isFreshchatNotification(didReceive.notification.request.content.userInfo) {
Freshchat.sharedInstance().handleRemoteNotification(didReceive.notification.request.content.userInfo, andAppstate: UIApplication.shared.applicationState) //Handled for freshchat notifications
withCompletionHandler()
} else {
withCompletionHandler() //For other notifications
}
}
7. Language Localization
7.1 Right-to-Left Language Support
Chat SDK supports RTL languages (Arabic).
Set value ‘NSTextAlignmentNatural’ for UserMessageTextStyle/TeamMemberMessageTextStyle textAlignment to support conversation messages for RTL languages.
7.2 Run-time locale change
If your app supports runtime locale change, add local notification name FRESHCHAT_USER_LOCALE_CHANGED event into your locale change method.
Objective C
[[NSNotificationCenter defaultCenter] postNotificationName:FRESHCHAT_USER_LOCALE_CHANGED object:self];
Swift
NotificationCenter.default.post(name: NSNotification.Name(rawValue: FRESHCHAT_USER_LOCALE_CHANGED), object: self, userInfo: nil)
7.3 String Localization
All strings used in the Chat SDK UI can be customized and localized in multiple languages.
You can do the following to customize your SDK.
Creating a bundle
Locate the FCLocalization.bundle in the FreshchatSDK pod or download the FCLocalization.bundle from here. You can rename the file to a custom name.
The structure of the bundle folder would be as follows,
Sample bundle structure containing strings for English, French and German.
YouCustomBundle.bundle
-en.Iproj
- FCLocalizable.strings
-fr.Iproj
- FCLocalizable.strings
-de.Iproj
- FCLocalizable.strings
Changing strings
In order to change a specific string used in the SDK UI, just update the appropriate key in FCLocalizable.strings. The keynames in the file are categorized by UI and the keys used are self explanatory.
Do the same for all the languages you want to support
SDK comes with only English at the moment, but you will be able to use translations for any language you want.
Linking to project
Once you have changed all the required strings in the languages that you are supporting, link it under “Build Phases” > “Copy Bundle Resources”.
When you are initializing the SDK, specify that bundle name as part of Chat config.
Define your custom bundle resources
Objective C
config.stringsBundle = @"MyCustomBundle";
Swift
config.stringsBundle = "MyCustomBundle"
Note: 1. Bundle name is case-sensitive
      2. Extension .bundle is not required
8. Customization
8.1 UI Customization options
Modify our default theme file FCTheme.plist to customize the interface or you could link your own custom theme
file to the SDK by using the following snippet.
Objective C
[config setThemeName:@"<Theme_Name>"];
Swift
config.themeName = "<Theme_Name>"
For individual component level customization, follow our theme guide.
Testing
Once you have made the changes, please run the app to verify the changes on the SDK UI.
9. Other Notes
9.1 Checklist for Launch
Ensure you have the latest SDK.
Ensure you are initializing the SDK at the starting of application: didFinishLaunchingWithOptions: function.
Check if push notification is working properly when the app is in foreground, background, and in killed state with production certificate.
See our Theming and Customization document here to make sure you are matching the experience with the rest of your app.
Configure your default channel name and welcome message right even if you aren't using other channels.
Capture the unique user identifier, email, phone number, or any other unique customer identifiers with the SDK to ensure smooth use of APIs, as well as for the best use of our "Smart Plugs" feature on the dashboard.
Ensure the push notifications are working for new installs as well as upgrades from your previous versions.
9.2 iOS 10 Compatibility
Starting with iOS 10, Apple requires developers to declare access to privacy-sensitive controls ahead of time.
To comply with this new privacy requirement, developers must add the required keys to the Info.plist,
"NSPhotoLibraryUsageDescription" and "NSCameraUsageDescription"
Moreover, we will also log a warning message on the XCode console if you have missed adding the required keys.
Warning!
Failing this iOS 10 will exit the app by crashing when user tries to access the controls of microphone, camera or photo library.
For more information, click here.
9.3 iOS 10 Simulator issue
Chat SDK depends on keychain services. Xcode 8.0 (8A218a) / iOS 10 simulators have an issue with keychain services, which does not allow the SDK to retrieve data from the store when there are no "entitlements" set up. To fix that in the project’s capabilities page, please turn on push notifications capability (and select the "fix issue" if any issue appears). This is a work around to ensure there is a valid entitlement file for the project (which the simulator requires to work correctly), and once testing is done you can discard these changes.
We have hosted a sample project which you could use to try out our SDK APIs.
It can be accessed at the following link : https://github.com/freshdesk/freshchat-ios/tree/master/Sample