Note: Custom flow and answer bots are no longer being actively maintained. It is recommended to transition to the improved bot builder, enriched with the latest Freddy Self Service features. Learn more.
Custom Bots can work all day, every day. Create Custom Bots to proactively start conversations, ask the right questions, qualify more leads, book meetings 24/7, onboard new users, and support customers.
You can design a fully functional Custom Bot in Chat in just a few minutes, without writing any complex codes. Just create simple paths for your prospects to follow and let the Custom Bot take care of the next steps like qualifying leads and assigning to the right teams.
How is Custom Bot different from other chatbots out there?
Not all questions can be answered by a bot, and sometimes human intervention is crucial. Custom Bot will hand off such conversation to a human agent to speed up resolution and improve customer experience.
If a user deviates from a question asked by Custom Bot responding with something random, Custom Bot will ask the user to rephrase the answer twice, post which the bot will automatically transfer the chat to a team member.
Design your Custom Bot
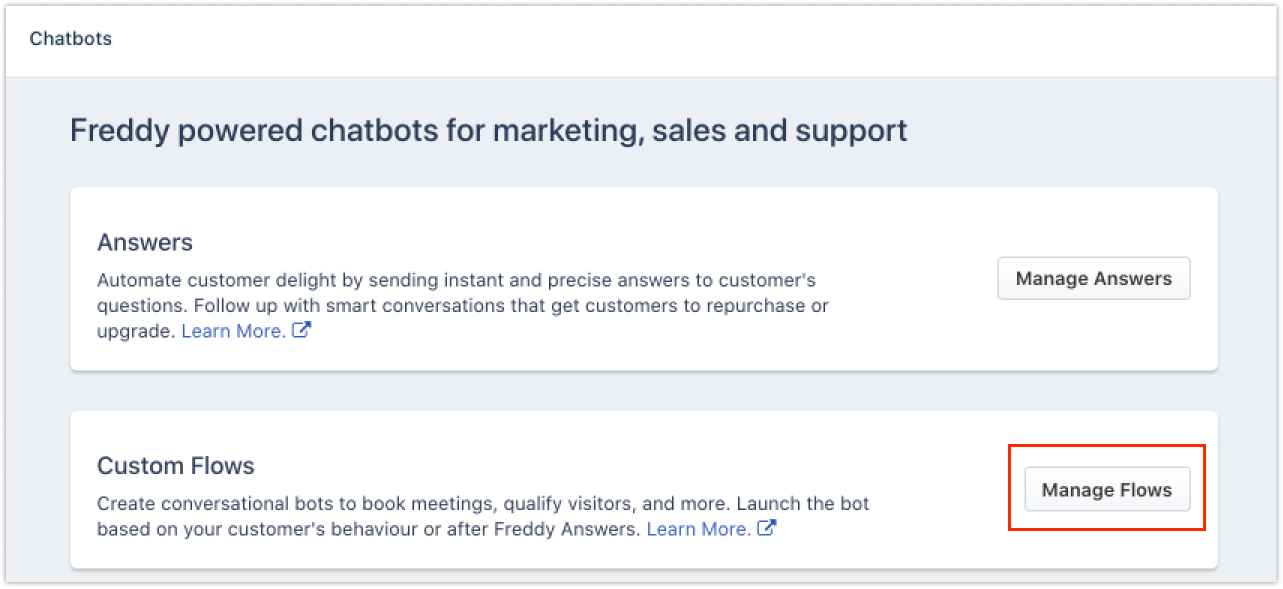
To create your first Custom Bot, go to Marketing Automation > Chatbots > Manage Flows.
Click New Custom Flow

Give a title
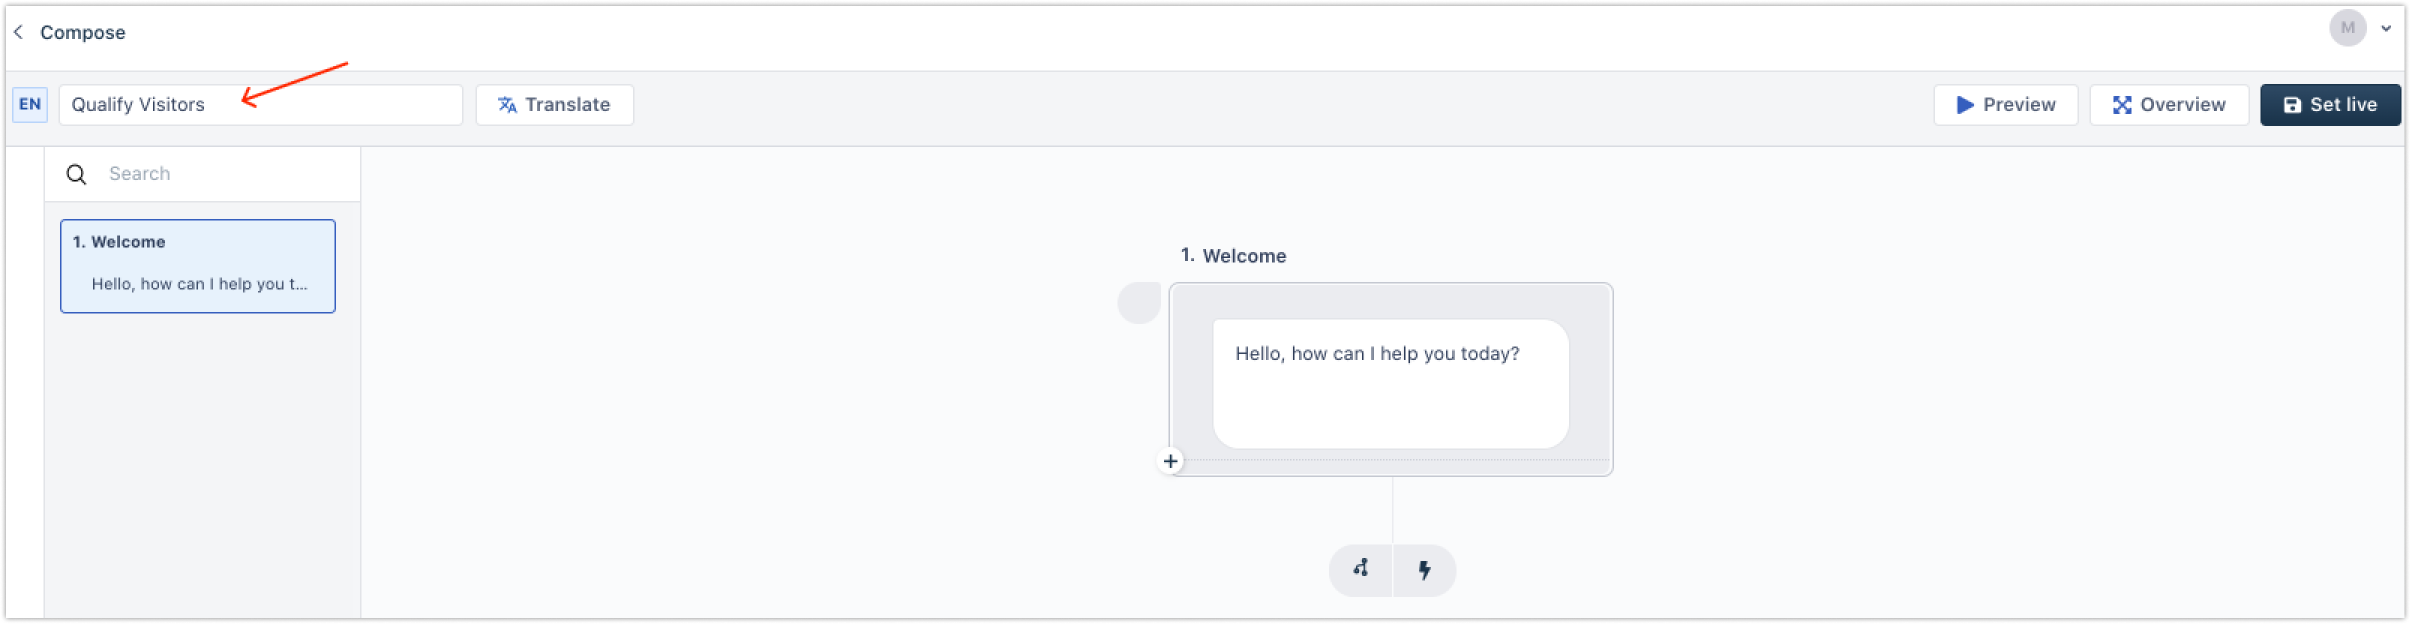
Start by adding a meaningful title to your Custom Bot. You should add a title that accurately describes your bot’s goal, so your team can easily understand the bot’s purpose.
Engage potential leads who come to your website
Add a welcome message to kickstart your bot conversation. The welcome message is the first message your visitors will get. You can make it easy for your visitors to respond to by adding multiple answer options they can choose from.
For example, you can ask something like this:

Next, add the quick reply buttons your visitors can choose from.

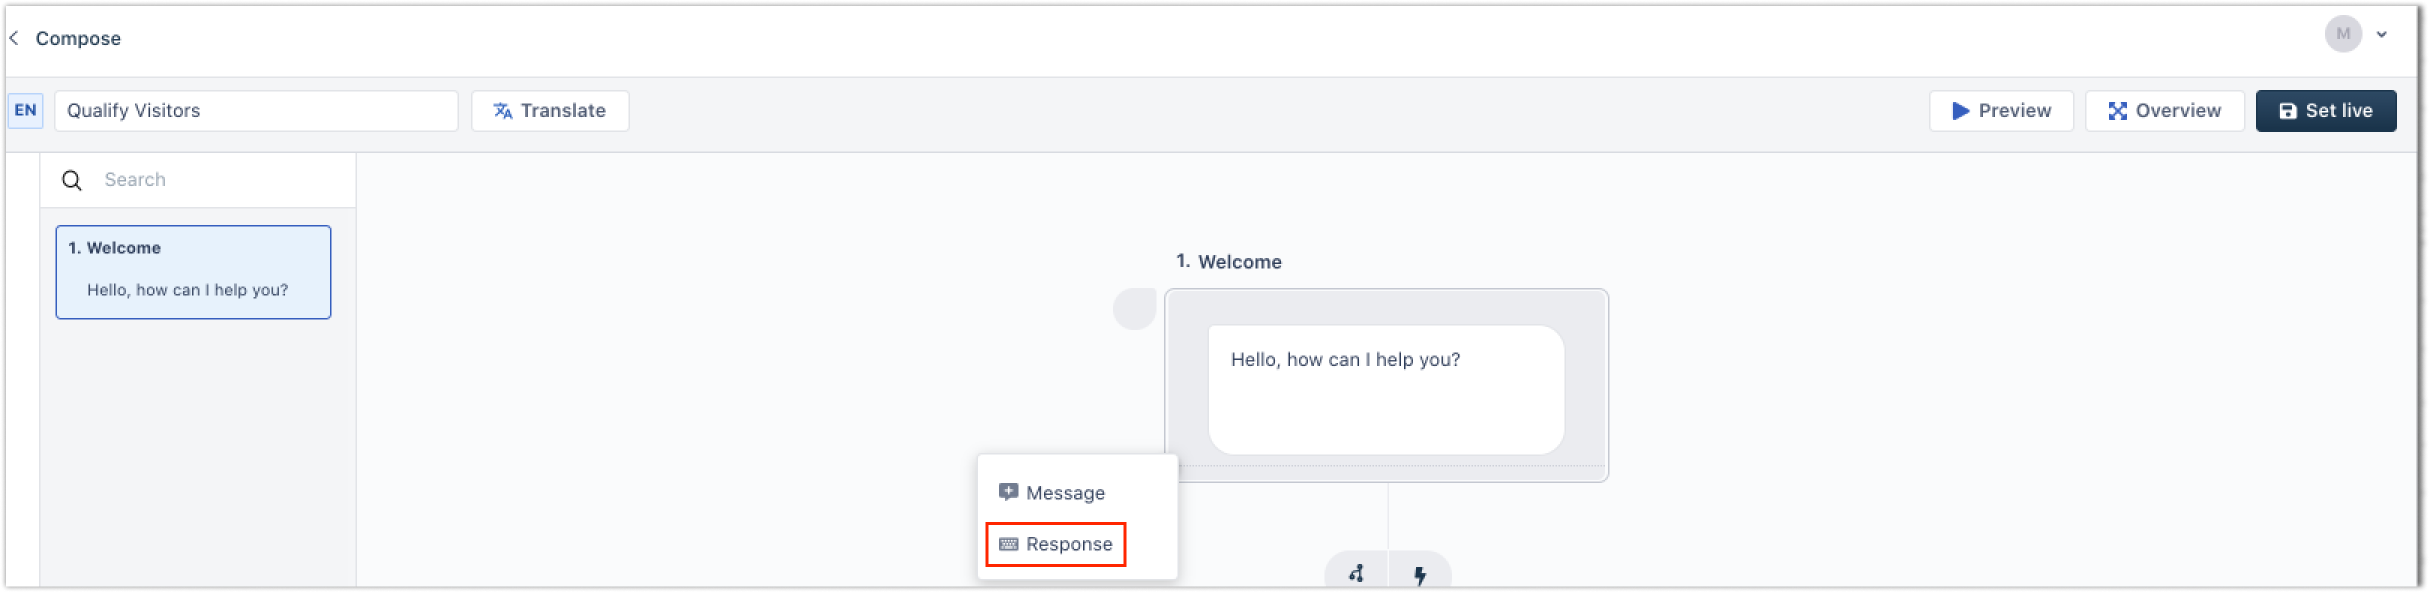
You can do this by clicking on the small '+' icon in the left and selecting Response > Quick Replies.

ProTip: Give a name to all the steps that you create so that it is easy to identify later. For example, in the above screen, the step name is 'Welcome'.
Personalize your bot flow based on who your visitors are
Now, you can direct leads through different sets of steps (bot flow) based on their response. Just click on the drop-down beside each reply button and create a new step. Give each new step, a clear, descriptive name so it's easy to identify later.

You can see a list of all the steps you’ve created on the left side of the screen.

Qualify leads and push them to the right teams
Now, configure your new set of steps.
Custom Bots can collect any data such as someone’s email, phone number, qualifying leads faster and creating a rich profile for every prospect. This will give your sales teams actionable insights to work with.
Apart from default response options, you can also add custom responses and get more information from your customers.

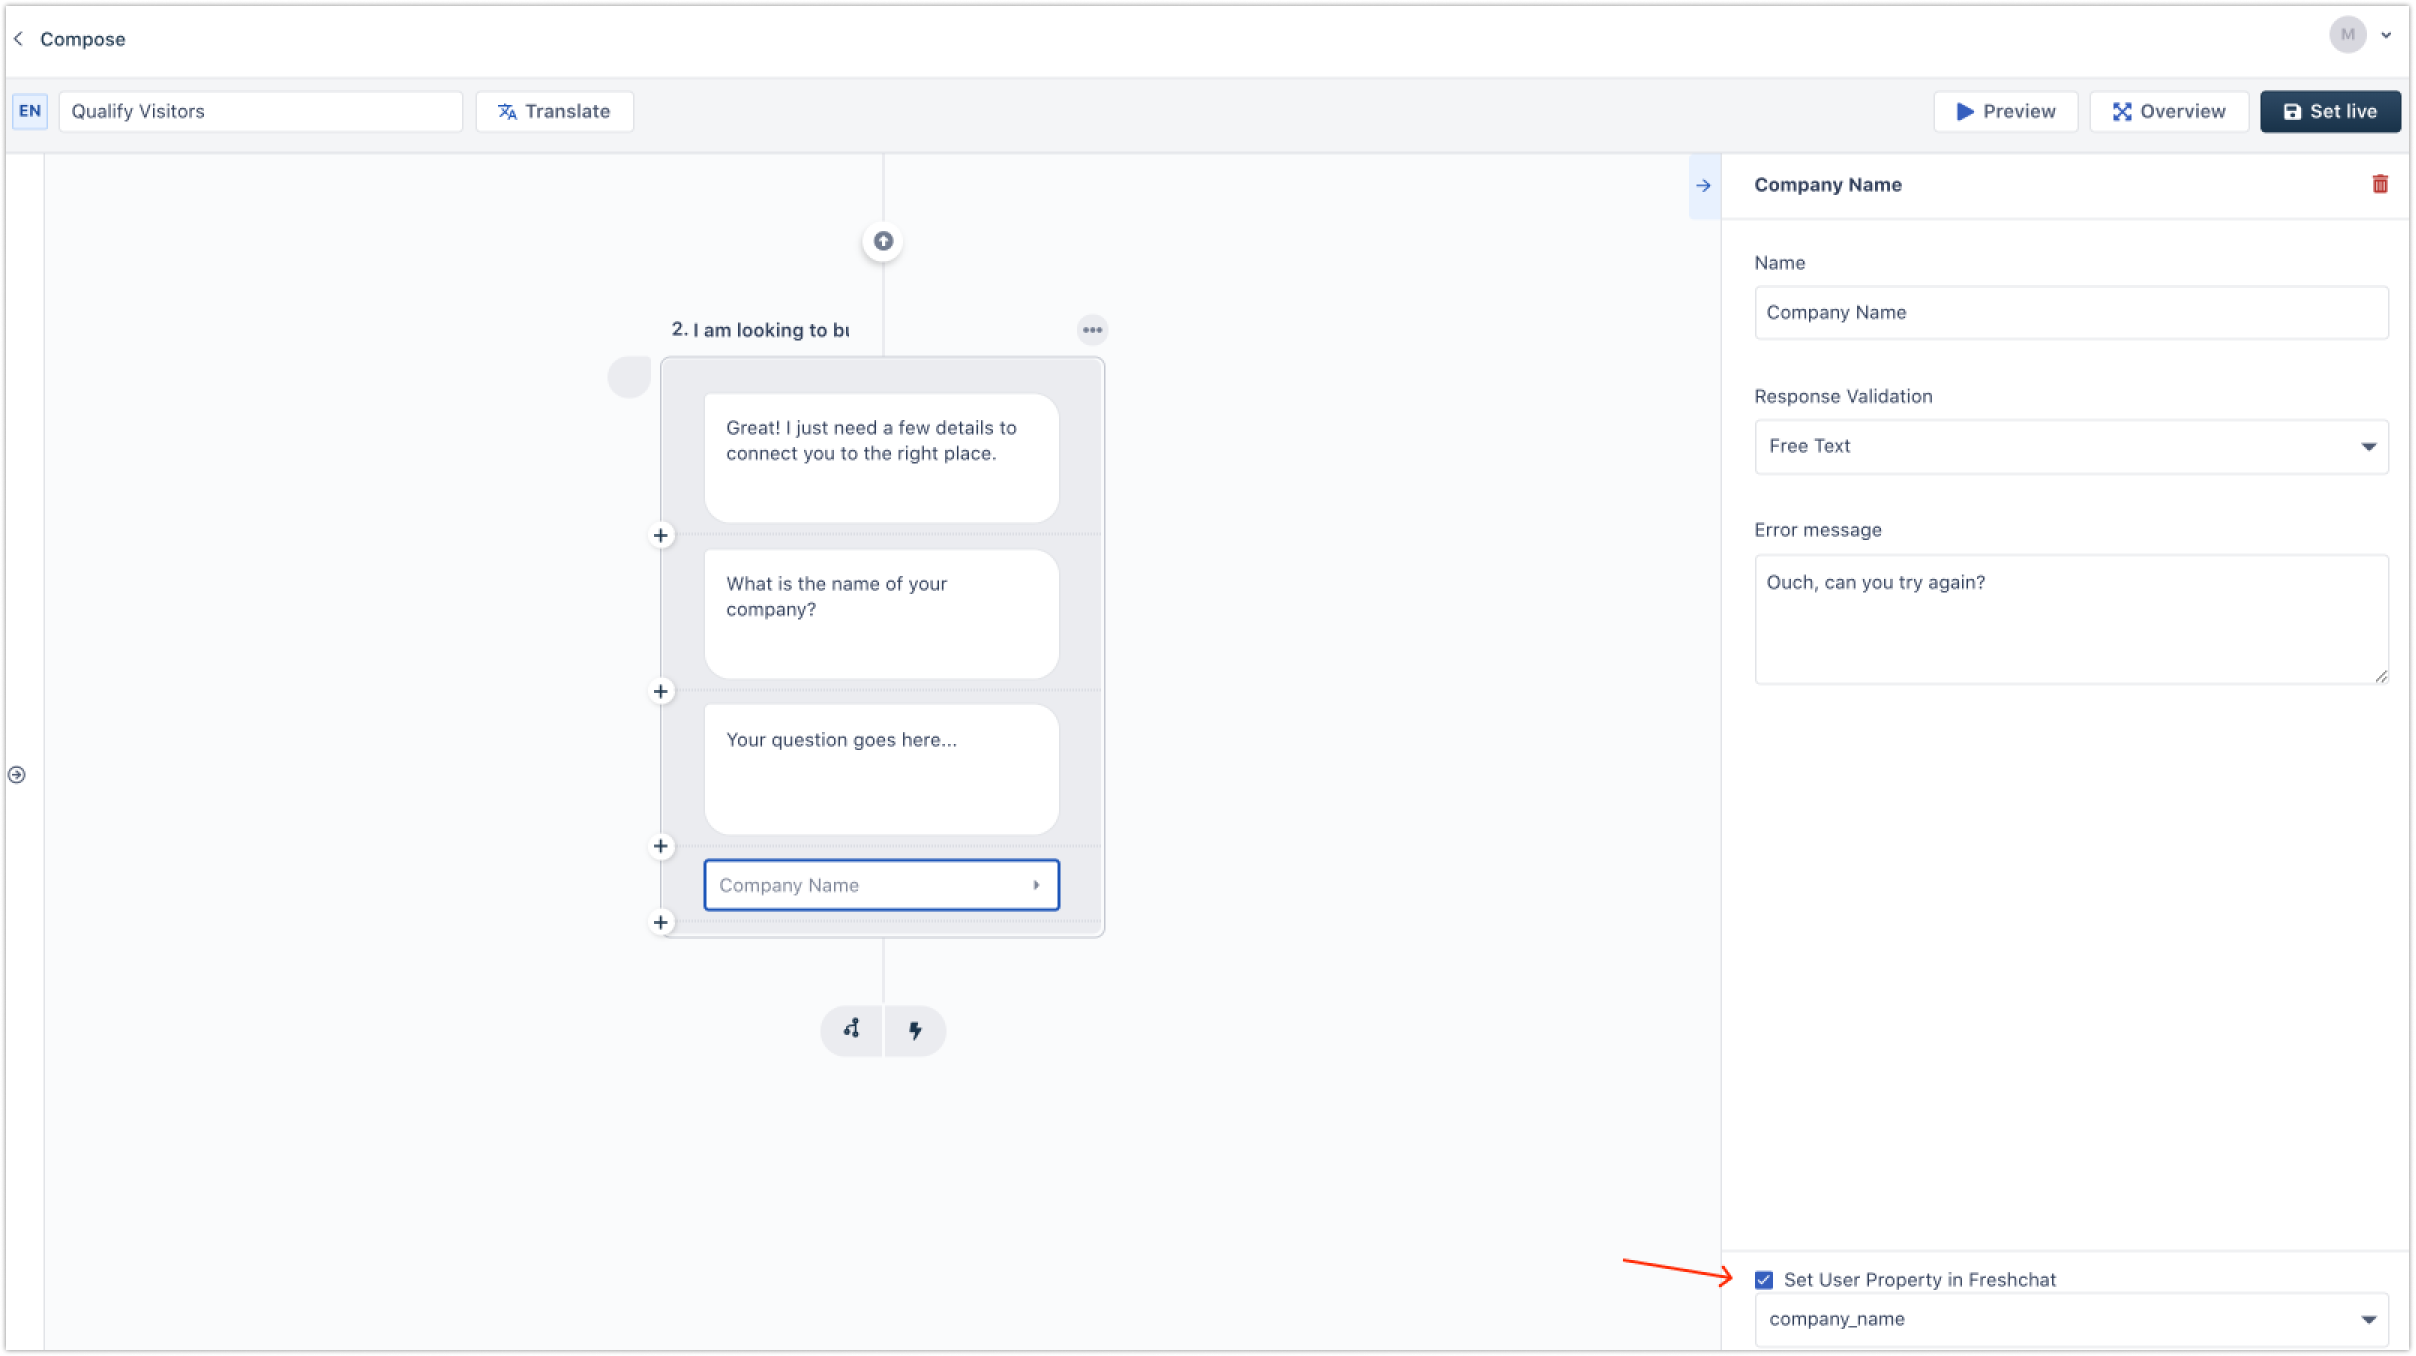
Just add a bot message, and configure the custom response option for the data you’d like to collect, like the name of their organization, company size, IMEI number or anything else you need.
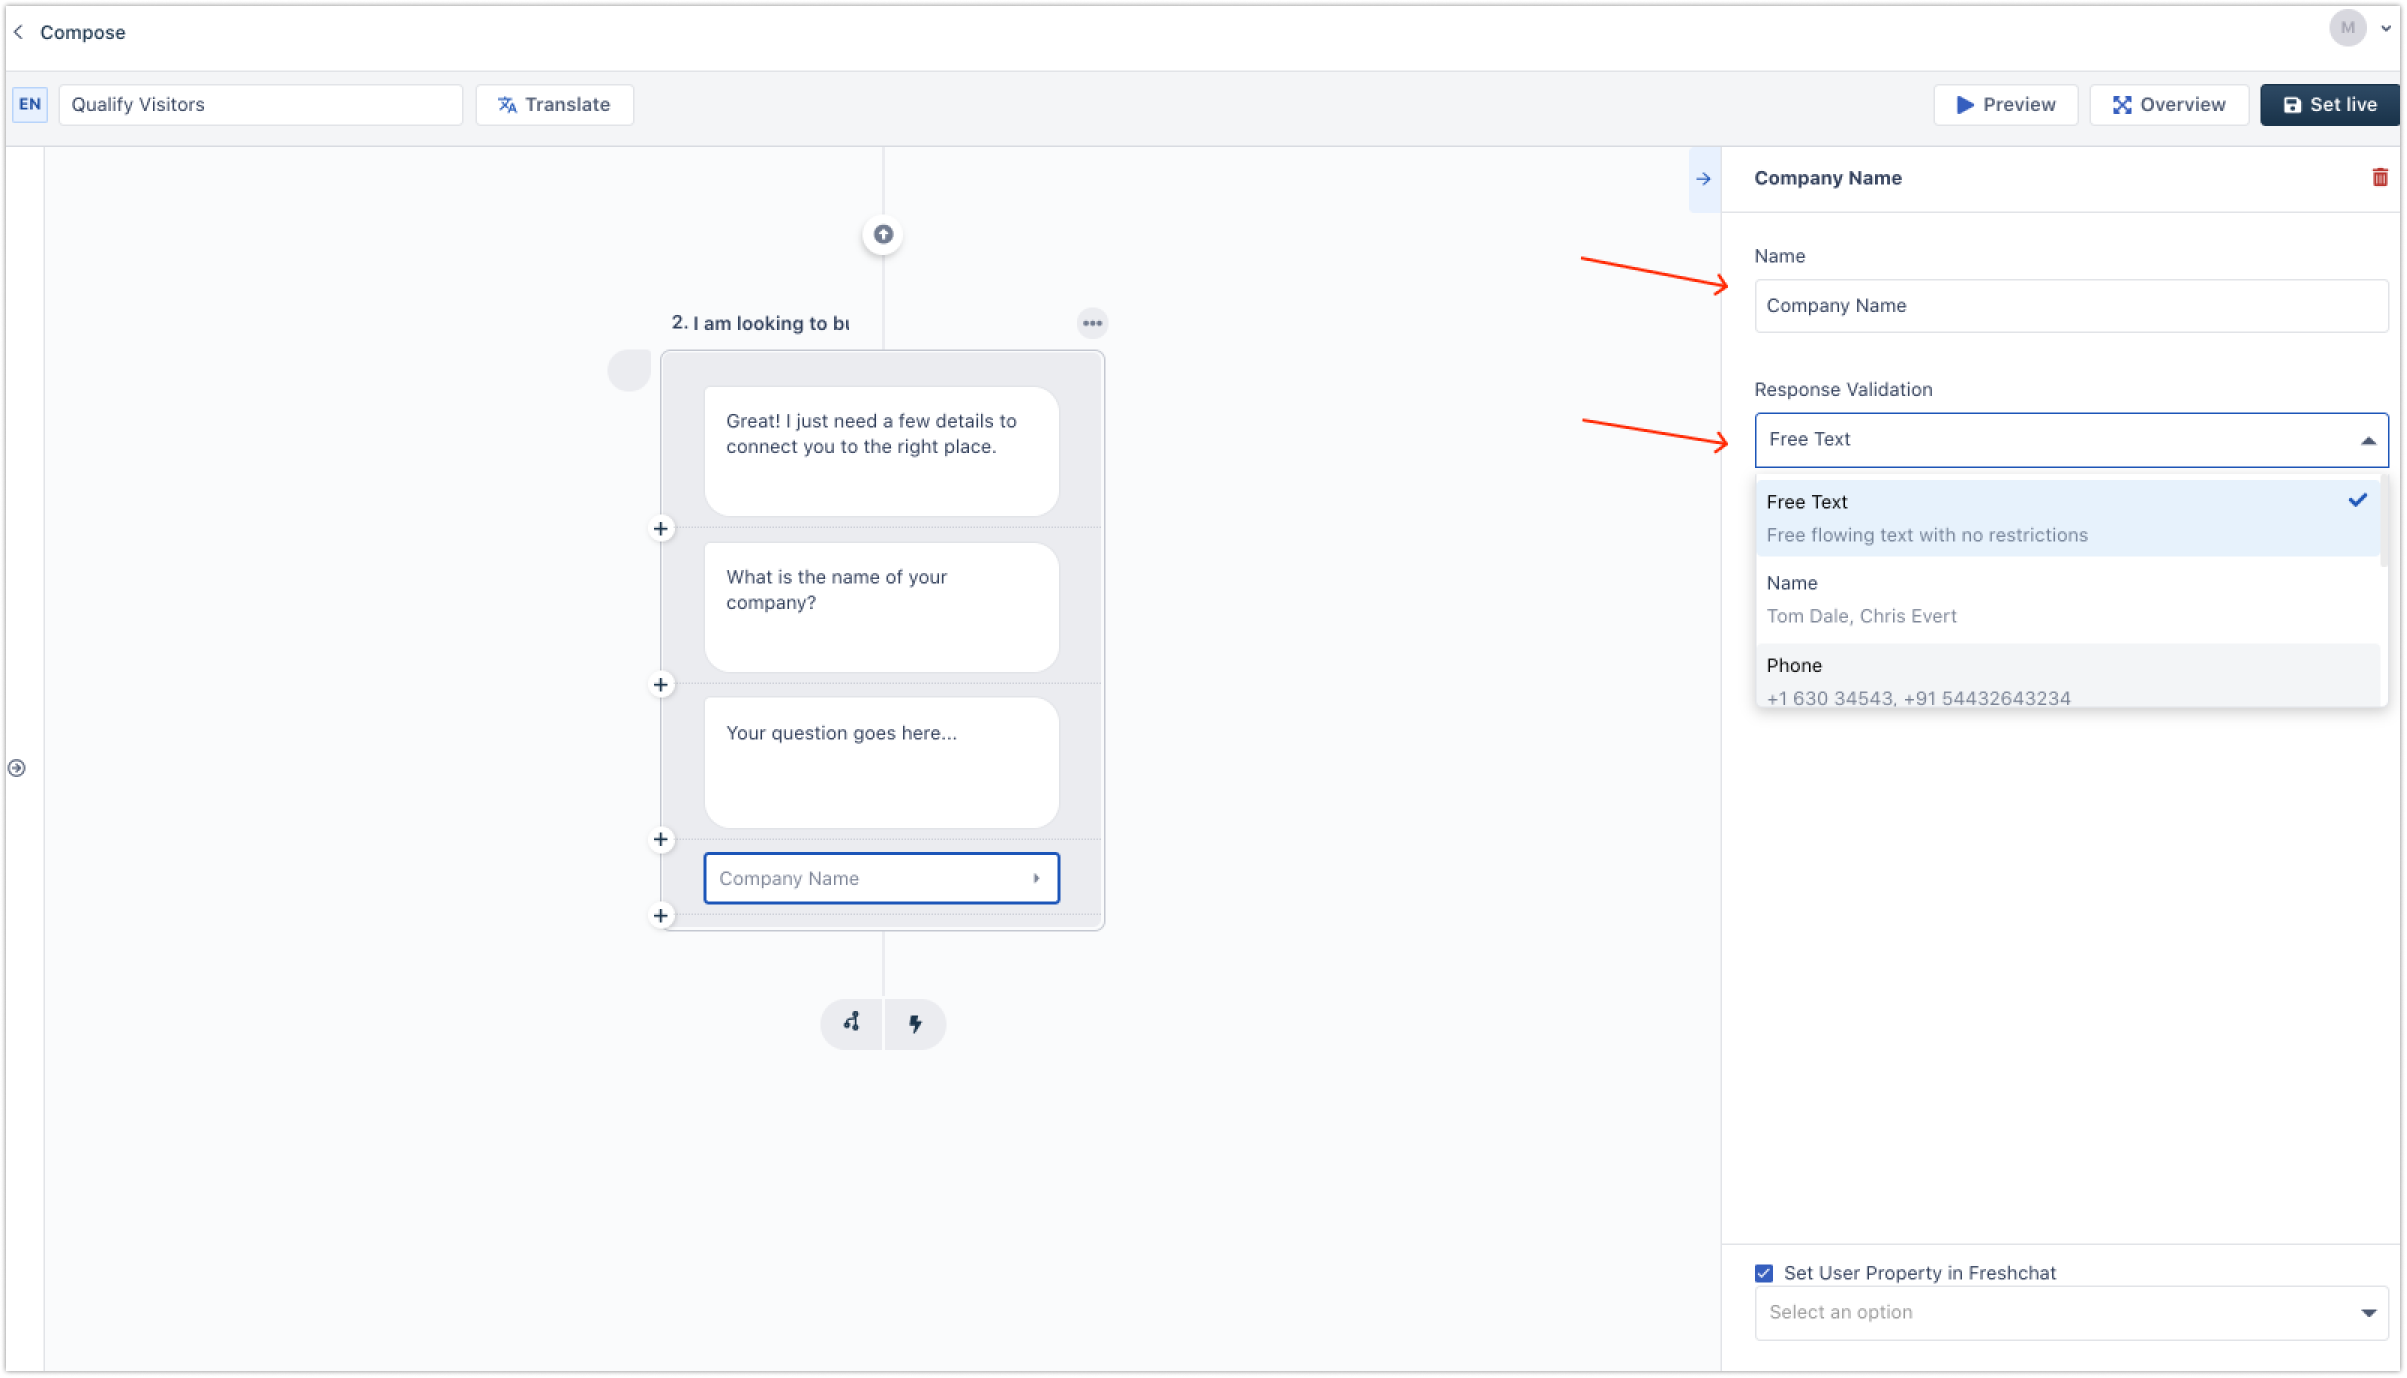
If you don’t already have an attribute for this value, you can create a new one, so it’s always available to your team. Just select the checkbox. The data will get stored in Chat as a custom user property.
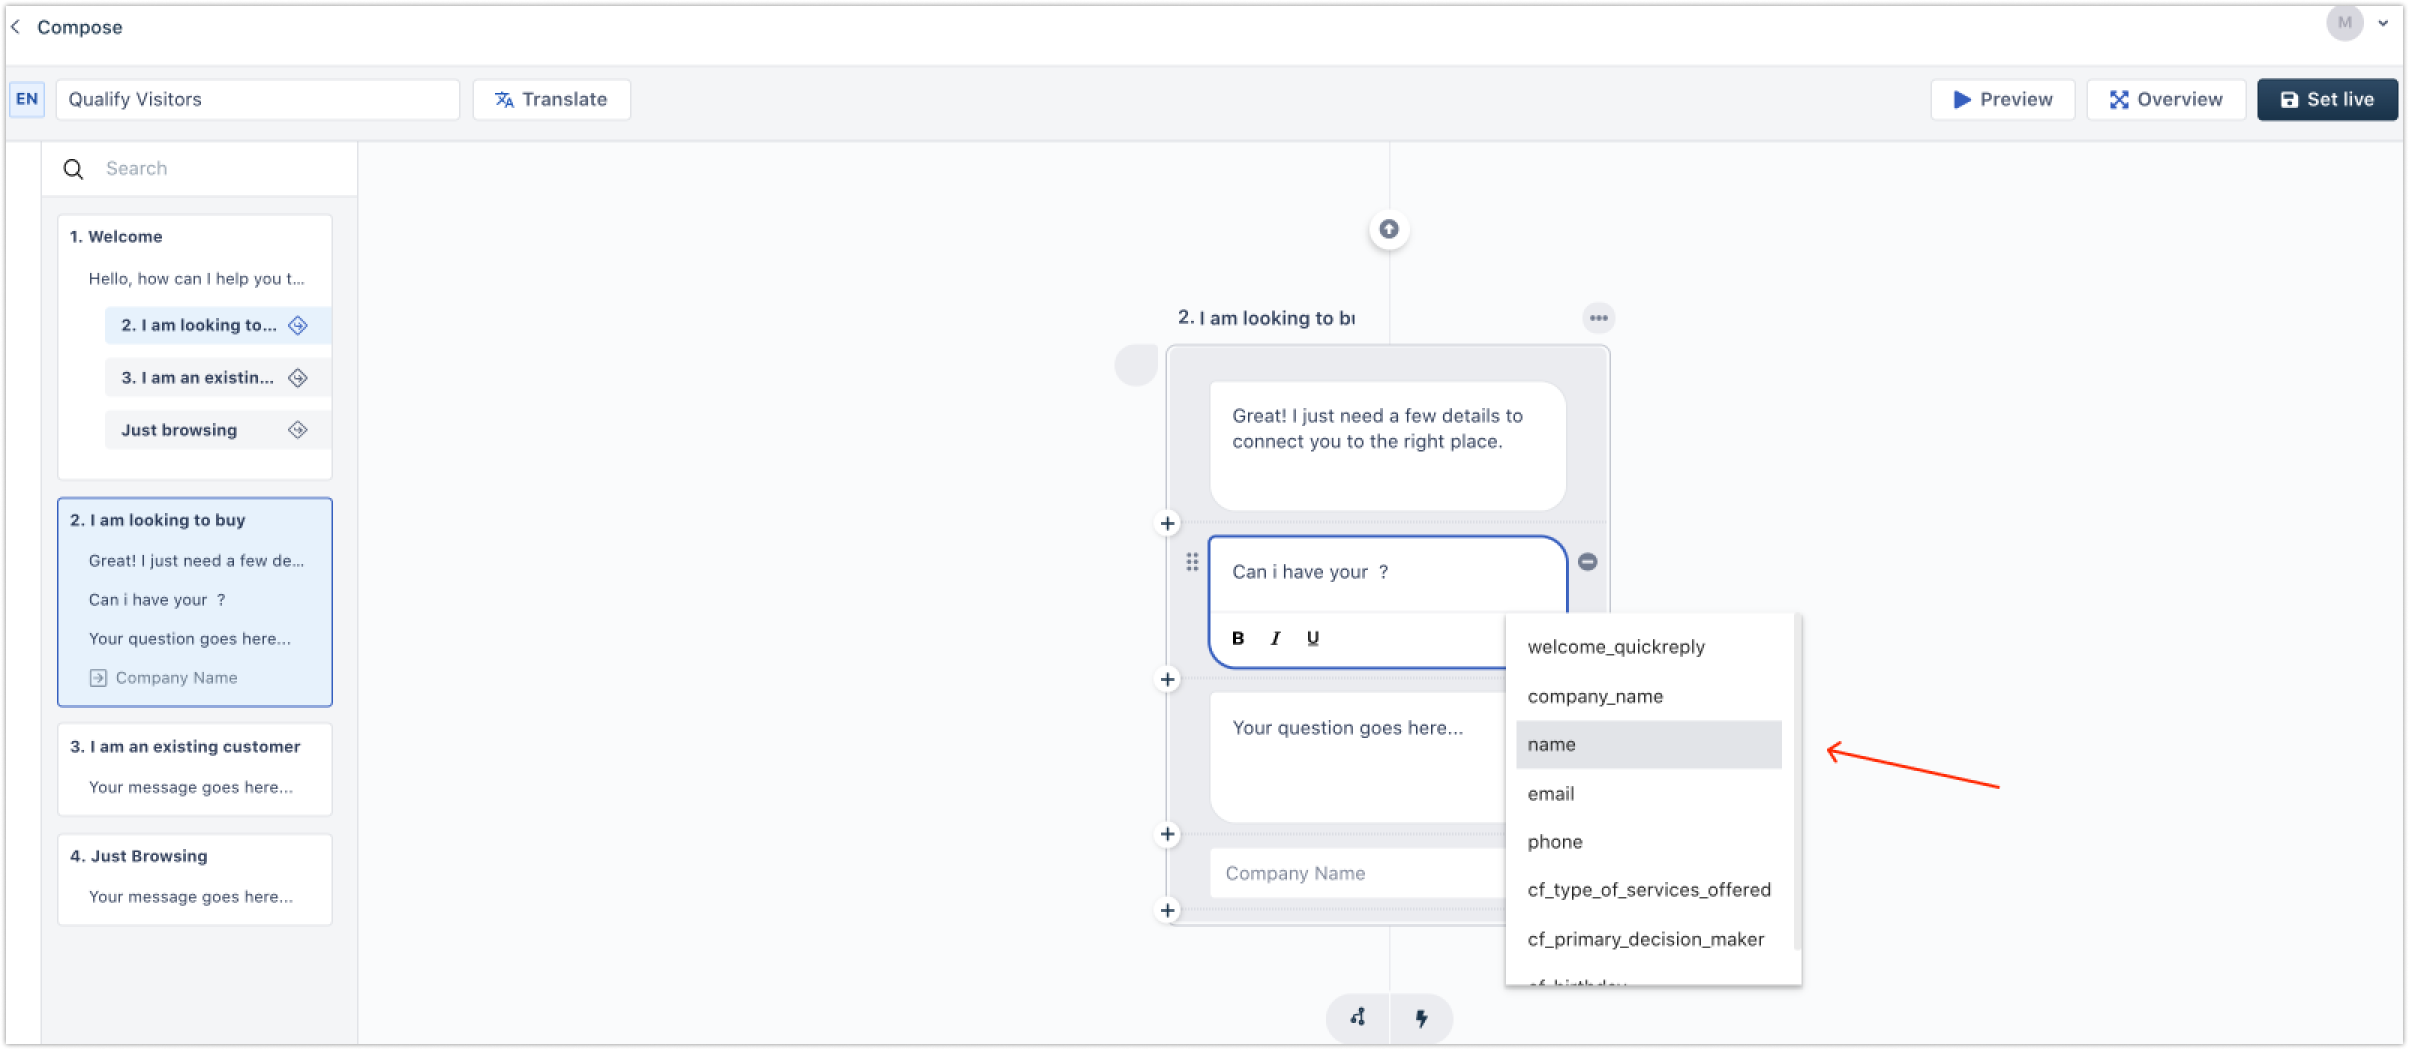
You can even personalize the bot responses within the bot flow using the data you collect, by adding placeholders.


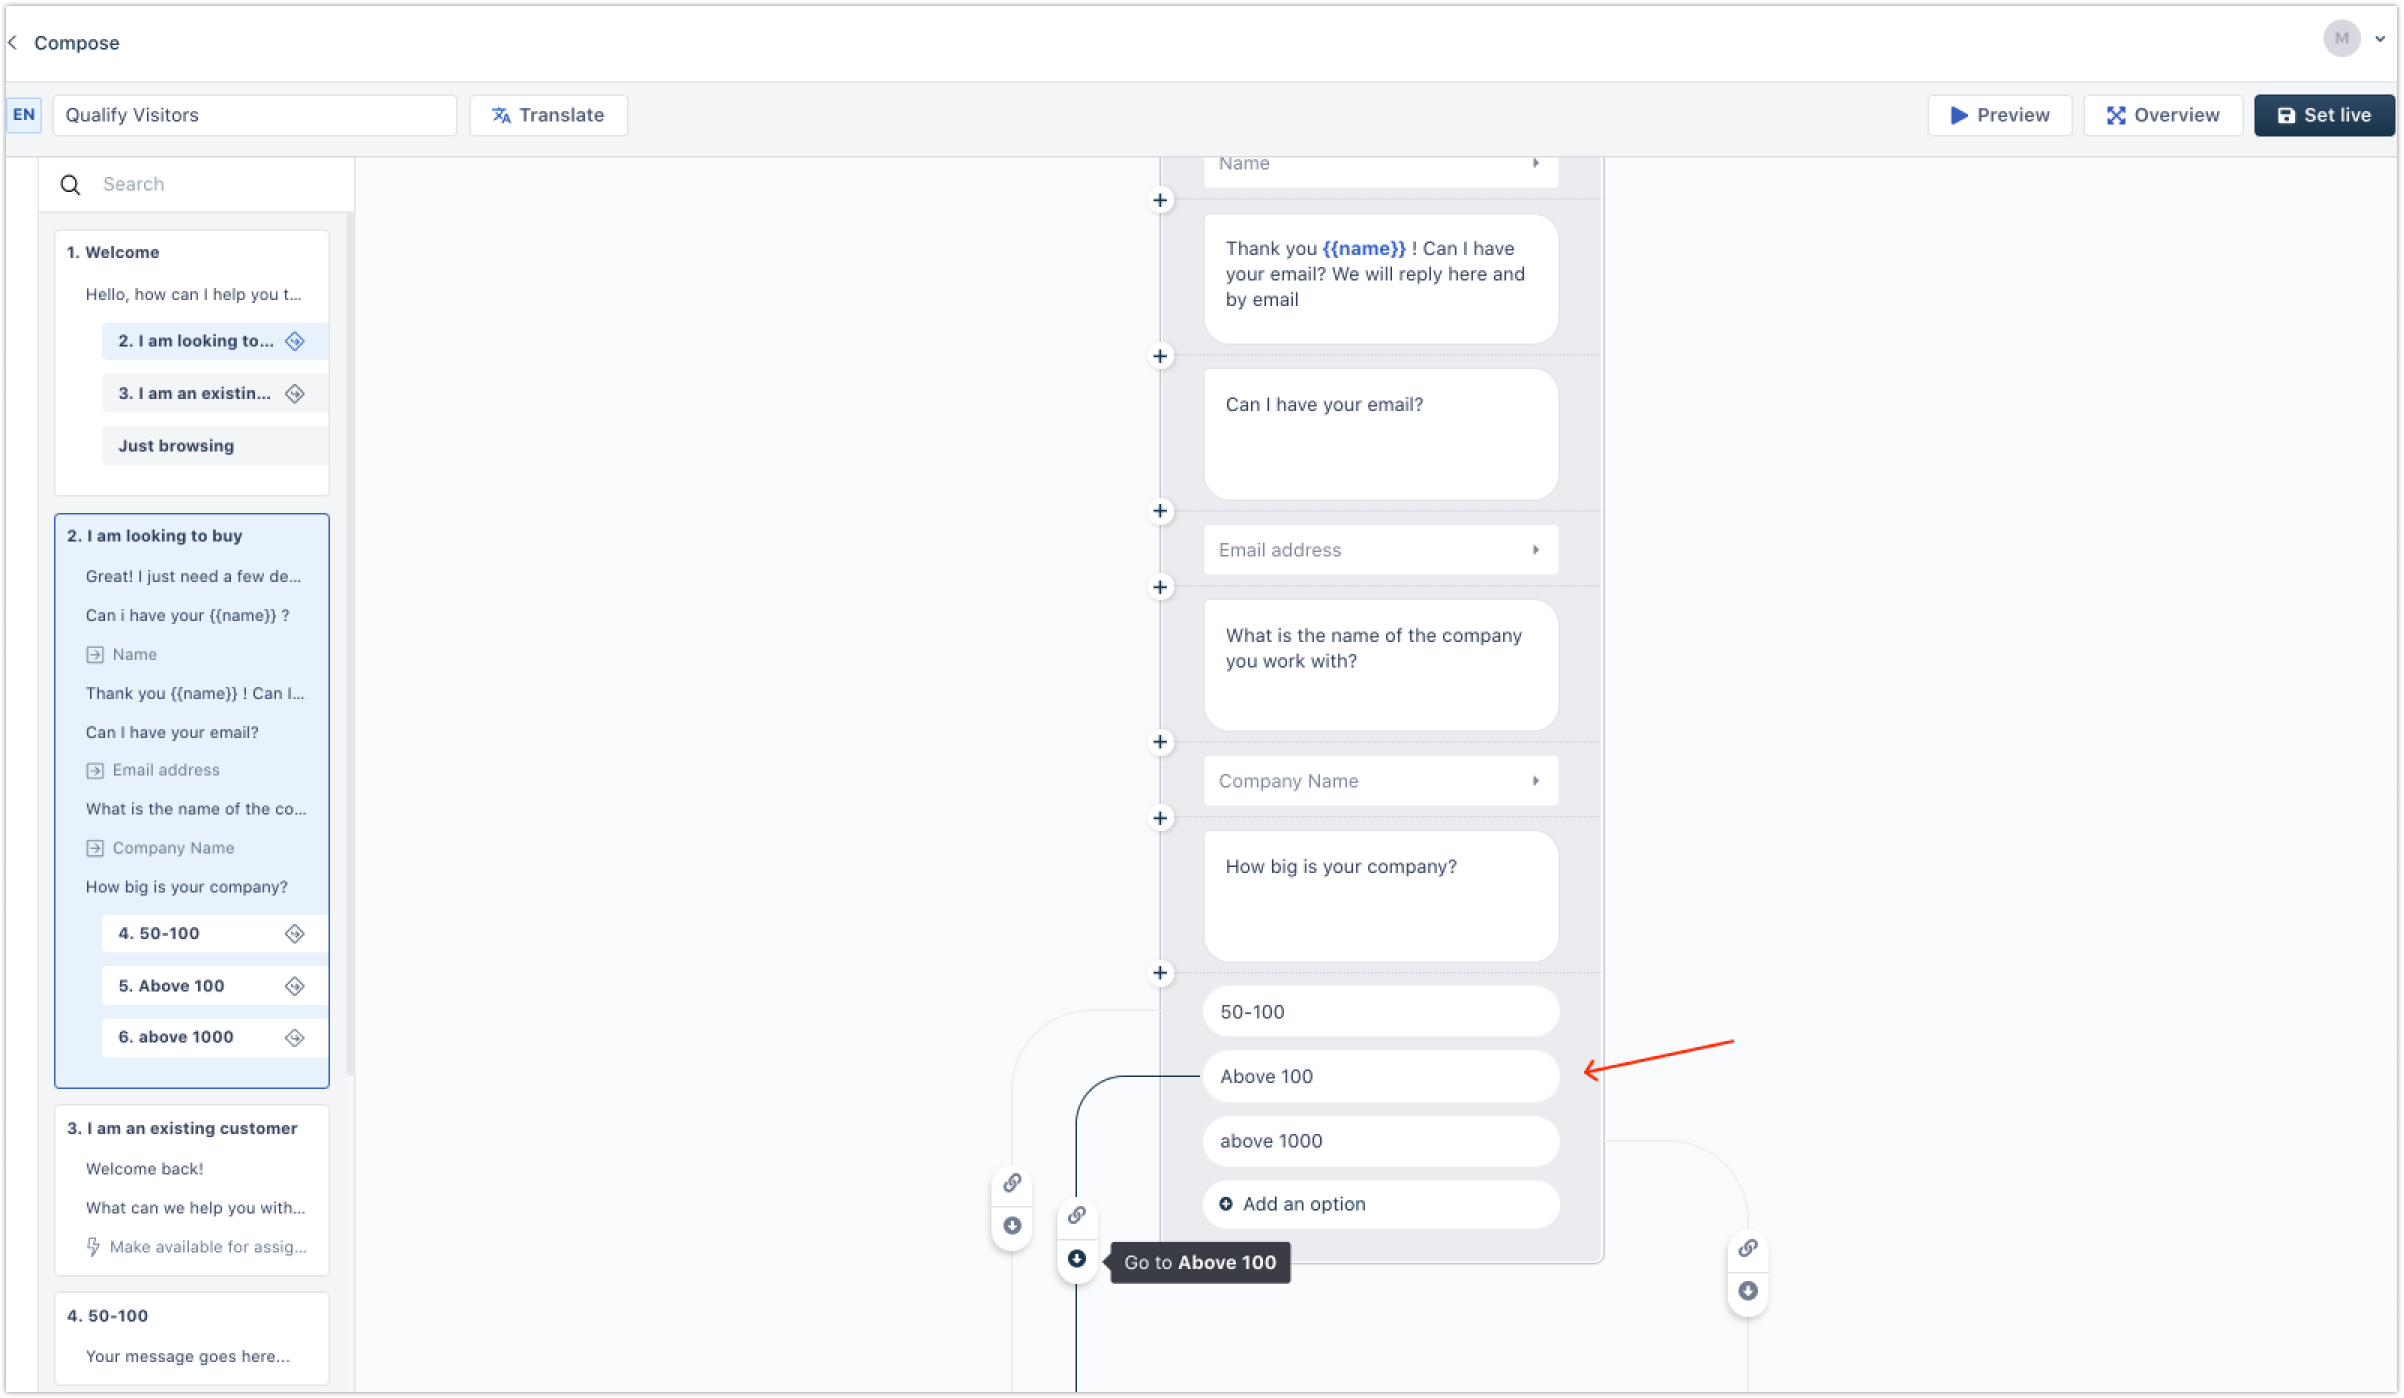
Direct people to the next step based on their response
You can guide people through the next steps based on their responses. Instead of adding data fields, you can end a step with reply buttons, creating new bot flows.
Add follow up actions and close the loop on the conversation
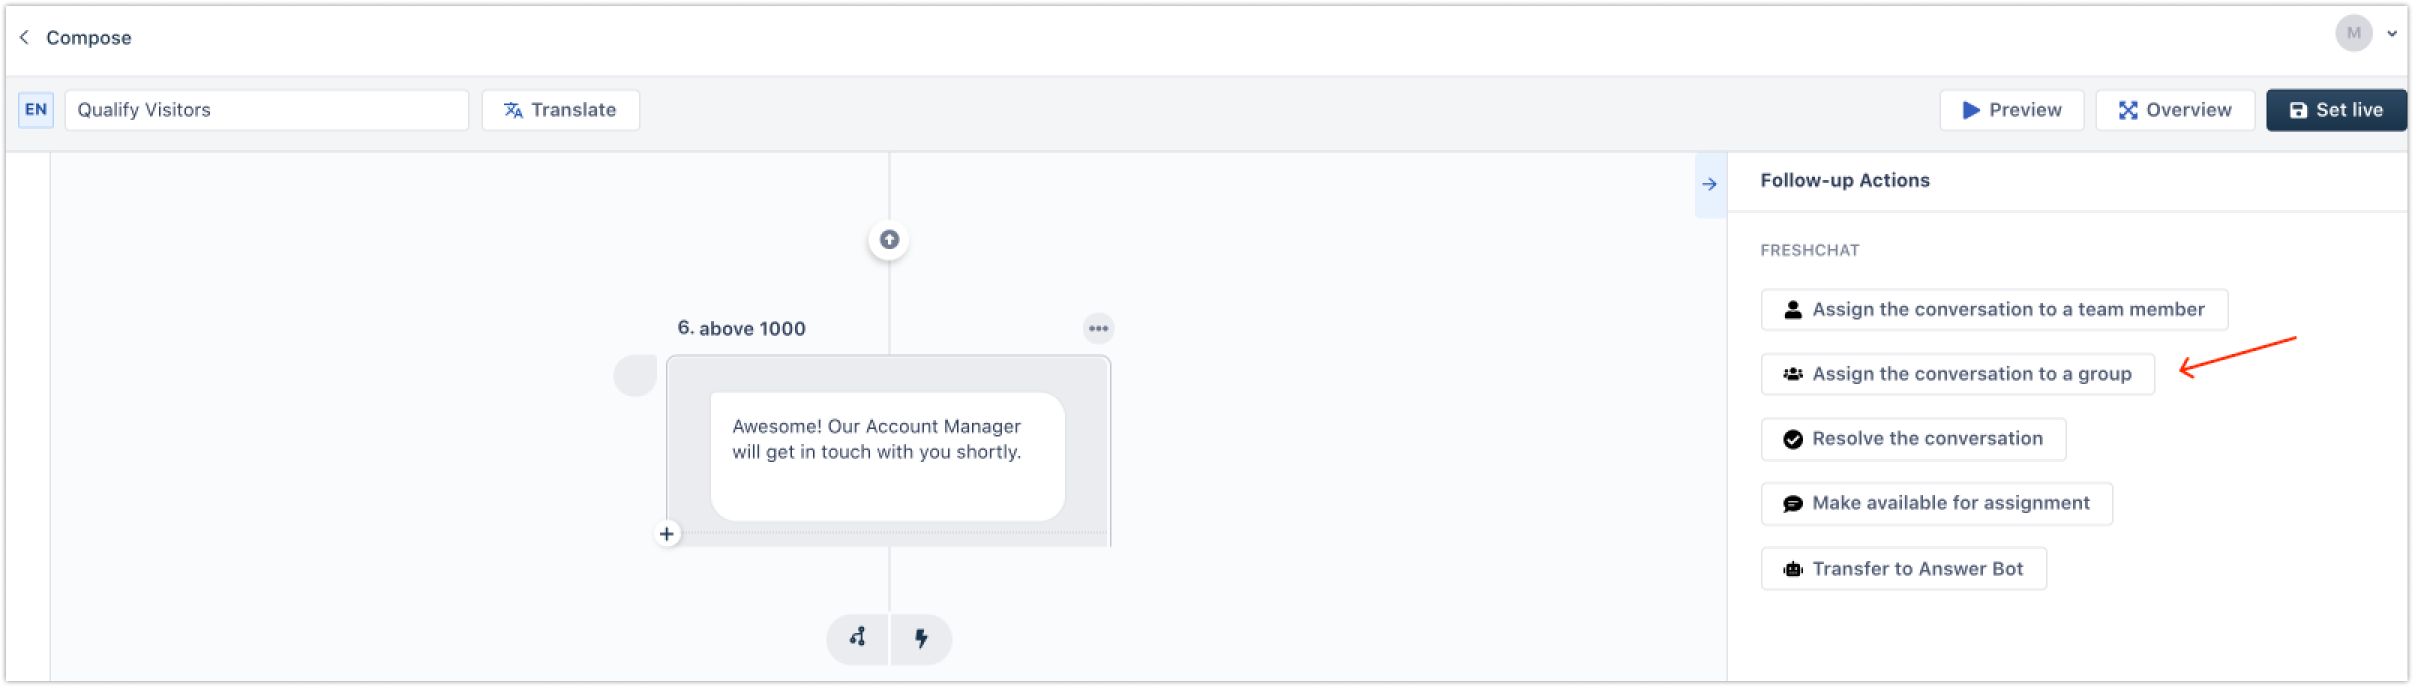
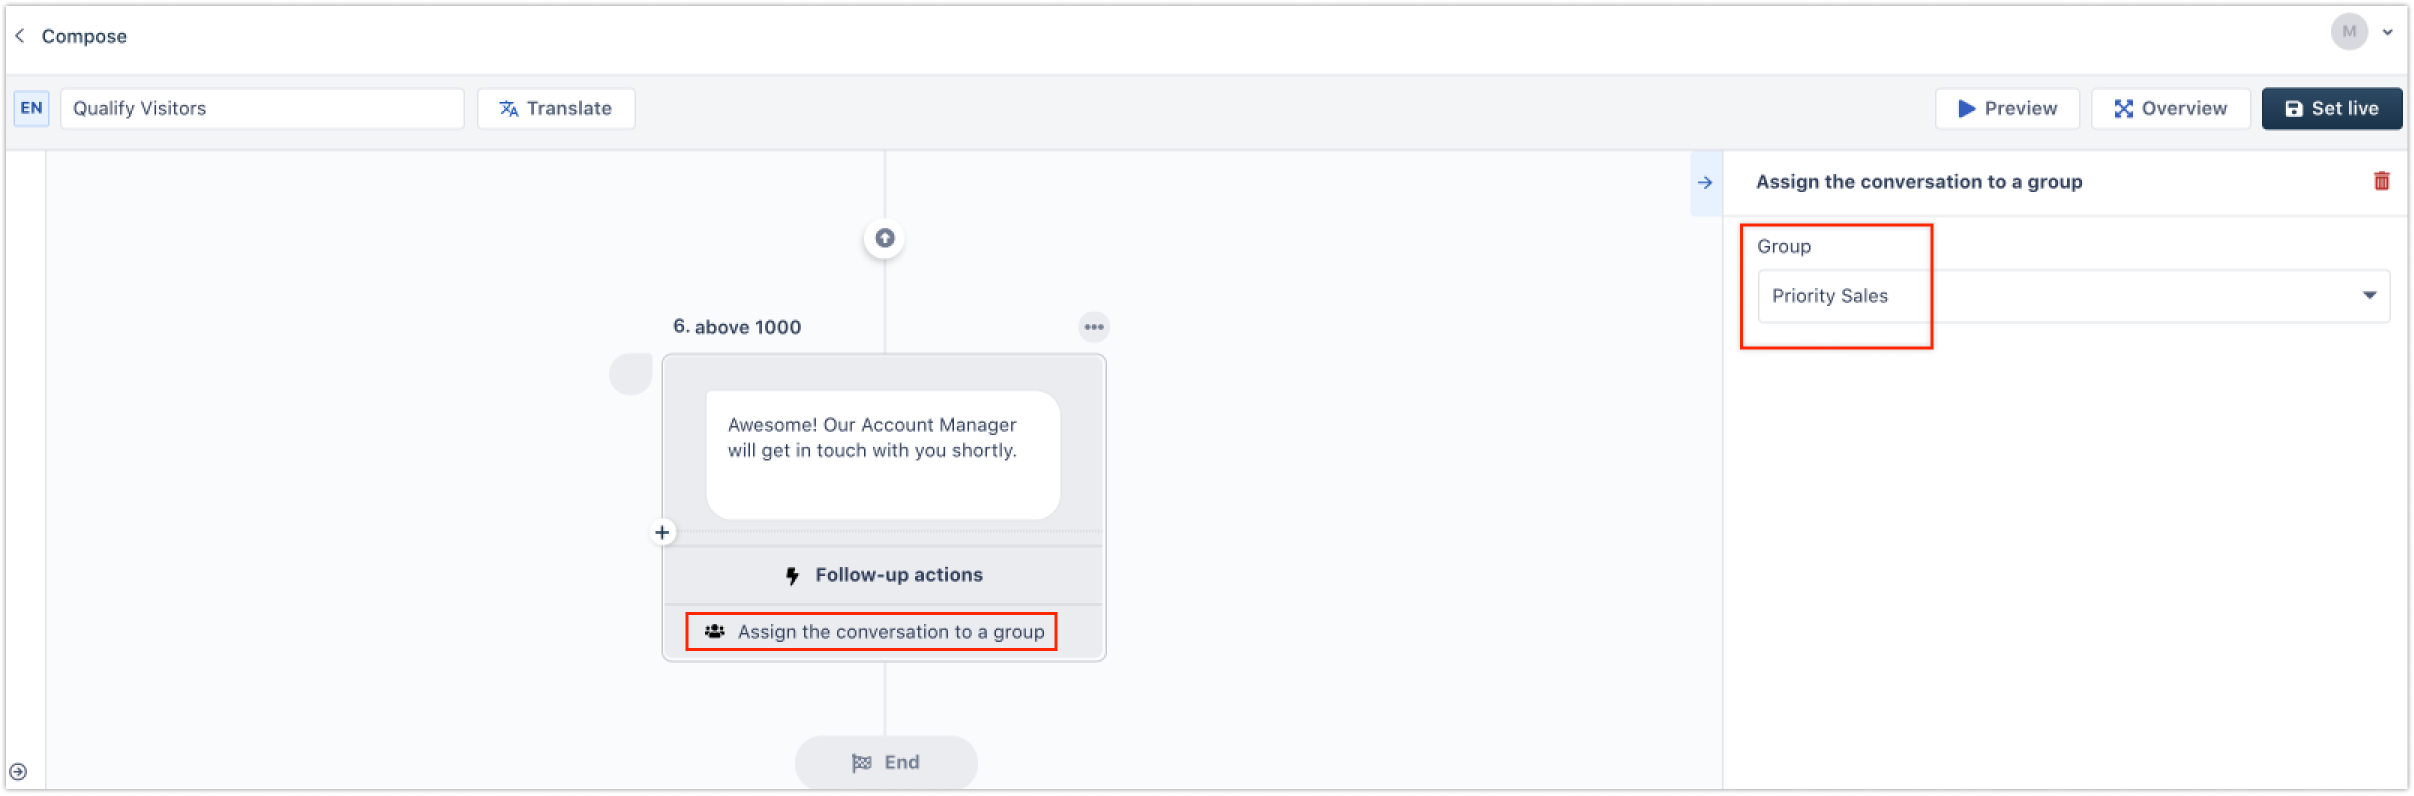
At the end of each step, you can set up follow up actions, based on who your users are.

Note: The lightning bolt icon will let you add a follow up action while the branch icon will allow you to link a new step with the current one.For example, you can assign high-quality leads (with more than 1000 employees) to your Priority Sales team.
And for people who are just browsing, you can set up the bot to automatically close the conversation, so it doesn’t distract your team from more important tasks.

Here are the other follow up actions Custom Bot can do:
Make the conversation available for Assignment - The conversation will be pushed to the new conversations view and based on Assignment Rules or IntelliAssign it will be assigned to a team member or group.
Loop in Freddy Answer Bot - For instance, if you have a Custom Bot flow to schedule a demo with a new user, and if the user responds with a ‘No’, you can transfer the conversation to Freddy Answer Bot, and the Freddy Answer Bot can continue helping the customer.
Preview your Custom Bot and take it live
Take a peek at your entire bot flow with ‘Overview’.


Or see a ‘Preview’ of how your bot will work in real-time by interacting with it, right from your Custom Bot setup page. Just click Overview or Preview in the top right corner.

Once you are happy with your design, you can take the bot live and launch it with Freddy Answer Bot, Campaigns and start interacting with customers. You can also choose when you want to trigger it.
How do Custom Bots work in a new conversation (Topics)
Once you’ve finished designing your Custom Bot, you can choose where and when you want your bot to trigger.
You can create several Custom Bots for different kinds of customer queries and Topics. For example, you can create a Custom Bot to qualify leads and trigger it on your 'Sales Enquiries' Topic or a Custom Bot for support and launch it on your 'Customer Support' Topic.

Trigger your bot to engage at a time that works for you
For example:
If you have a sales qualification bot, you can trigger it during your office hours, when your team is available to reply.
Or, if you have an out of office bot, you can trigger it outside of your office hours, so you can generate leads, even when your team is away.
When a customer starts a conversation with you on the messenger, the Custom Bot will trigger and start interacting.
Customers can then clarify why they’re reaching out, and provide additional information without needing to wait for a response from your team, or take up their time.
Proactively engage, support, and sell with Custom Bots (Campaigns)
You can trigger Custom Bot with campaigns to proactively start conversations and engage, nurture, onboard, and upsell users.
Here are some examples of the powerful ways you can use Custom Bots with Campaigns:
Book meetings with high-intent users: Automatically invite users to book a meeting with your Sales team after they show intent, such as viewing your plan upgrade page.
Provide proactive support: Onboard new users, help customers set up a feature, or educate them on the value they can get by using a feature.
Upsell customers: Grow your business by encouraging customers to try features from higher plans.
Announce launches and updates: Launch new features to users in a fun and engaging way with a video campaign, followed by a Custom Bot to answer any questions.
Here’s how you can launch bot campaigns.
Trigger a Bot Campaign
You can set up your bot campaign just like a Triggered Message.
Go to Marketing Automation > Chat Campaigns > New Campaigns > Triggered Messages > Trigger a Bot.

Here, instead of a team member, you will pick a Custom Bot for this Campaign. Once launch this campaign, the Custom Bot will trigger and start engaging your users.
